Tutorial: Scibor Moscal Strielec part two
In case you missed it, here is Part One of this tutorial. And now to finish the Scibor Strielec!
17. Basecoat the bag and strap with RMS Chestnut Gold.
18. Highlight the bag and strap with RMS Tanned Leather.
19. Basecoat the gun and chainmail metal with RMS Stormy Grey.
20. Basecoat the hat with RMS Amber Gold.
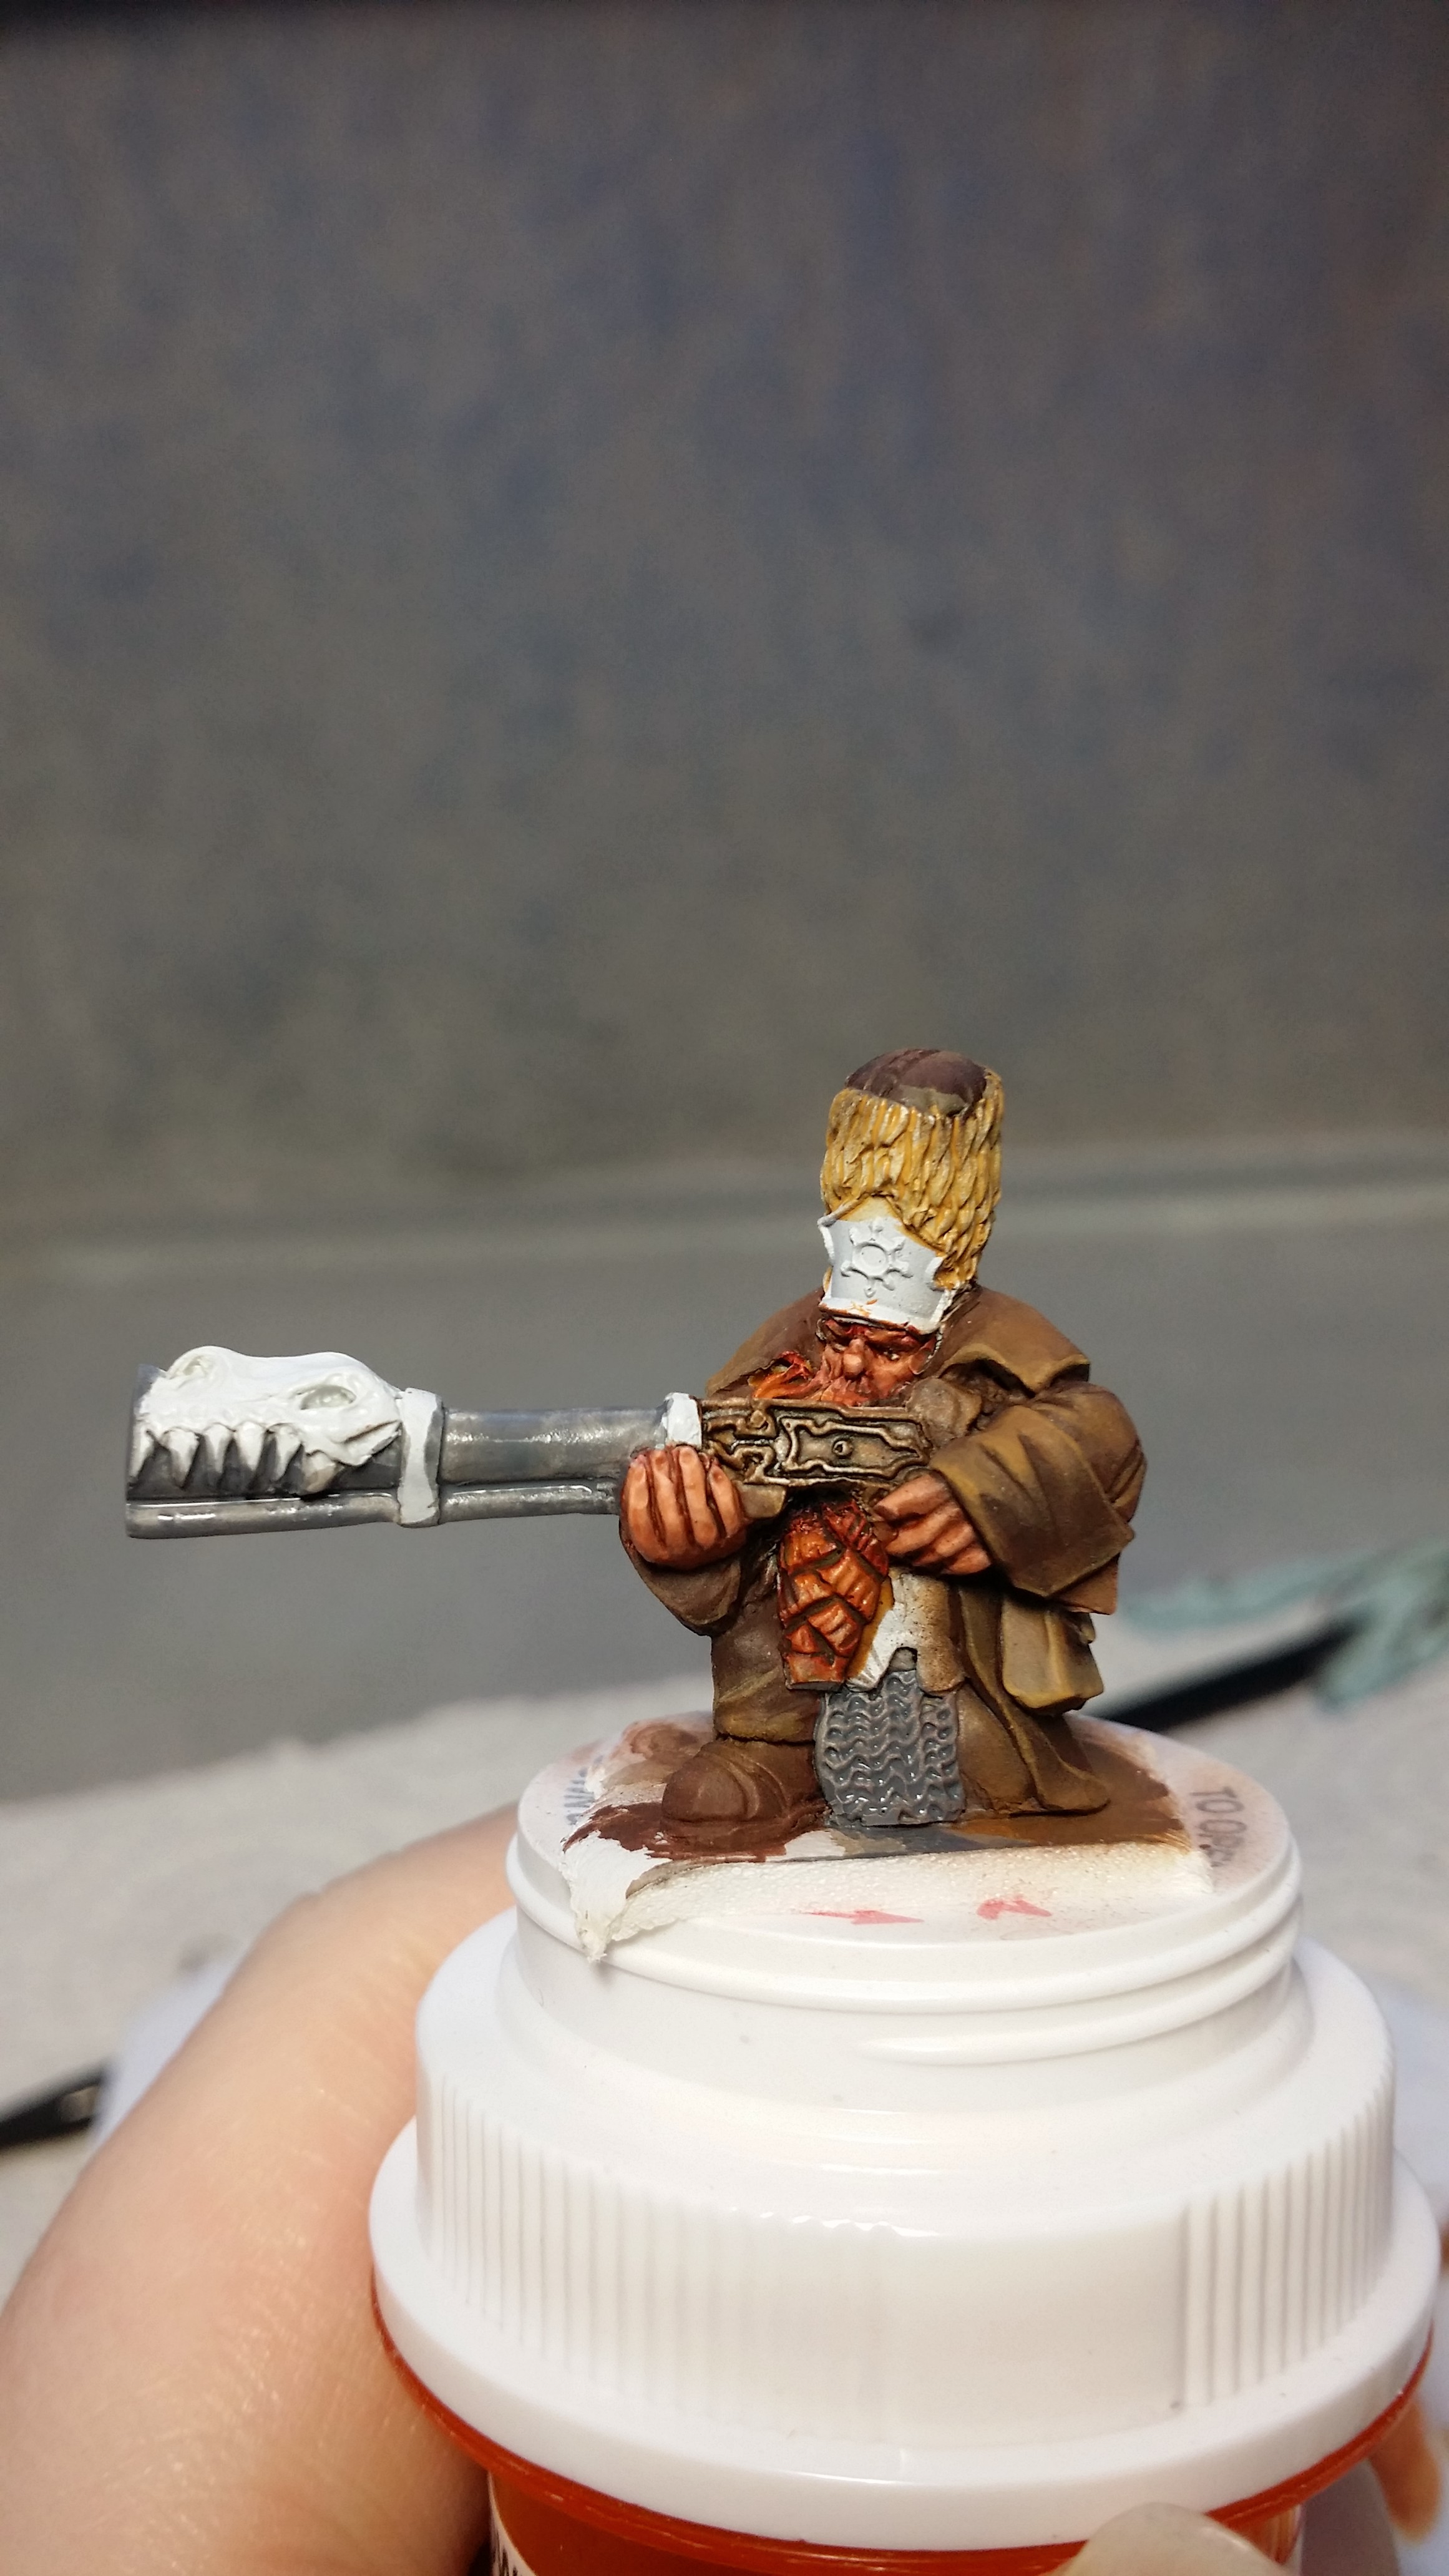


21. Wash the chainmail and line the crevice in the gun with Army Painter Dark Tone Ink (I’m starting to really like these inks!)
22. Start highlighting the gun and chainmail with RMS Cloudy Grey.
23. Gradually add RMS Ghost White to the RMS Cloudy Grey and continue with the non-metallic metal on the gun and chainmail.
24. When that mix has gone as far as it can add RMS Pure White.
25. Shade the dark areas of the gun barrel with Army Painter Dark Tone ink.
26. Drybrush the hat with RMS Creamy Ivory.
27. Wash the hat with Army Painter Soft Tone ink.
28. Basecoat the skull on the gun with RMS Polished Bone.
29. Wash the skull with Army Painter Soft Tone ink.
30. Drybrush the skull with RMS Polished Bone.
31. Wash the skull with GW Seraphim Sepia.
32. Drybrush the skull with RMS Polished Bone while the GW Sepia is still wet.
33. Drybrush again when dry, very lightly.

34. Basecoat the brass with a 1:1 mix of RMS Chestnut Brown and VMA Orange.
35. Shade the brass with RMS Brown Liner.
36. Mix a little VMA Yellow Ochre into the Chestnut Brown/Orange mix and begin working up the brass.
37. Gradually increase the VMA Yellow Ochre in the mix and continue on the NMM brass.
38. When that mix has gone as far as it can add VMC Golden Yellow.
39. Wash the brass with GW Seraphim Sepia.
40. Final highlights on the brass NMM with a mix of VMC Golden Yellow and RMS Linen White.
41. Put in glints with RMS Linen White.


Posted on January 6, 2014, in Forge World, Games Workshop, Scibor Miniatures, Tutorial and tagged Chaos Dwarfs, Forge World, Games Workshop, Scibor, Tutorial, Warhammer, Warhammer Fantasy. Bookmark the permalink. Leave a comment.

Leave a comment
Comments 0