Monthly Archives: February 2014
WIP: Reaper Dalton Krieg, Adventuring Knight cont.
After my last post I did a lot more work on Dalton Krieg. I finished the tunic, painted details per the character description I was given, and began a base. I built the base up with green stuff to the level of the rocky base he was cast with. I didn’t have to take much care to make it flat since it was going to be a stone floor. The texture could only work in my favor.


After the green stuff hardened I painted the base!

WIP: Reaper Dalton Krieg, Adventuring Knight
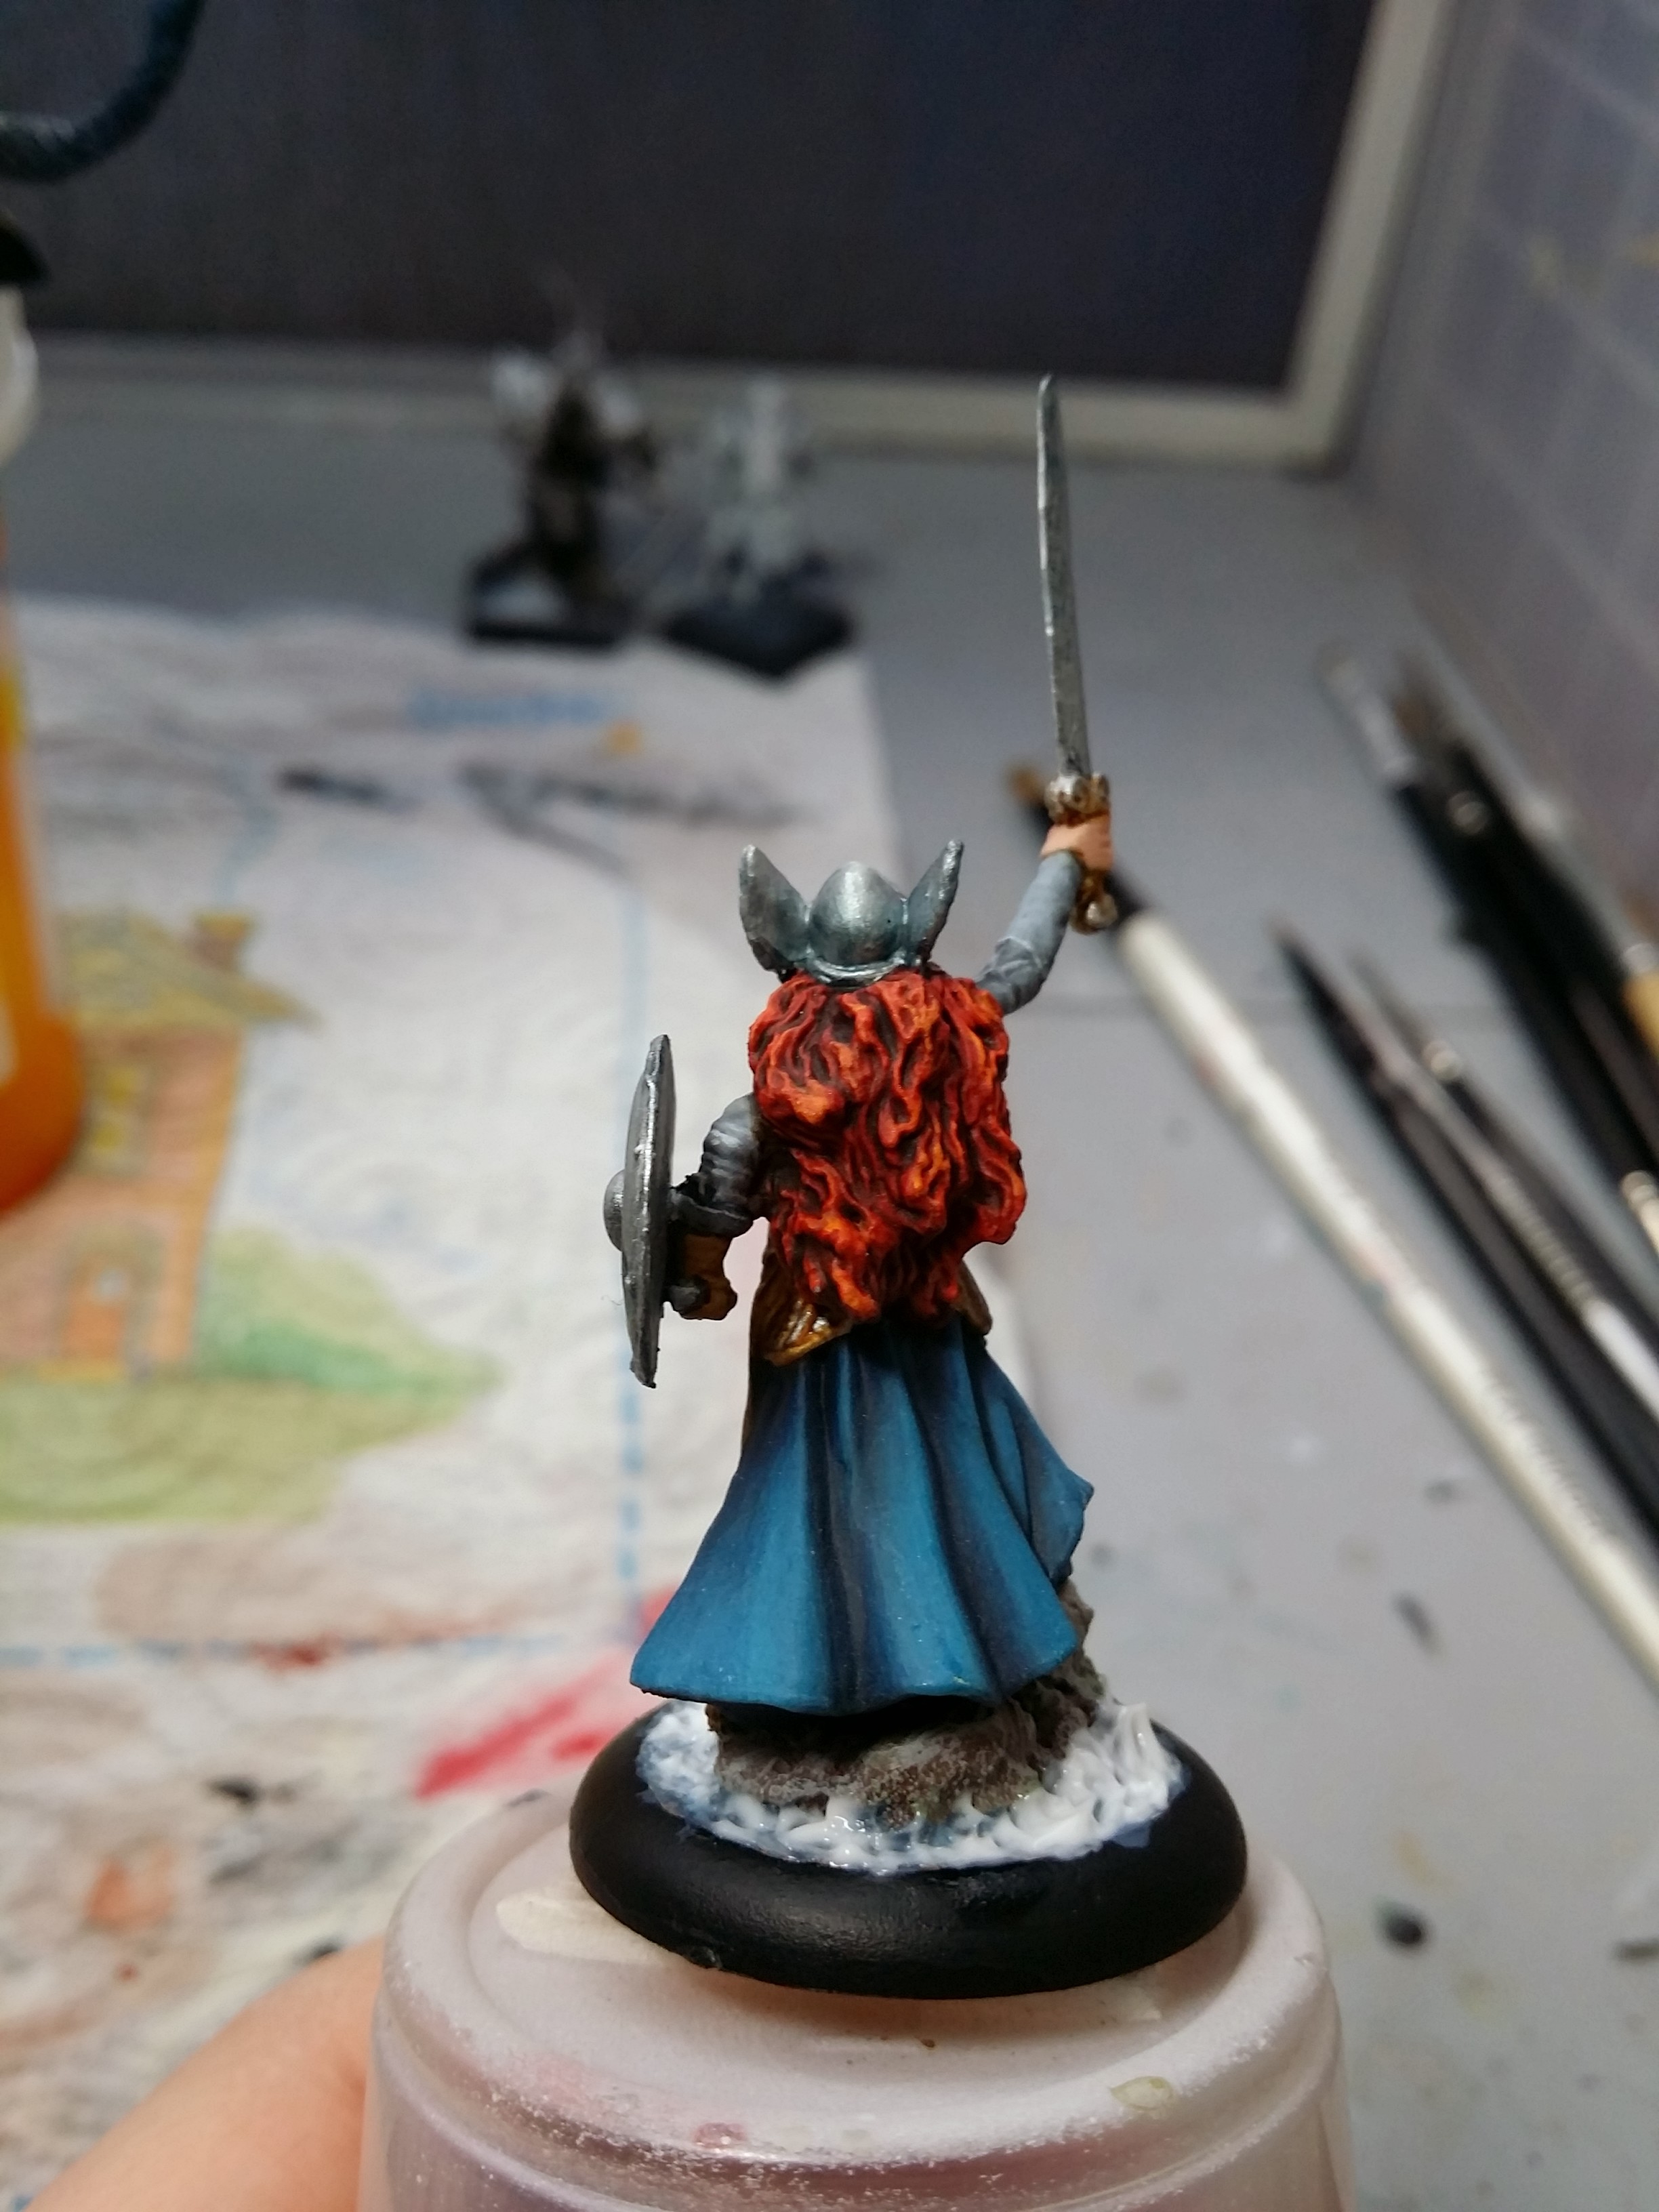
I recently painted a knight to be used as a D&D character – Reaper Dalton Krieg, Adventuring Knight. I really like this sculpt, although the cast had some issues on the face. On this model I tried a new-to-me technique for shading and highlighting metallic paint.
First, the model was primed Vallejo Surface Primer Grey. He was painted with the sword and shield separate.

Next, I painted the armor with a basecoat of VMA Gungrey.

Next, I decided to use the verdaccio underpainting technique on the red tunic, and this time with greater care than before. First, I used RMS Military Green.


Next I added black to the Military Green to deepen the shadows.


After the green undercoat was finished, I used a 1:1 mix of RMS Violet Red and VMC Carmine Red for the base red color. You can see how the shading of the red is already well-started.


Next it came time for the armor! The new-to-me technique is really more of a way of looking at how to paint metals in general. Basically, all metal is painted in a NMM technique whether you’re using regular paints or metallic paints. High contrast is extremely important, as is taking into consideration what the metal will reflect. You have to paint in all the darks and lights. The metallic paint will not do all that on its own, and it’s not designed to. To that end, I shaded the VMA Gungrey with a very thin VMA Black (mixed something like 5 parts water to 1 part paint, maybe even a little thinner). I highlighted first with a very thin VMA Aluminum, and then with a very thin VMA White.


Reaper Devona Female Mage
A while back I posted about painting Devona, but I never posted about finishing her base!
The first thing I did was to level out her base with some green stuff. It didn’t have to be perfectly flat because she was going to be standing on stones. Next, I painted the base black, and then painted grey stonework onto it.
Here’s how she turned out:


Devona is currently for sale for $40. Contact me if you’re interested at MGMPaint@gmail.com.
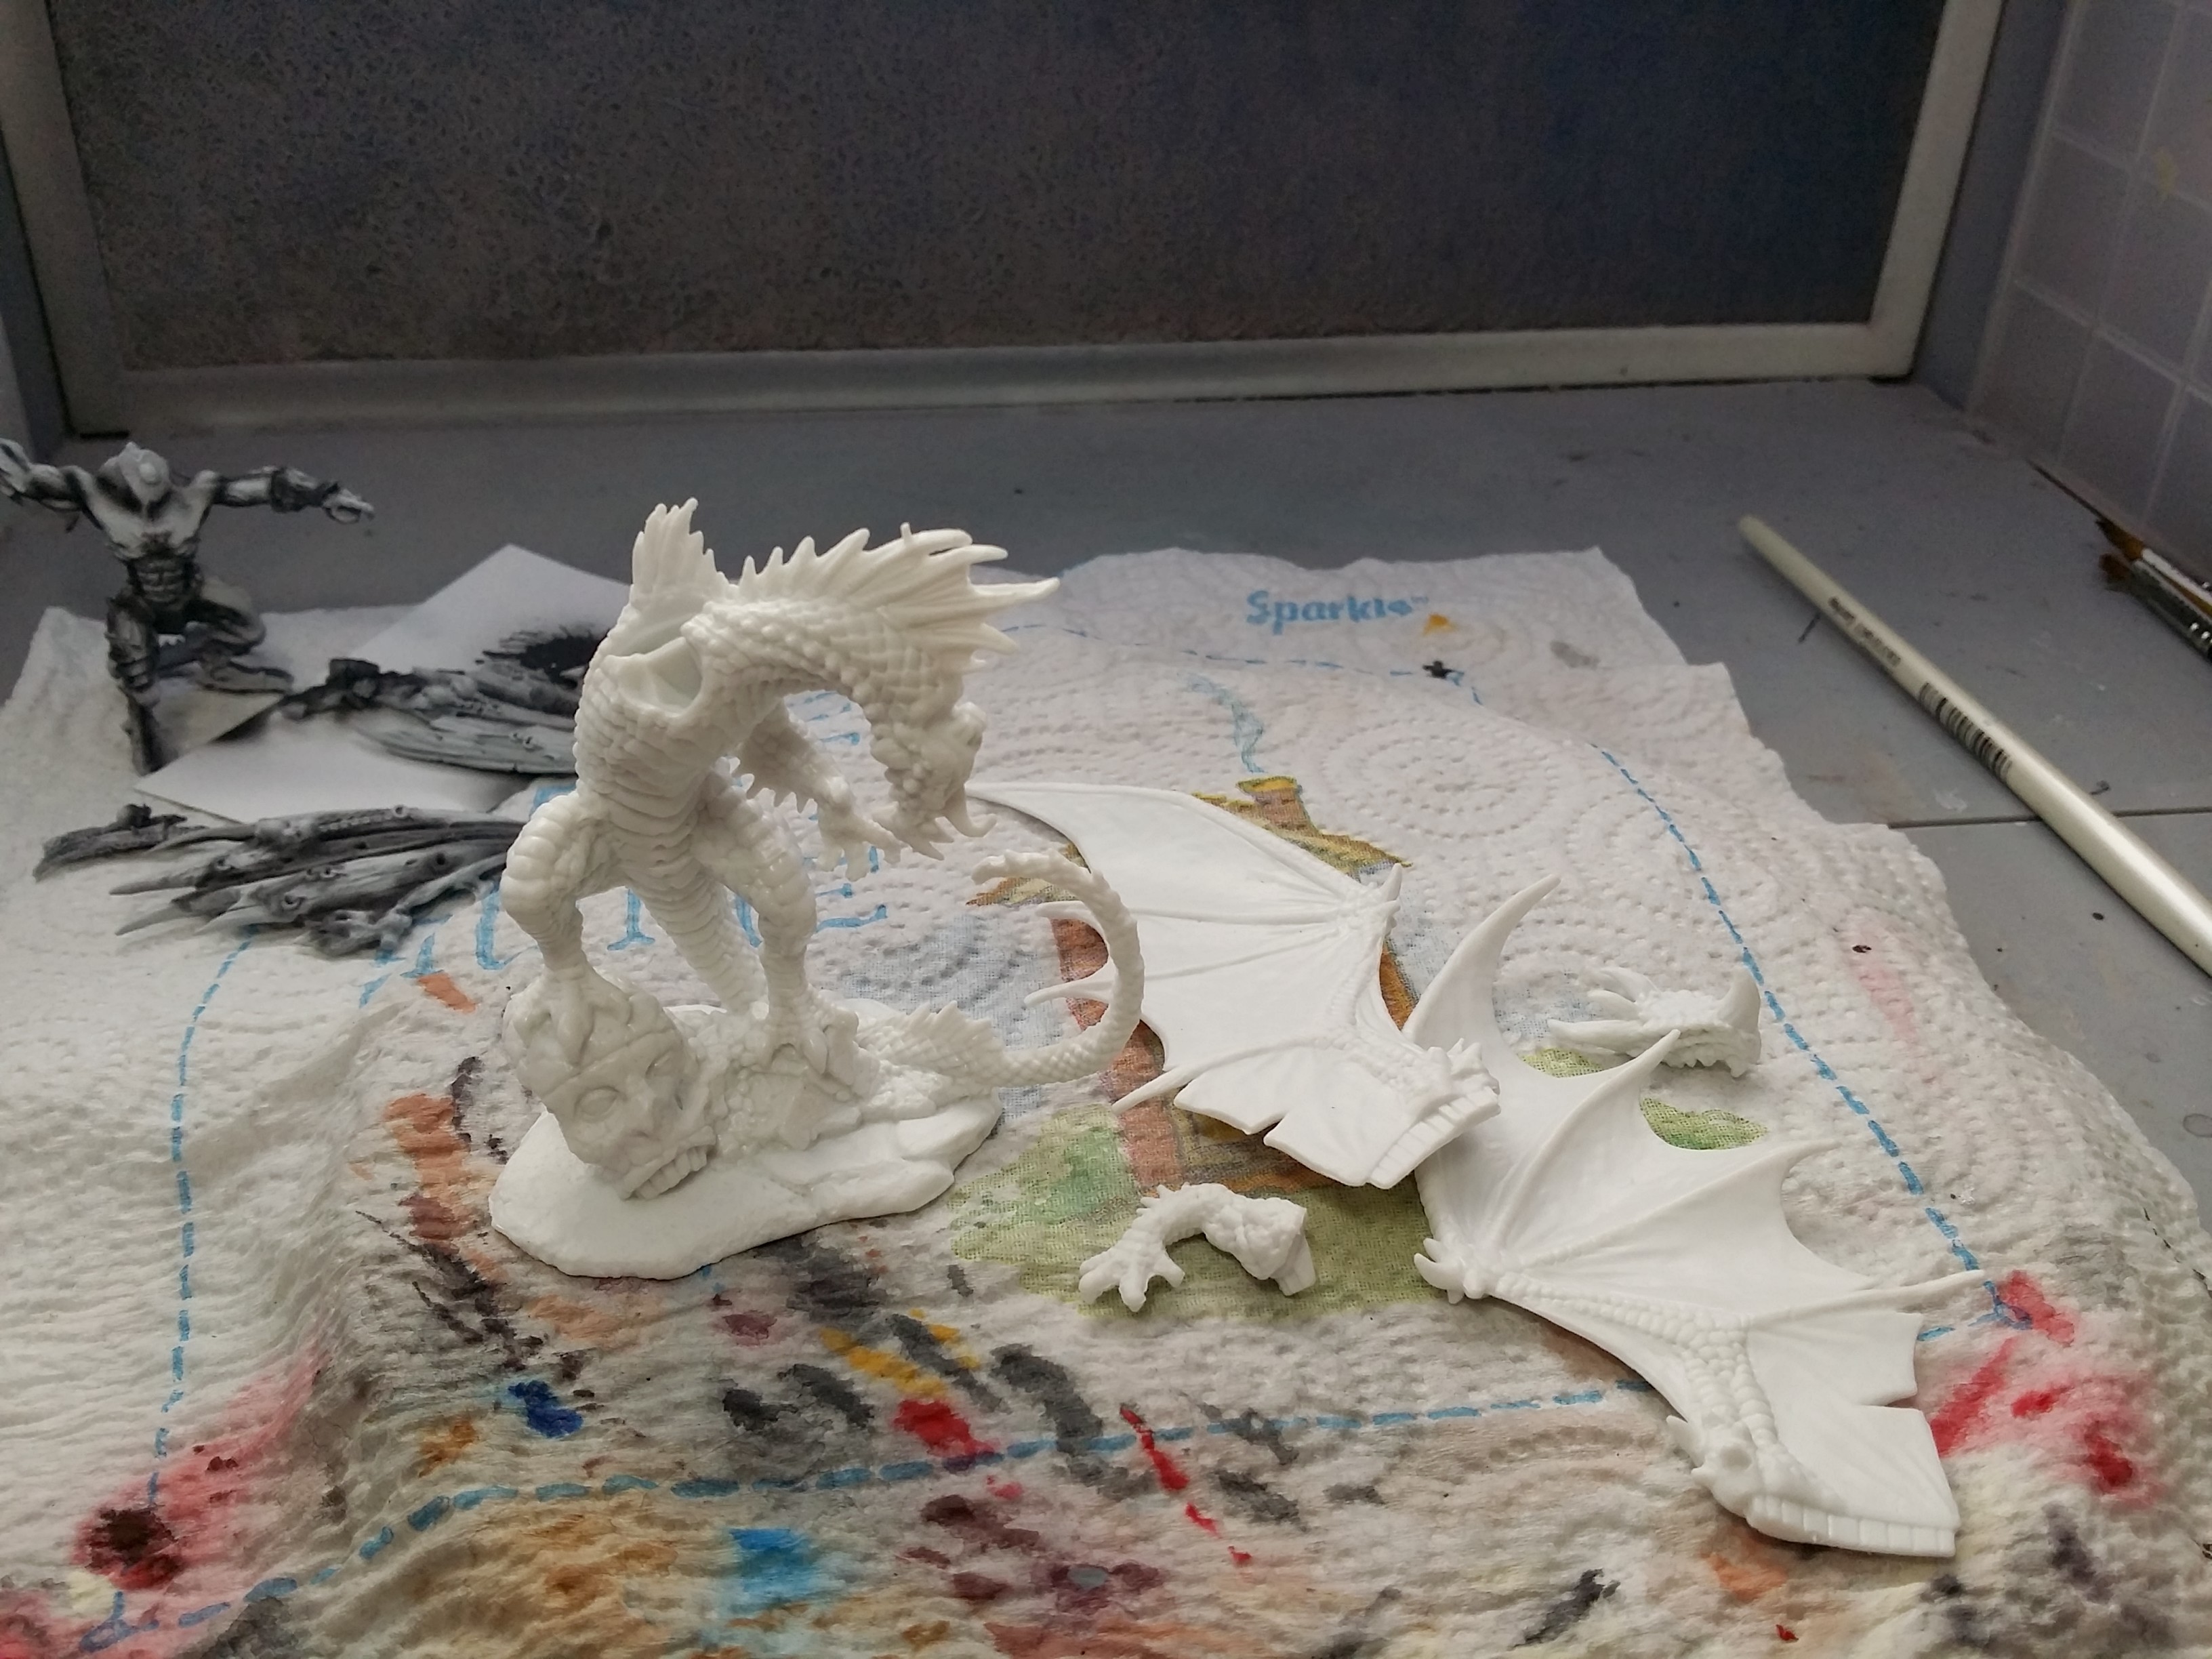
WIP: Reaper Pathfinder Red Dragon
The bulk of the work on this figure was done with my airbrush. I used Reaper Dark Elf Shadow as a base color, then highlighted with RMS Dark Elf Highlight. I used VMA Black for the deepest shadows. Then I used VMC Dark Prussian Blue (a fabulously beautiful color!) to begin the blue areas on the wings, frills, and body. After that, the blue areas were taken up to RMS Surf Aqua. Then, for the final lights on those areas, I used VMA White and then RMS Surf Aqua again. Putting the white first allows the Surf Aqua to be brighter. The transparent nature of these paints means that even if a bright color is used, if it has a dark base it will not appear bright. Putting that white “barrier” in between the dark and the aqua helps that.


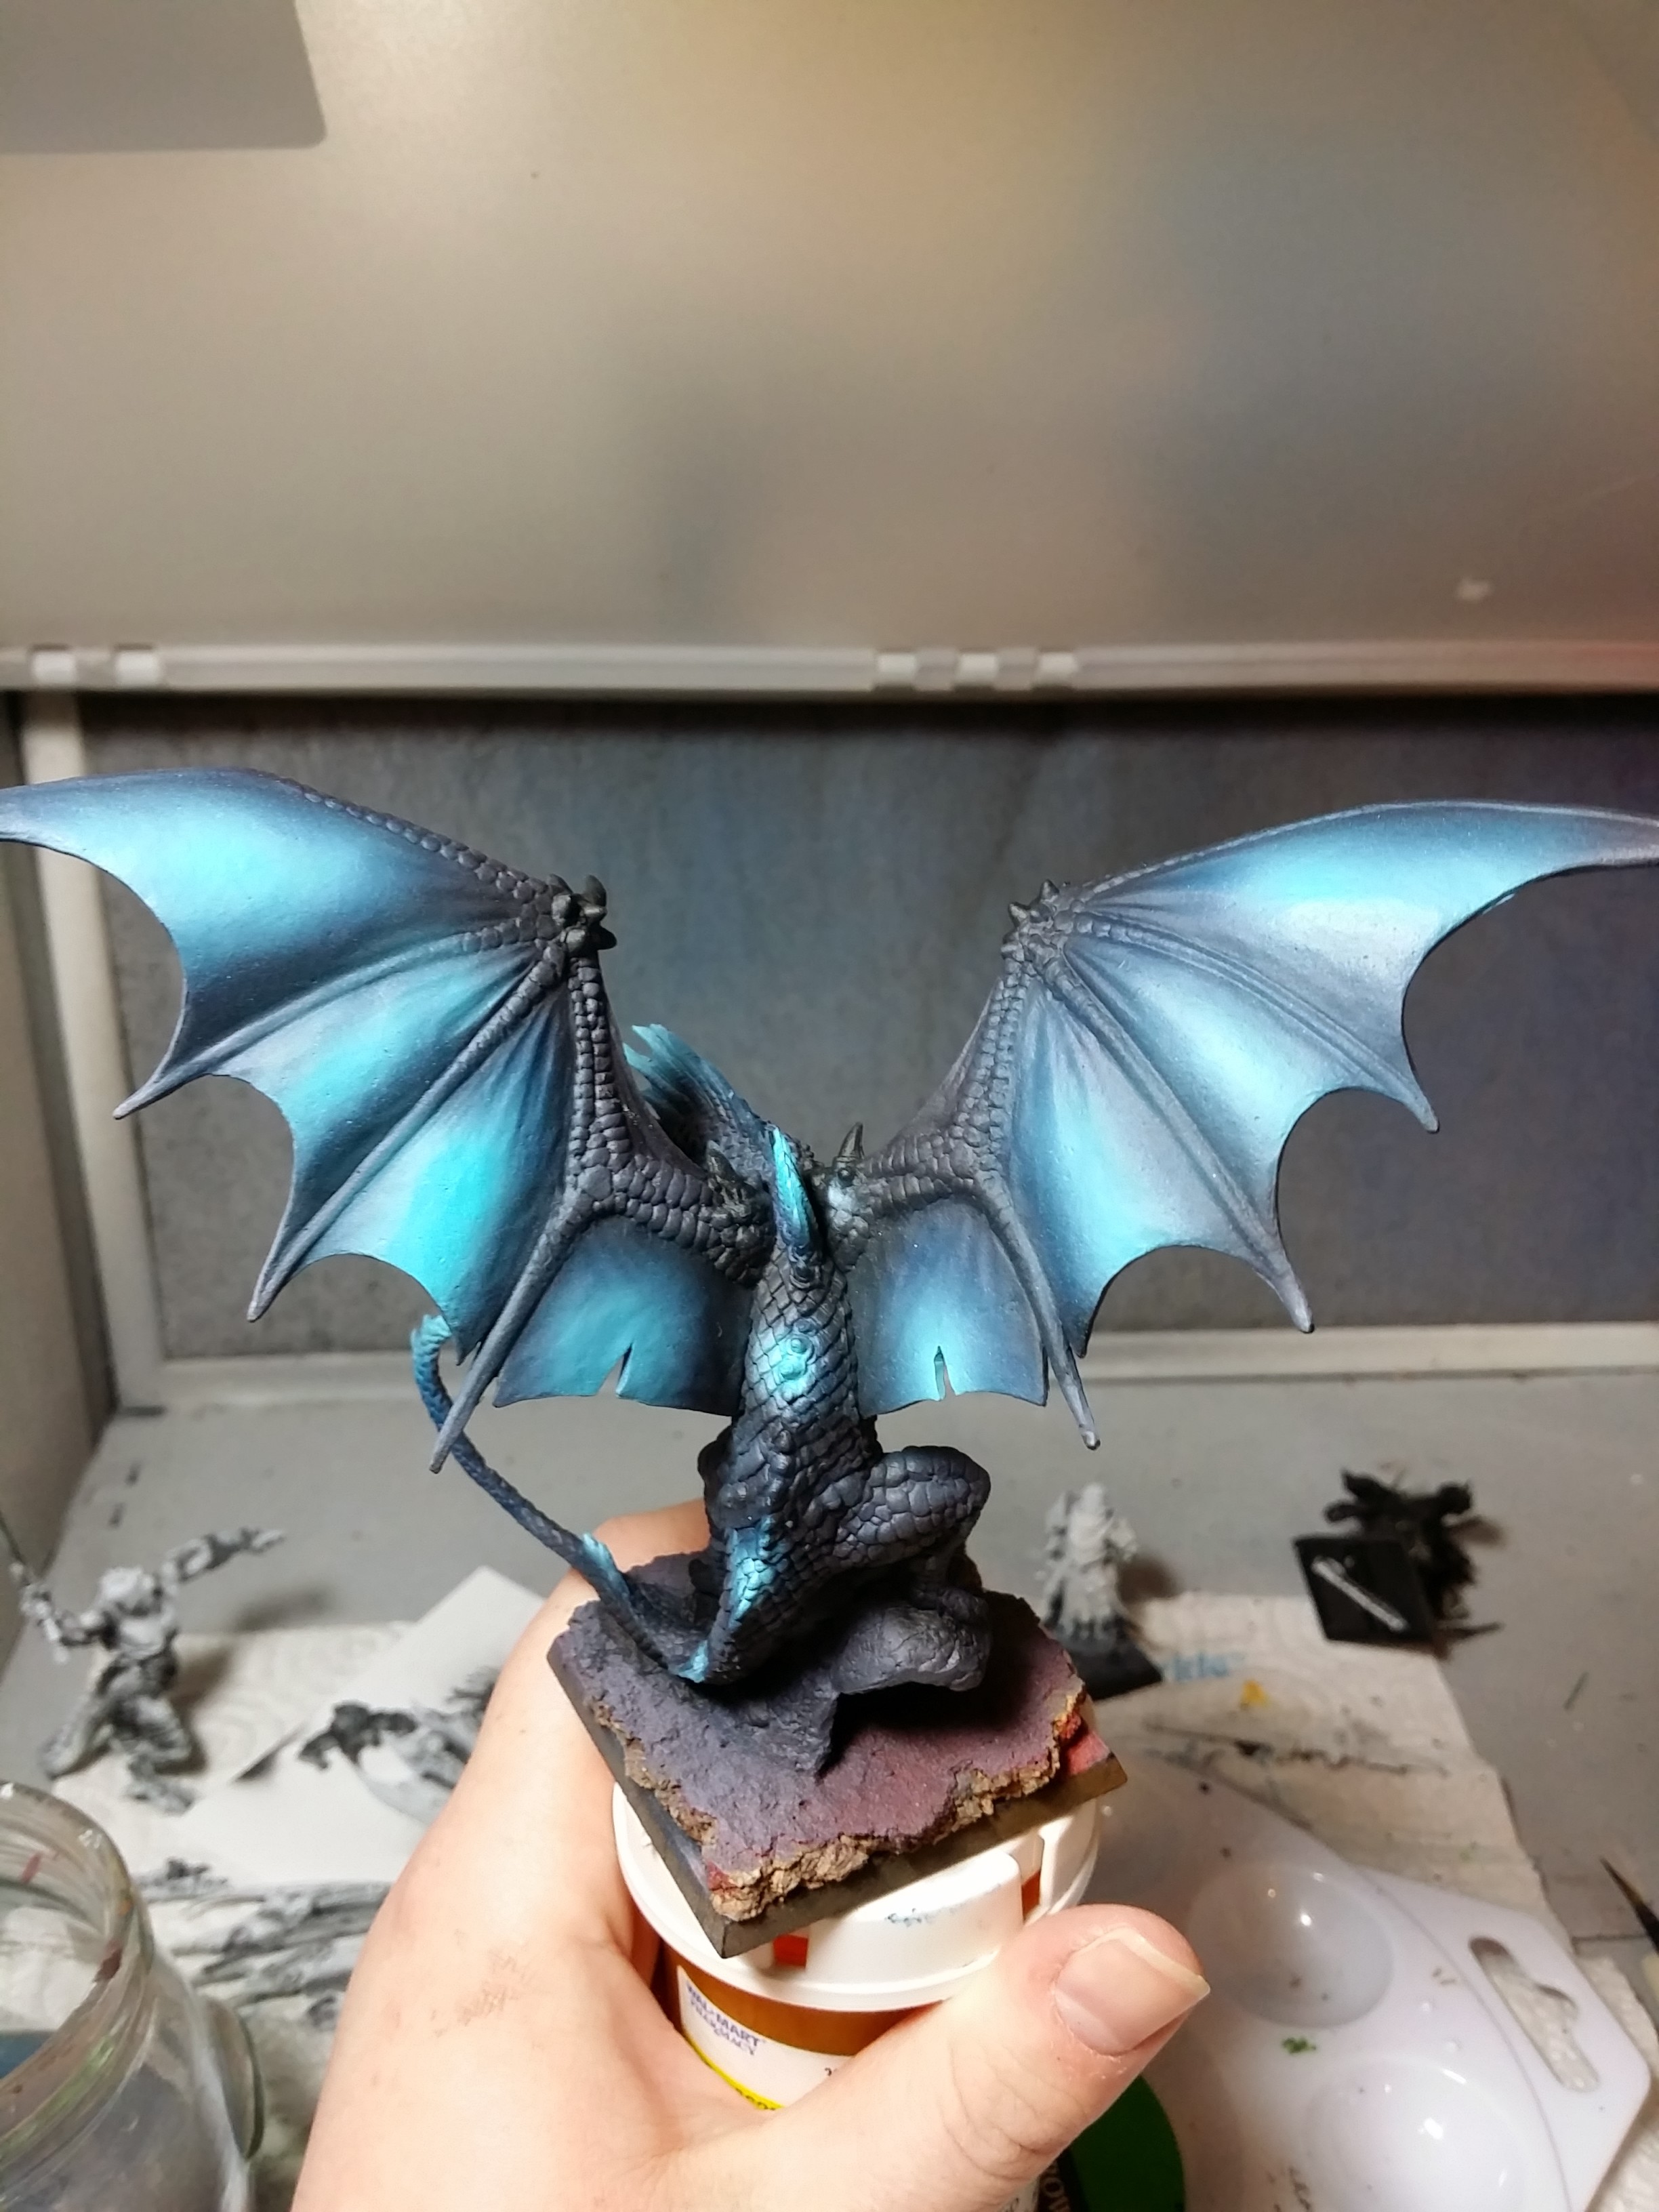
The airbrush really made quick work of it to this point, but now it was time for the detail-work.
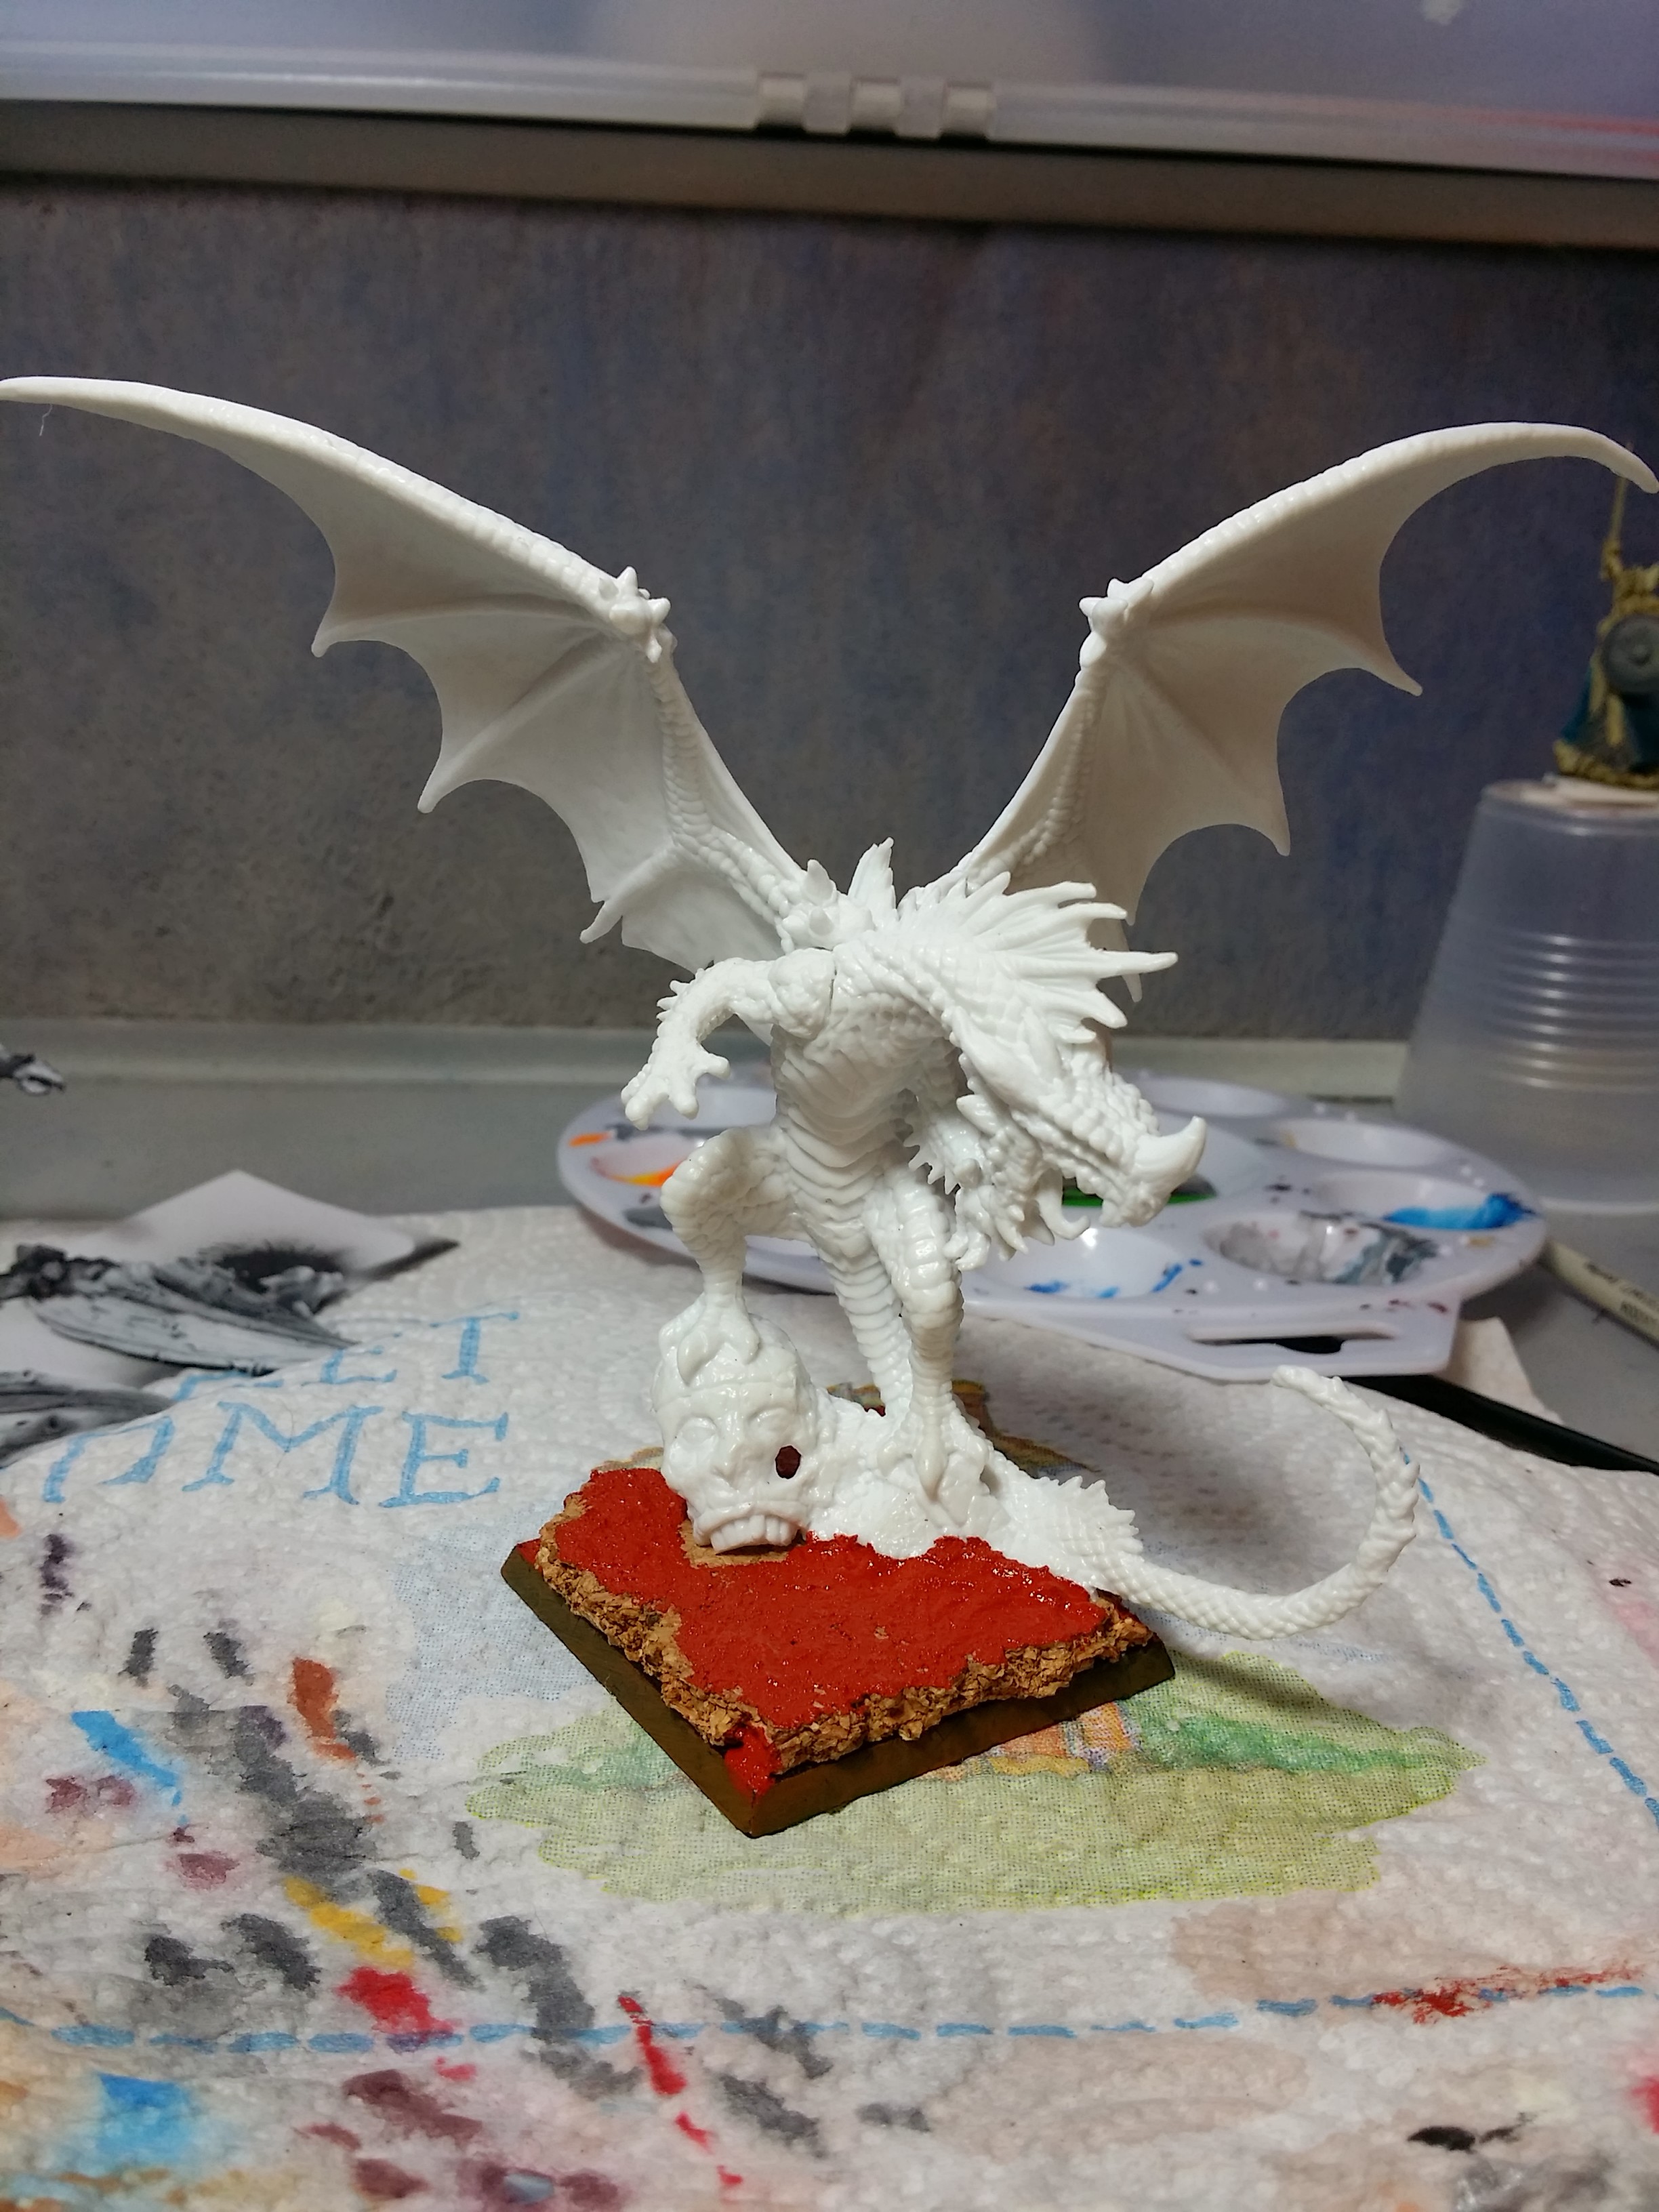
The plan was to make the scales, especially the chest, appear iridescent. To that end, the next colors used were a bright green and a violet-red.
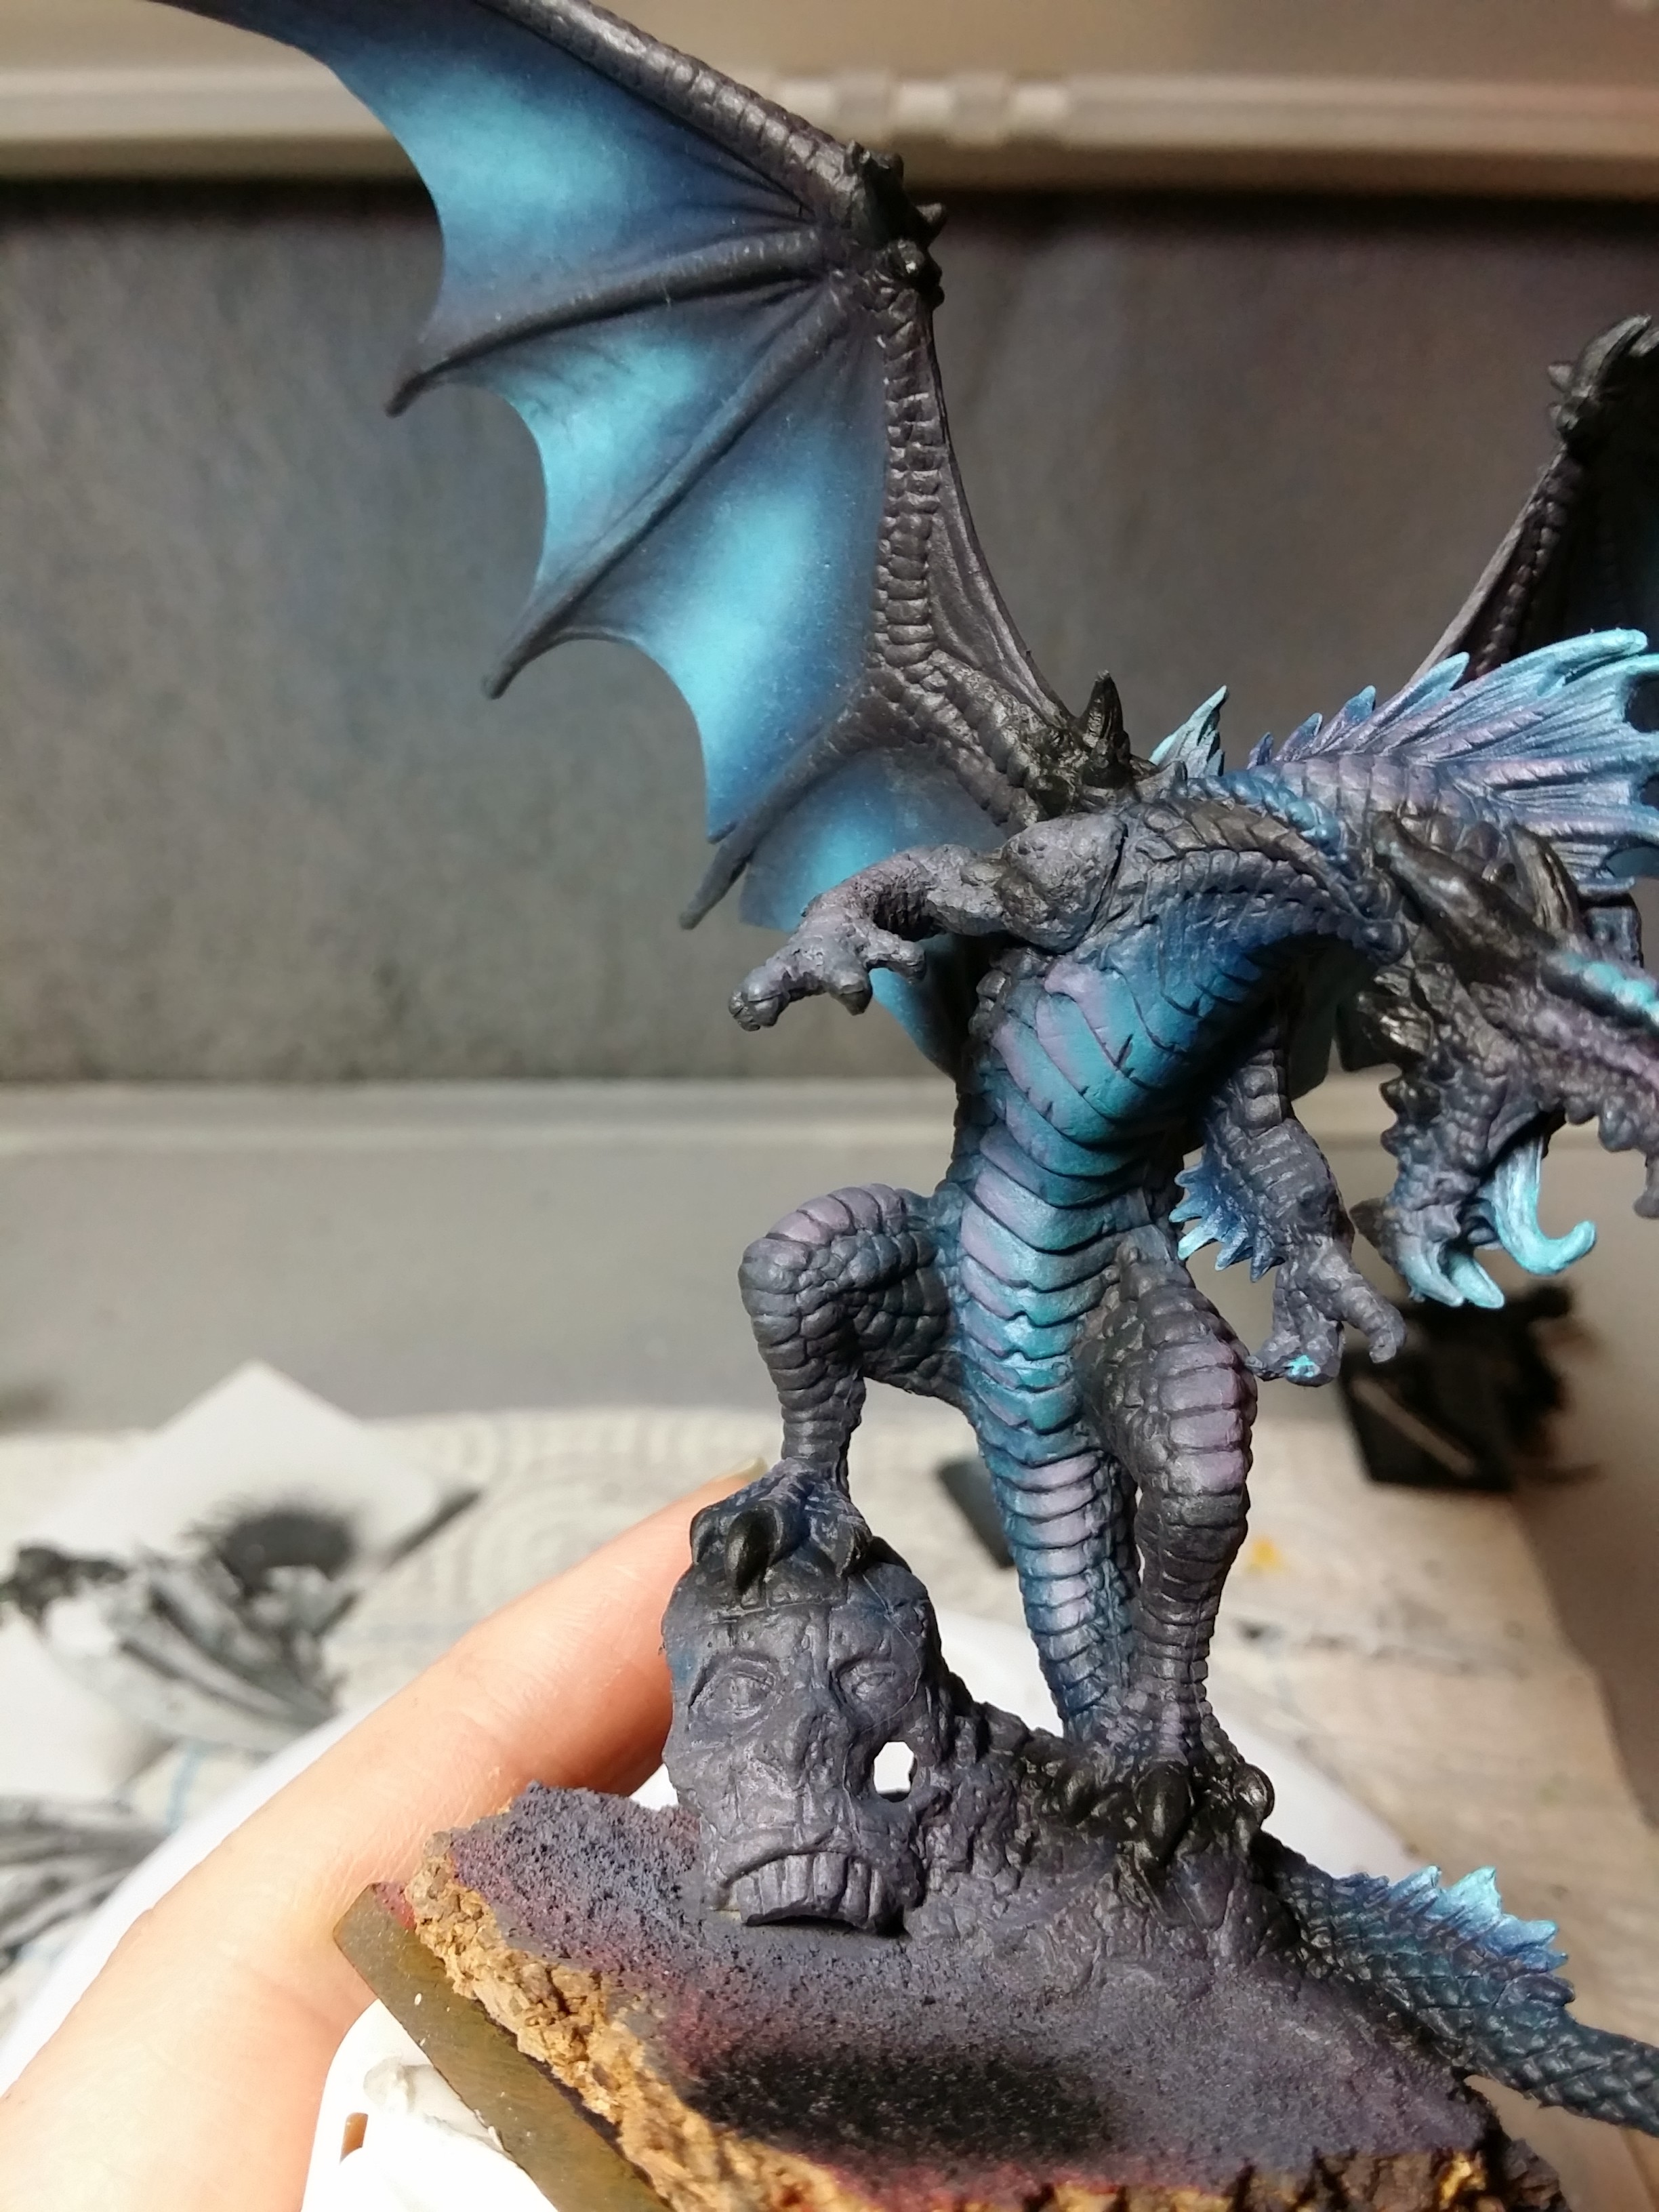

After that it was the horns. I base-coated them with RMS Weathered Stone.

After that, I washed them with Army Painter Dark Tone Ink, and then highlighted them back up with RMS Weathered Stone.
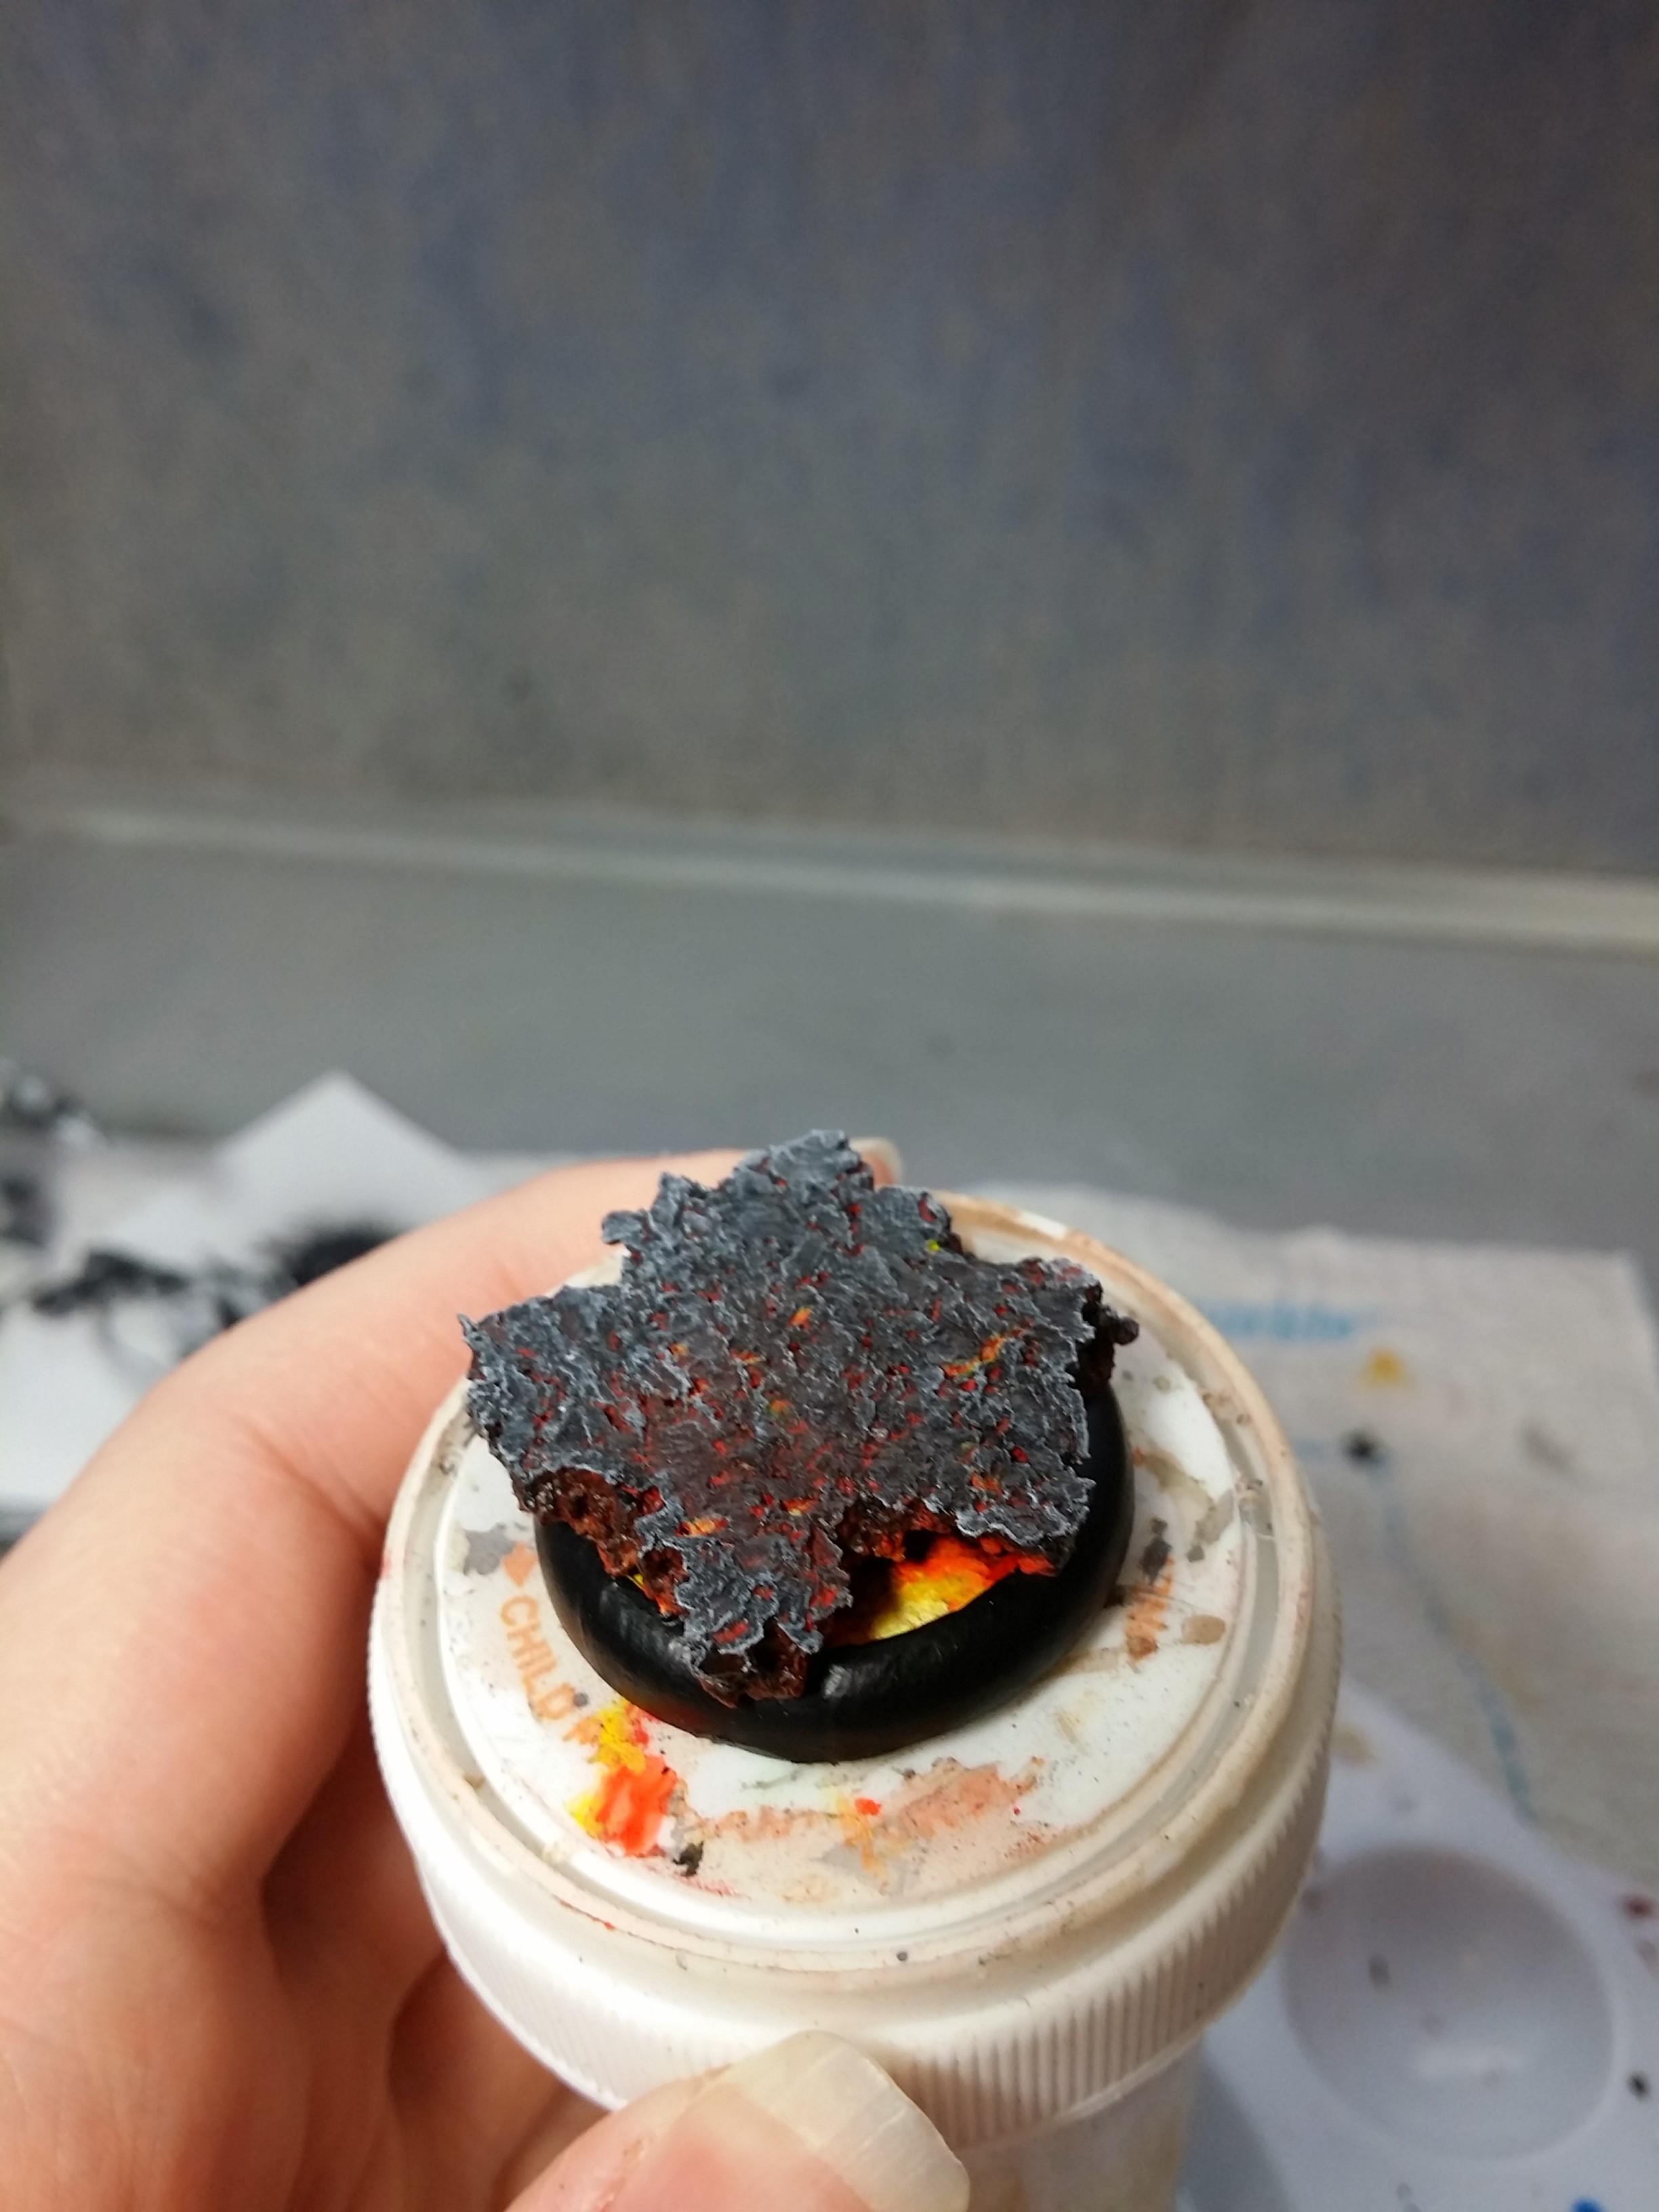
About this point in the painting, the owner of this dragon asked me to add a washer in the base so that it magnetic counters used in D&D would stick to it, so I dug a hole in the cork to place it so that the surface of the base could remain flat.

Next, I covered the washer with Vallejo Red Oxide Paste.

After that dried, I began painting over it to blend that area back into the base, and I decided the eyes should be a bright orangey-yellow instead of bright blue.

And here he is finished:


This dragon was a ton of fun to paint. I really enjoyed the colors. However, the Bones plastic was such a pain! Mould lines would just appear out of nowhere! I will probably paint a couple more of these dragons this year.
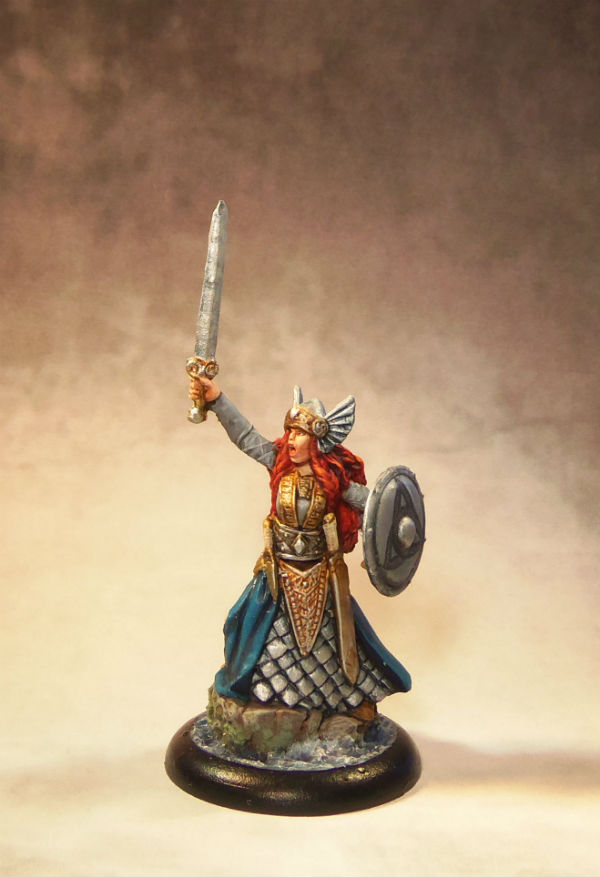
Reaper Vaeloth Hellborn Paladin and Reaper Aina Female Valkyrie
Here are the final pictures of Vaeloth and Aina. They have both been added to the Gallery and the For Sale! page.

Reaper Vaeloth Hellborn Paladin Standard+ with Level 2 base
Reaper Vaeloth Hellborn Paladin Standard+ with Level 2 base
Reaper Vaeloth Hellborn Paladin Standard+ with Level 2 base
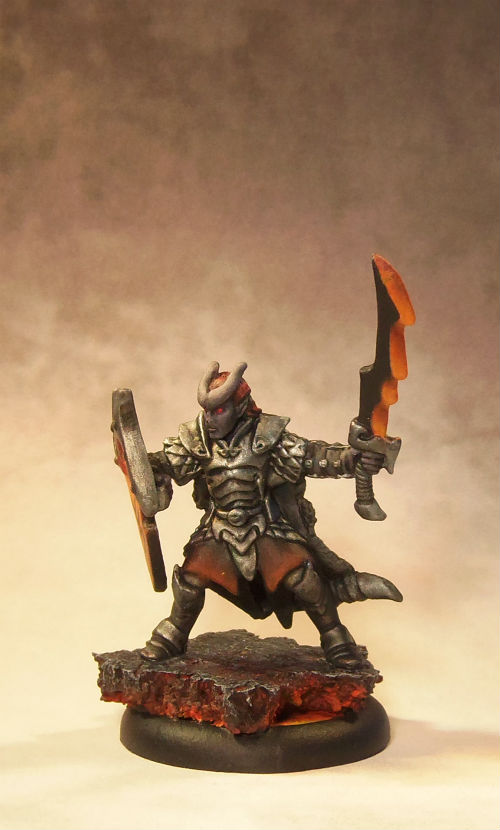
Reaper Vaeloth Hellborn Paladin Standard+ with Level 2 base

Reaper Aina, Female Valkyrie – Standard+ with Level 2 base
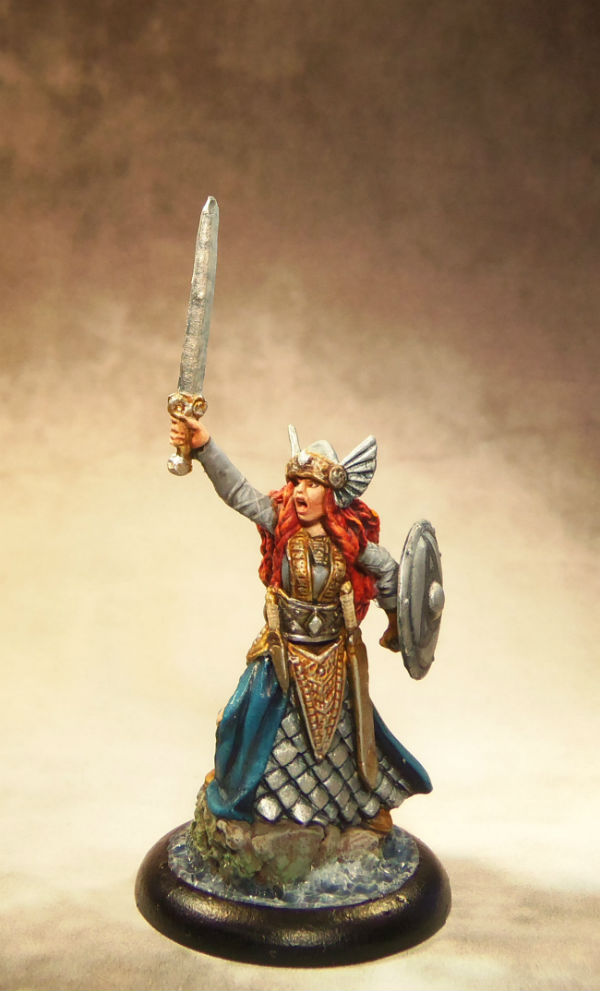
Reaper Aina, Female Valkyrie – Standard+ with Level 2 base
Reaper Aina, Female Valkyrie – Standard+ with Level 2 base
WIP: Reaper Aina Female Valkyrie cont.
The next step for Aina was her base. At first I put Red Oxide Paste on her base and painted it like earth, blending the rock in, but after that was done I decided I didn’t like it well enough. She needed something better. So, I painted the earth blue and white like water, and then I put Woodland Scenics Water Effects on it.

I gave that a few hours to dry, and when it was done I put a bit more white on some of the water, and here she is:


At this point she is finished. I’ll post final pictures of her soon and update my For Sale! page with her information.
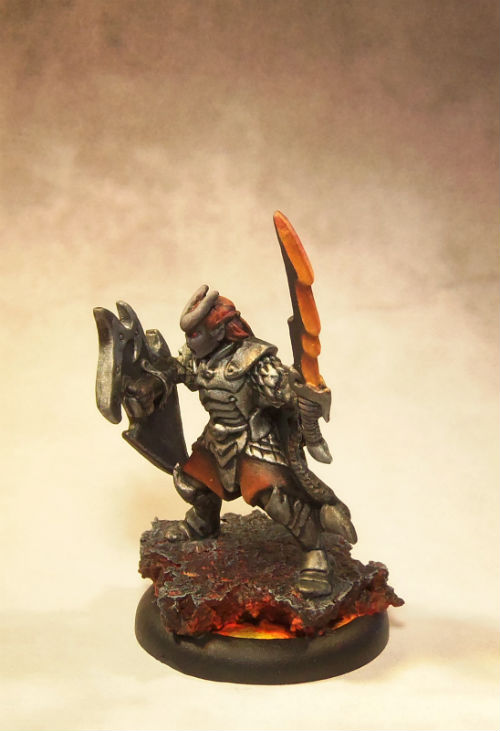
WIP: Vaeloth Hellborn Paladin with Lava Base
Another quick update here – I needed to wrap up several projects including the Hellborn Paladin, and I decided that Vaeloth should have a simple lava base:
It was a lot of fun to make it, and the Vallejo Fluorescent paints came in handy!
Here he is finished and attached to his base:

I’ll put up good final pictures and list him on my For Sale! page shortly!
WIP: Dark Angels Company Masters and Reaper Pathfinder Red Dragon
I finished up the two Company Masters, which means I have one for sale again. I’ll take some good pictures of it soon and put it up on the For Sale! page.
Here are the pictures in my spray booth!


Here’s the next model I’m working on – Reaper Pathfinder Red Dragon:
WIP: Dark Angels Company Masters cont.
Just a quick update. I got a chance to do some work on the Company Masters today, and here is their stopping point. I plan to finish them tomorrow.

Looking at the minis it wasn’t clear to me before, but seeing them now in pictures it’s pretty obvious I need to do more highlights on those cloaks!
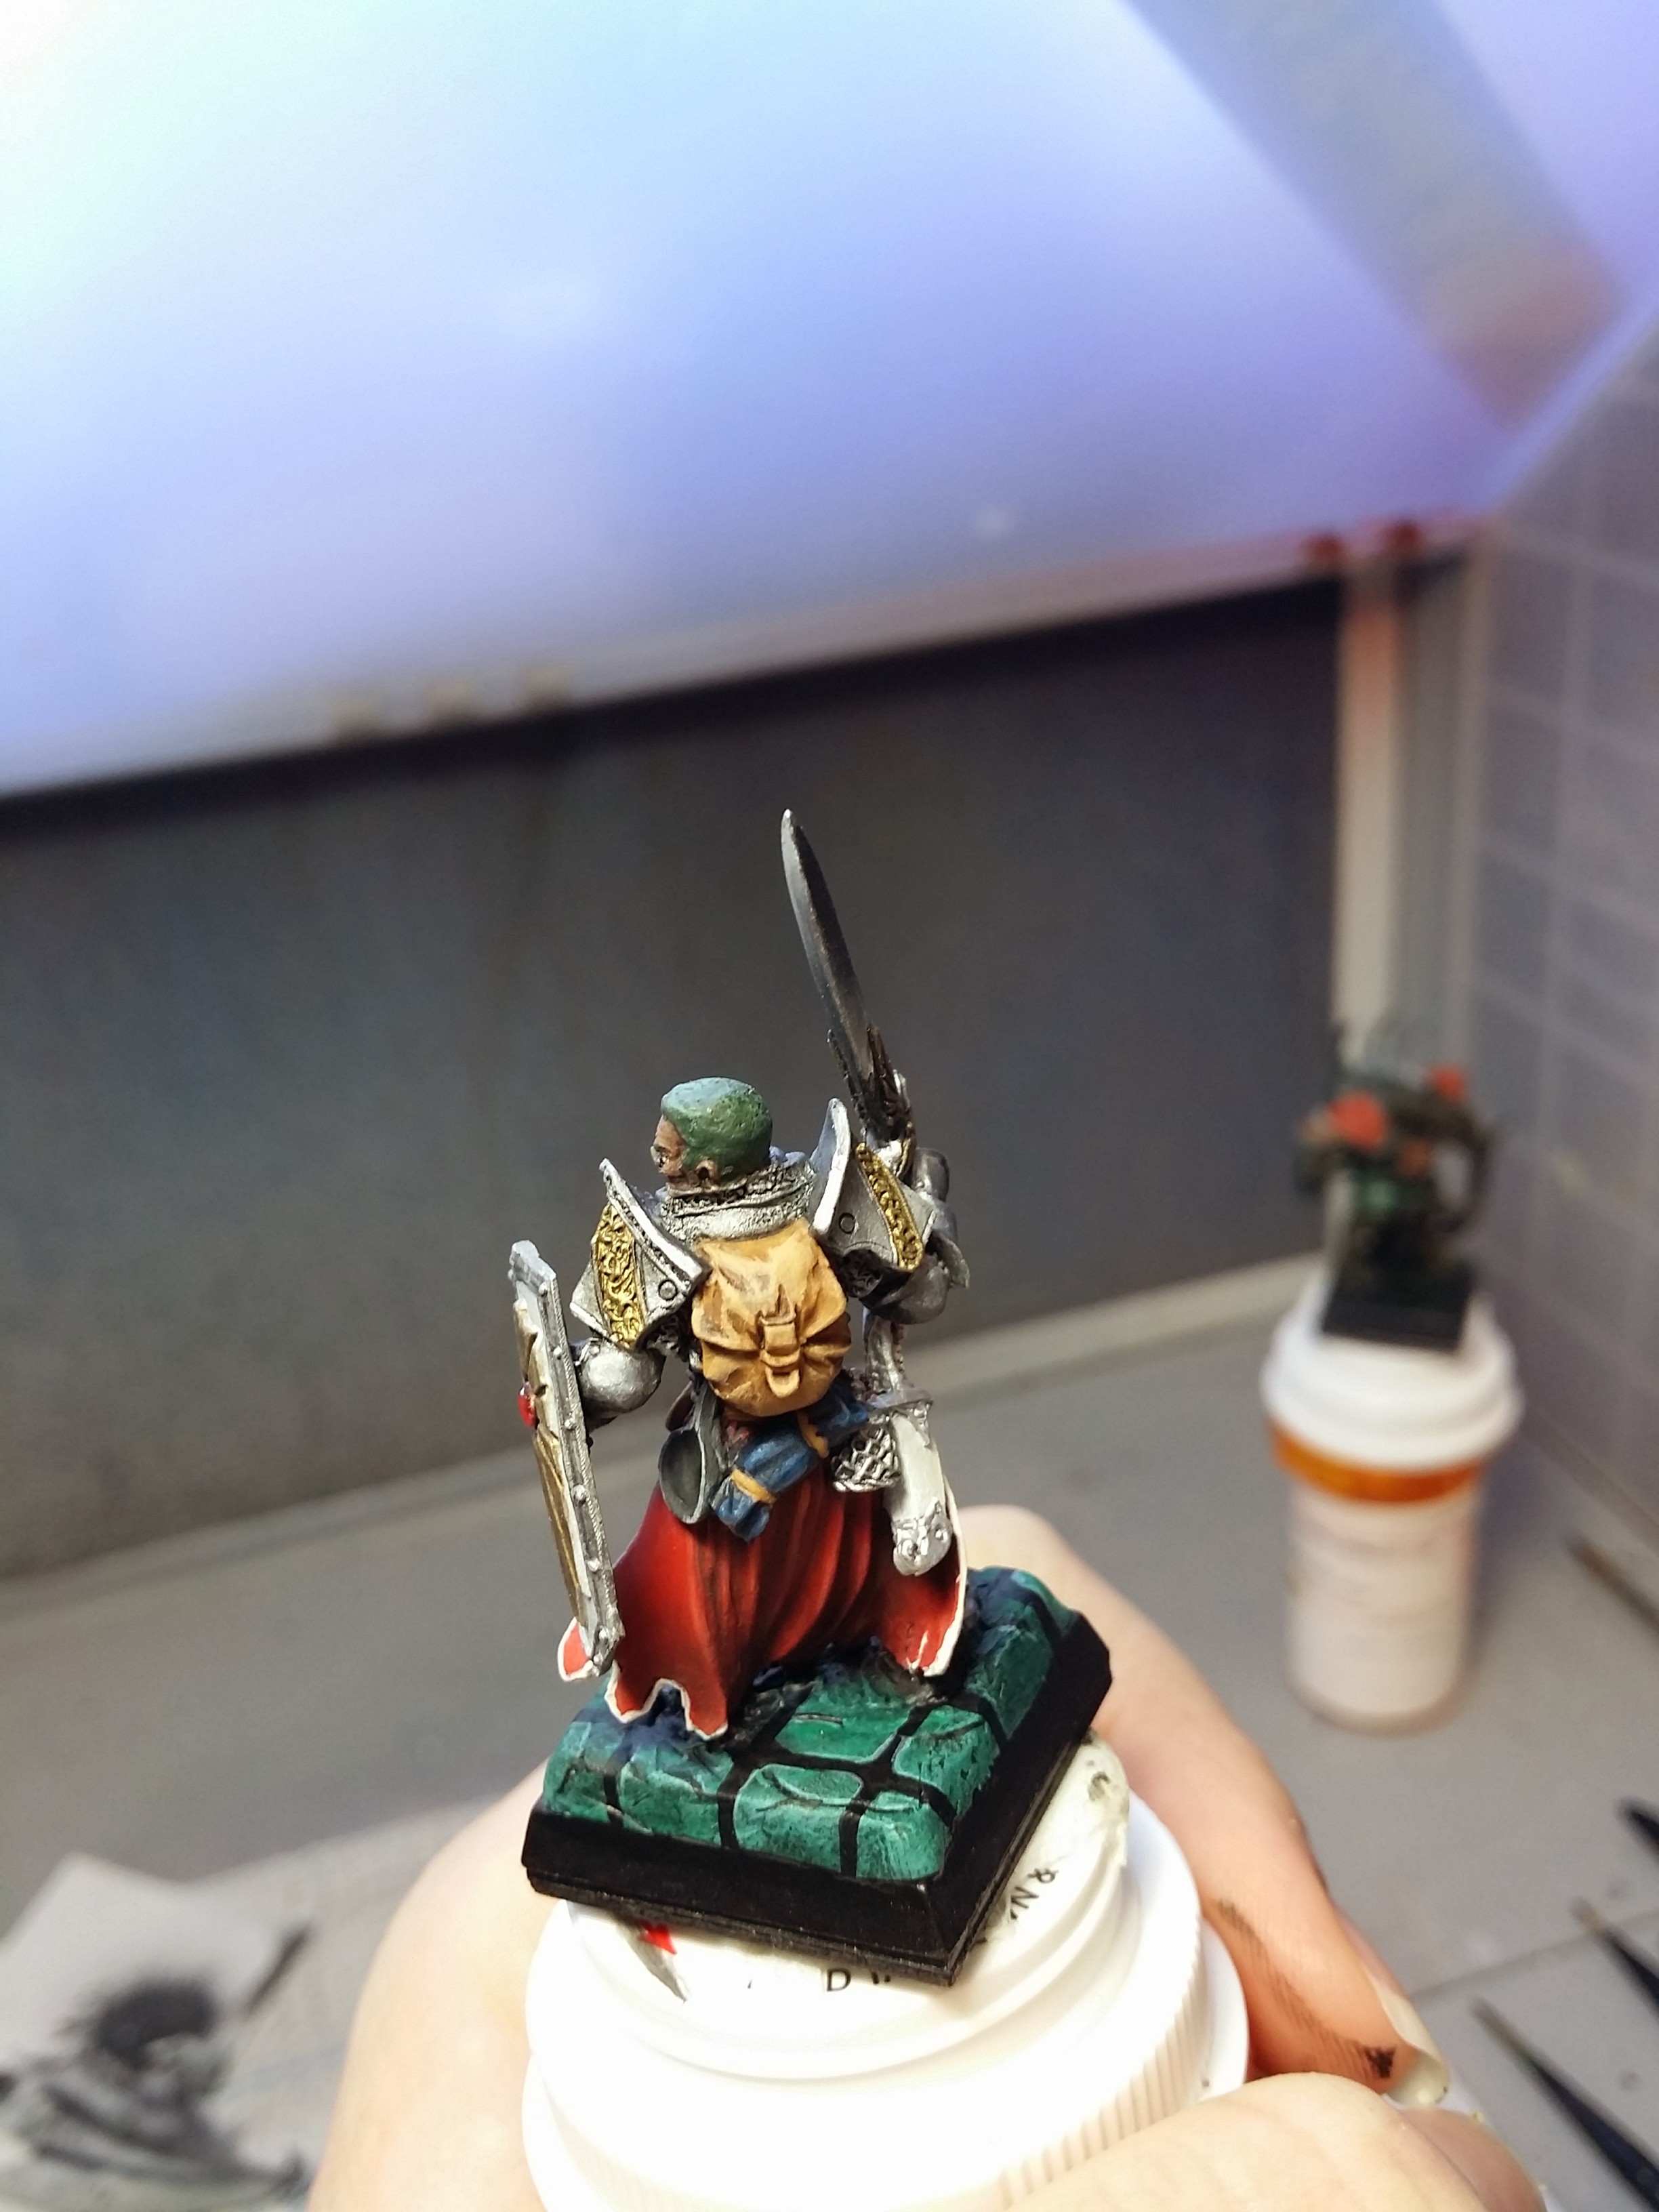
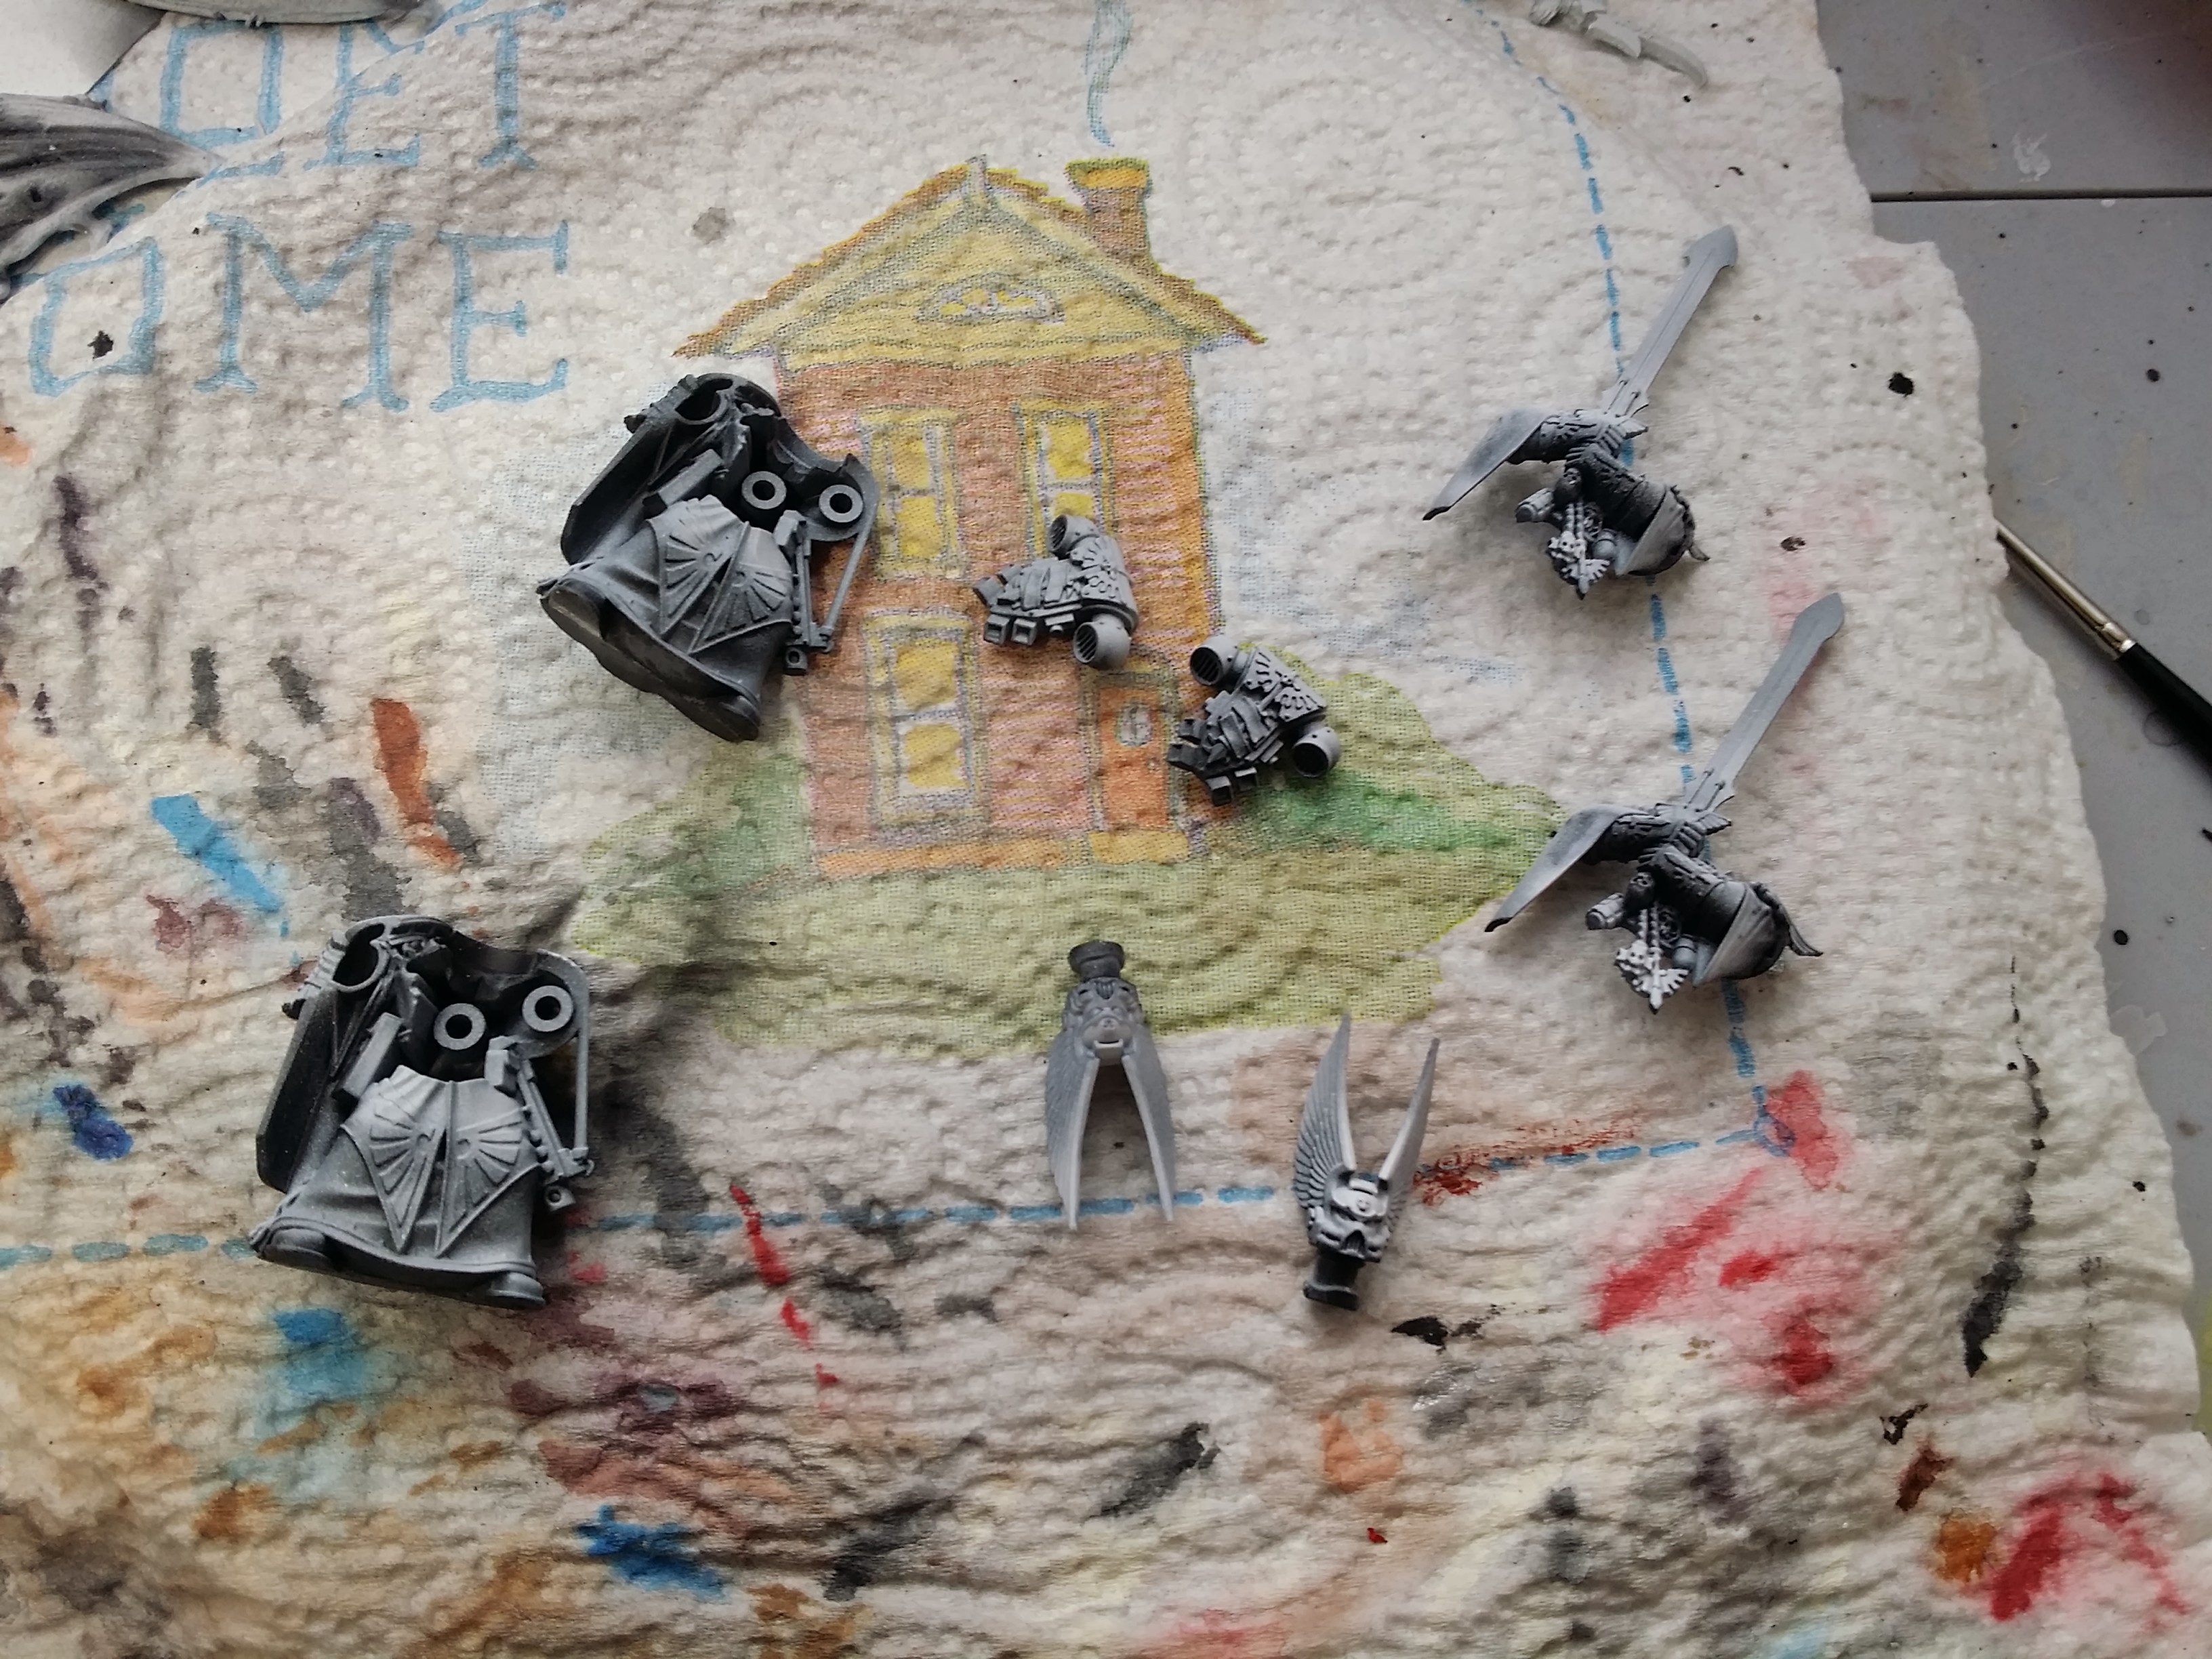
WIP: Dark Angels Company Masters
So I took a quick commission for a DA Company Master like one I painted previously. In order to be as efficient with my time as possible, I decided to paint a second one alongside it, and the second one will be for sale when it is finished. I’m doing these two a bit differently than the last one (more airbrush and pre-shading), and hopefully the results will be even cleaner, neater, and better overall than the last.
After priming, I airbrushed black where the shadows should be, and I airbrushed white in highlighted areas and anywhere that should be a focal point.
Next, I airbrushed the armor RMS Leaf Green.

The pre-shading did an excellent job of establishing shadows in the green. The next step for me was to airbrush a highlight on the armor with RMS Pale Green.
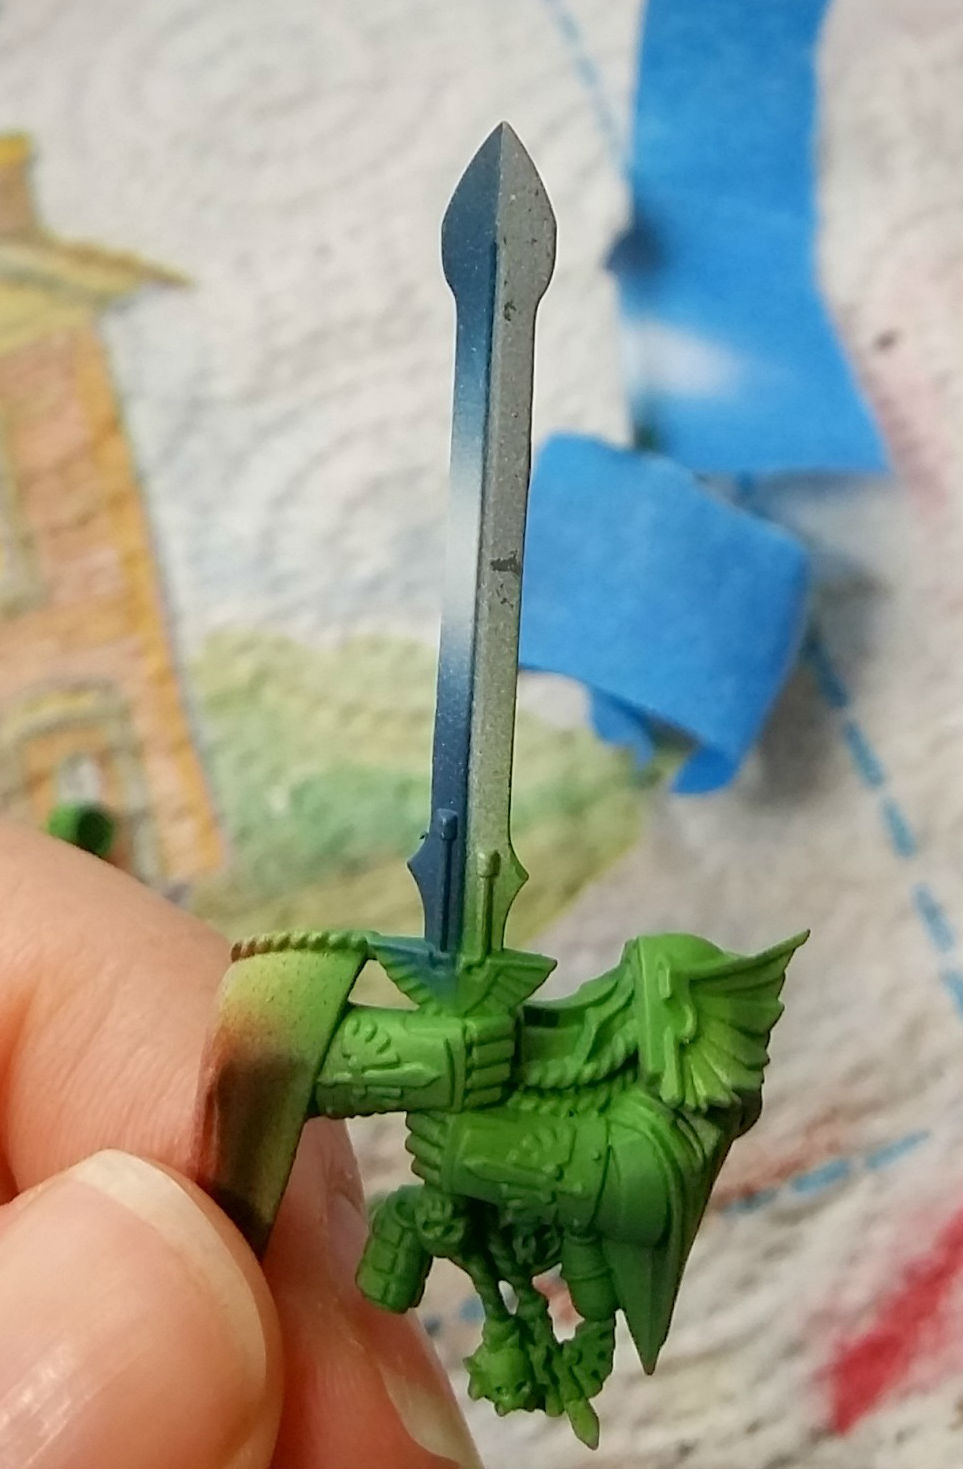
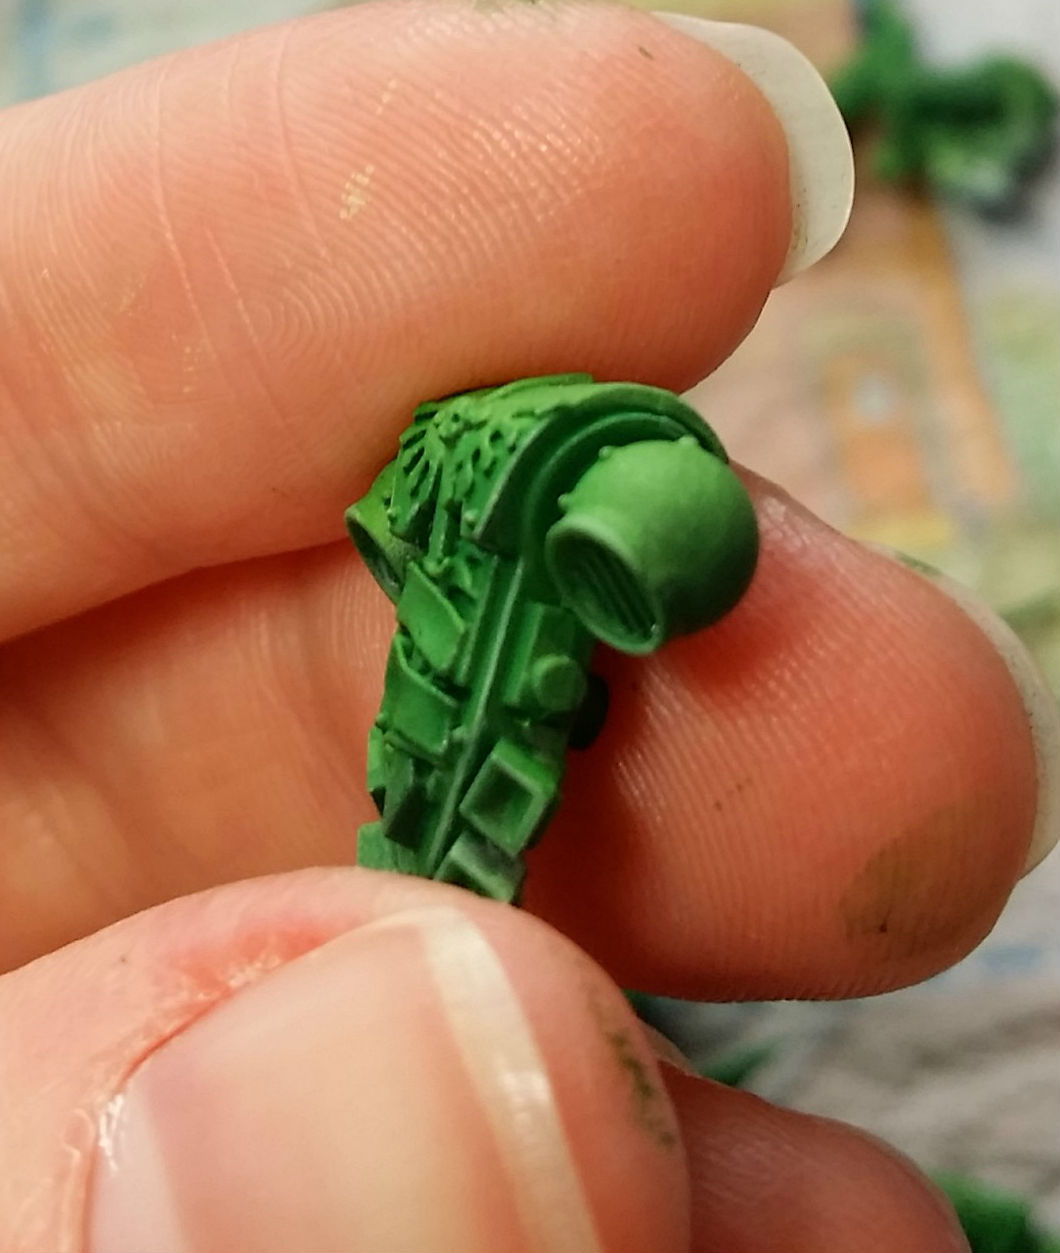
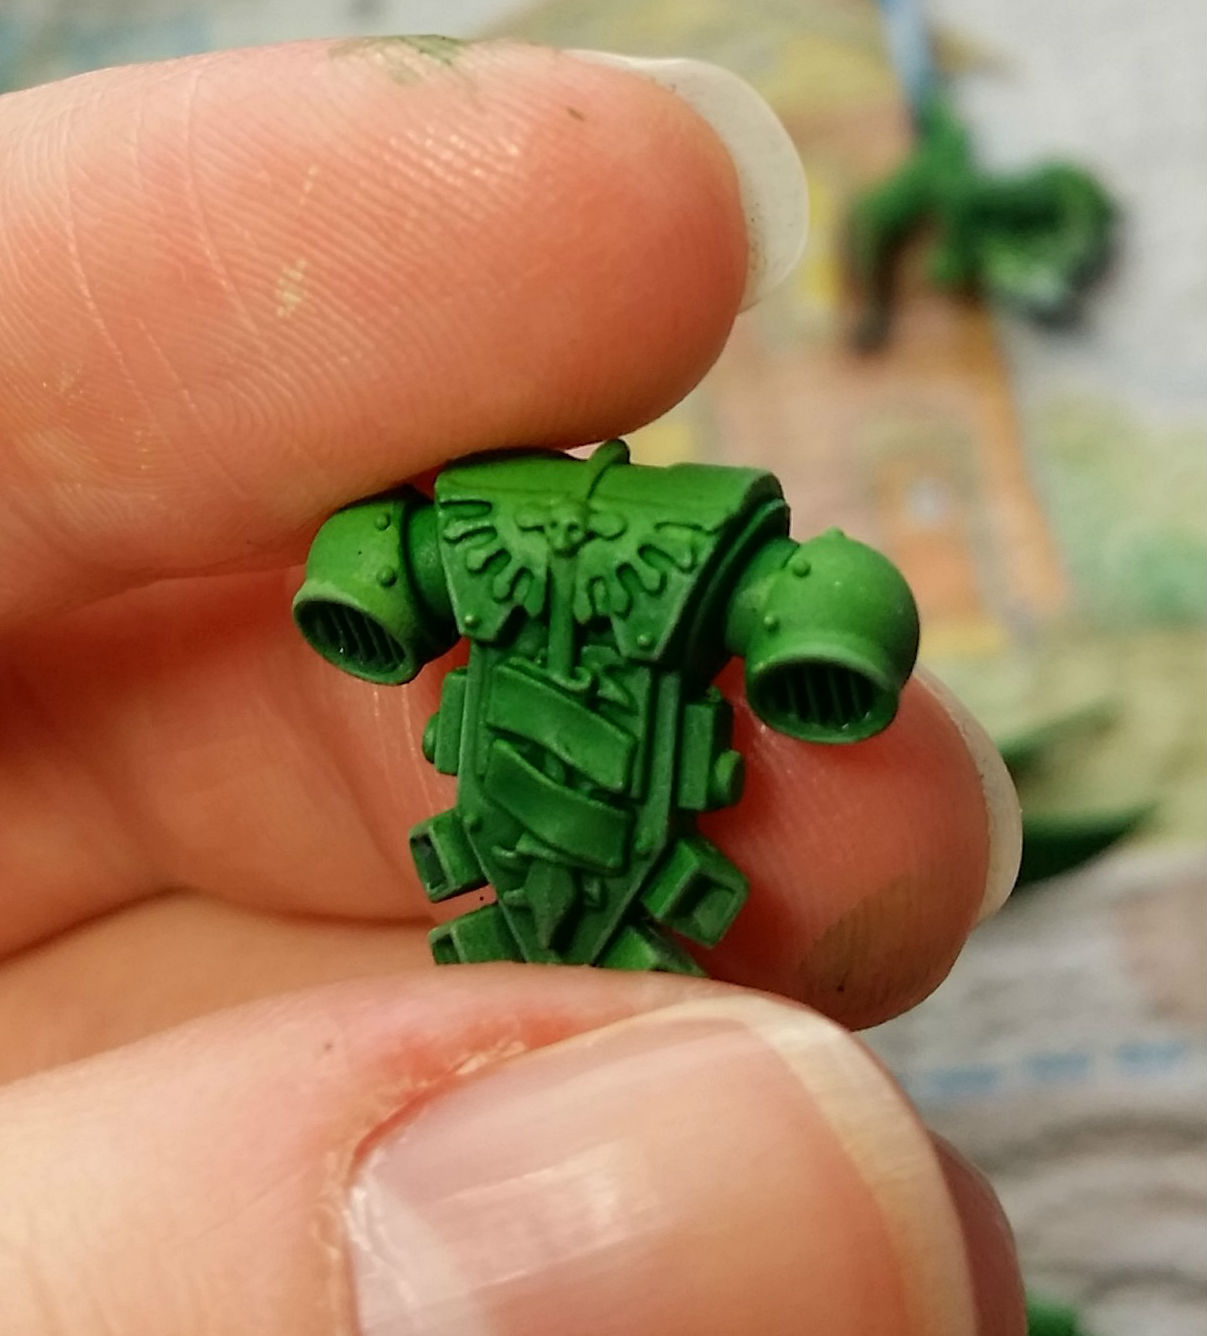
Since the models weren’t yet assembled at this point, I wanted to focus on the areas that were difficult to paint properly when assembled so that I could put the models together – the sword, jump-pack, and head.
First, I decided not to bother with trying to wet-blend the swords like last time. It was a lot of bother the last time, and I only did that for the sake of practice. This time, as efficiency is one of my main concerns, the swords were to be airbrushed. I masked half of each side of each blade, and starting with the darkest colors, sprayed the gradient. First was 1:1 VMA Black and VMC Dark Prussian Blue (I just purchased that paint, and I am absolutely in love with that color!), then VMC Dark Prussian Blue over the whole blade except where it was to be white, then RMS True Blue in the mid-tones, then VMA White. 

After that, I painted in the eyes VMC Carmine Red (another color I really love), and washed the helms GW Biel Tan Green.

Then I washed the jump-packs with GW Biel Tan Green, except where the highest lights are.
I also washed the arms.
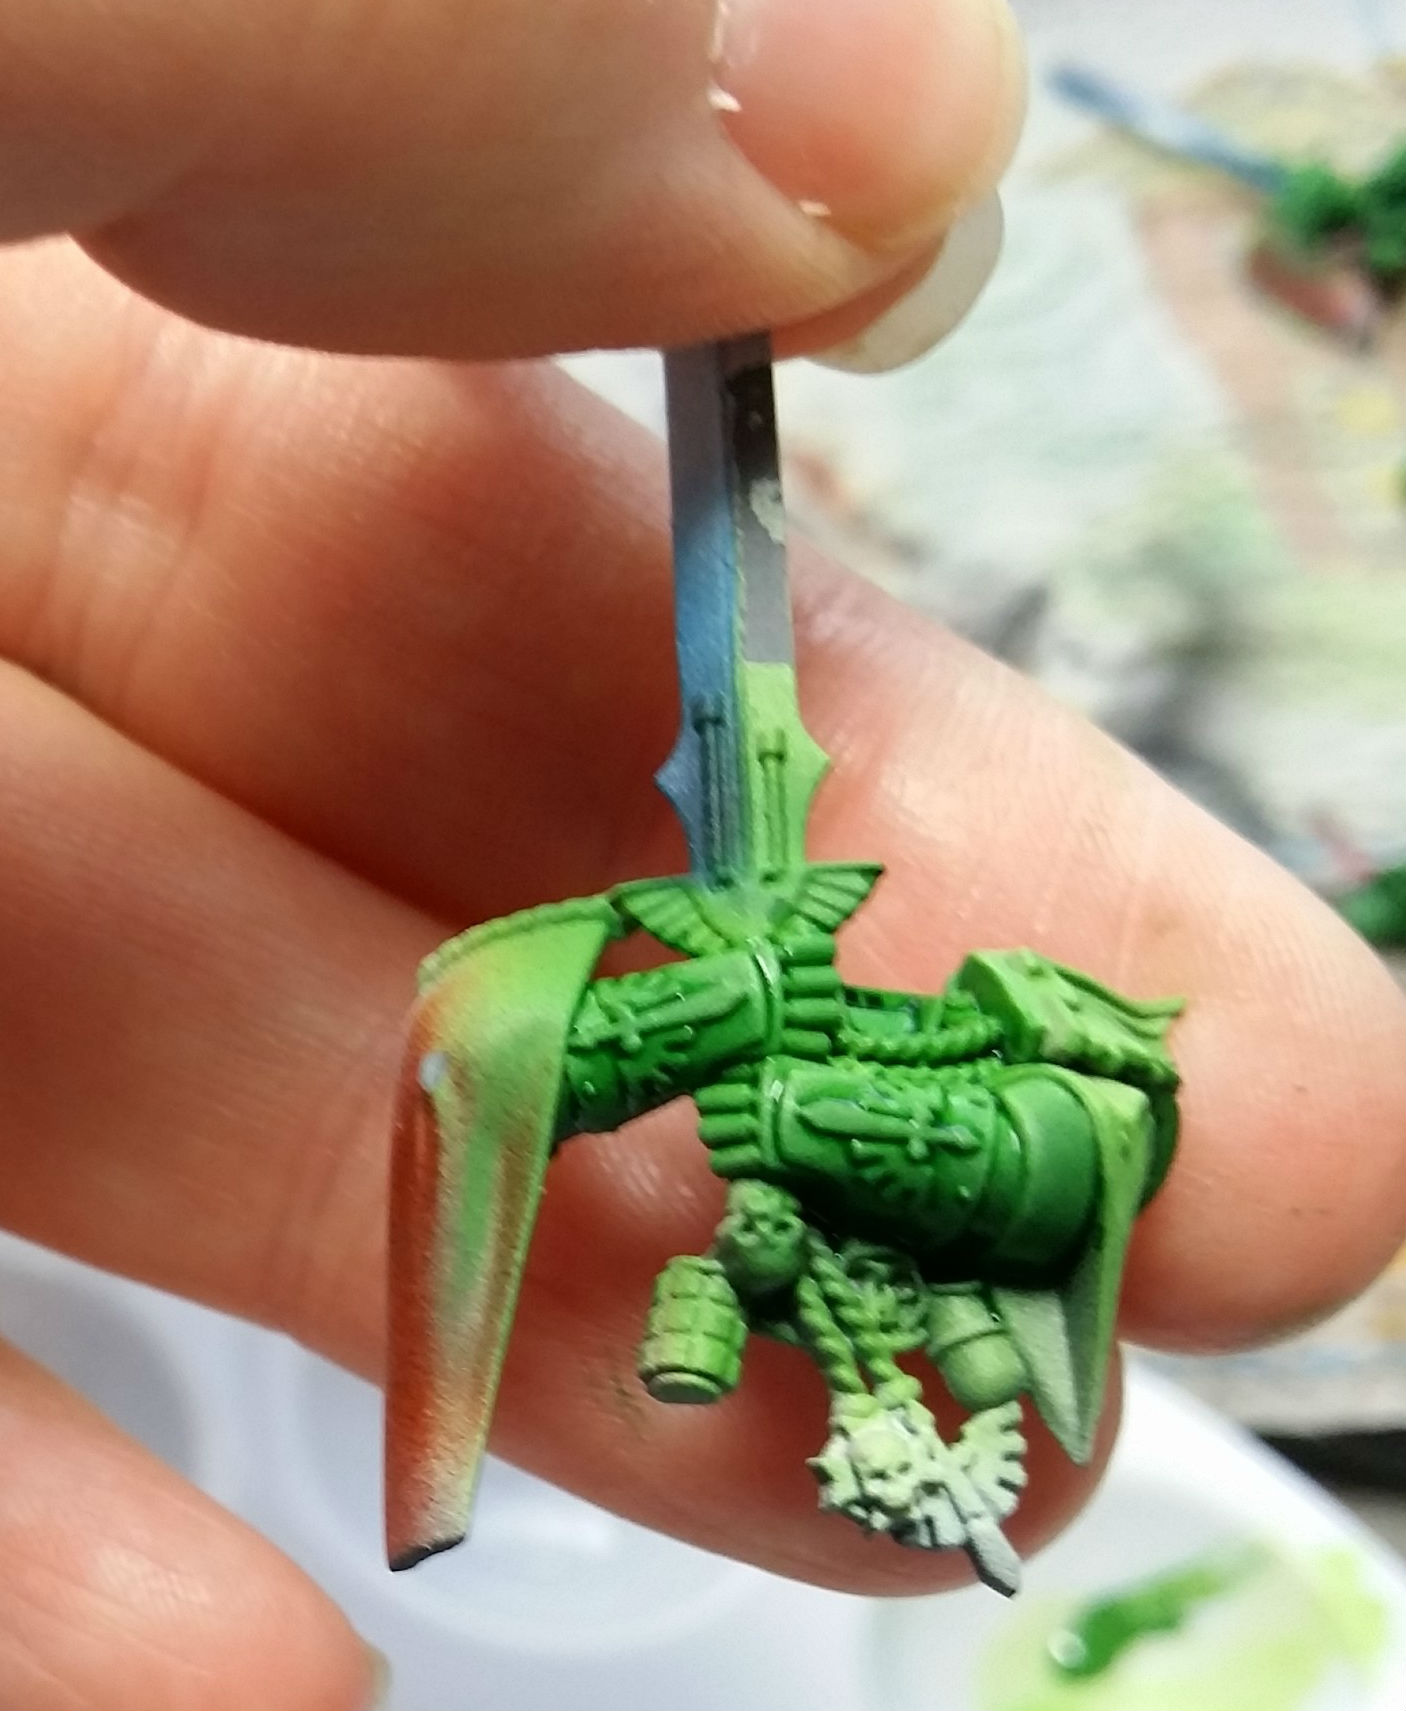
After that, I was able to assembled the models, and here is their current stopping point:

