Monthly Archives: March 2014
Reaper Hydra For Sale!
Just a quick update…here’s a Reaper Bones Hydra I just finished painting! It is for sale, and it is listed on my For Sale! page.

This model is mounted on a 50mm x 100mm base. It would make an excellent Warhammer Fantasy Dark Elves Hydra!
How to Elven Ruins base
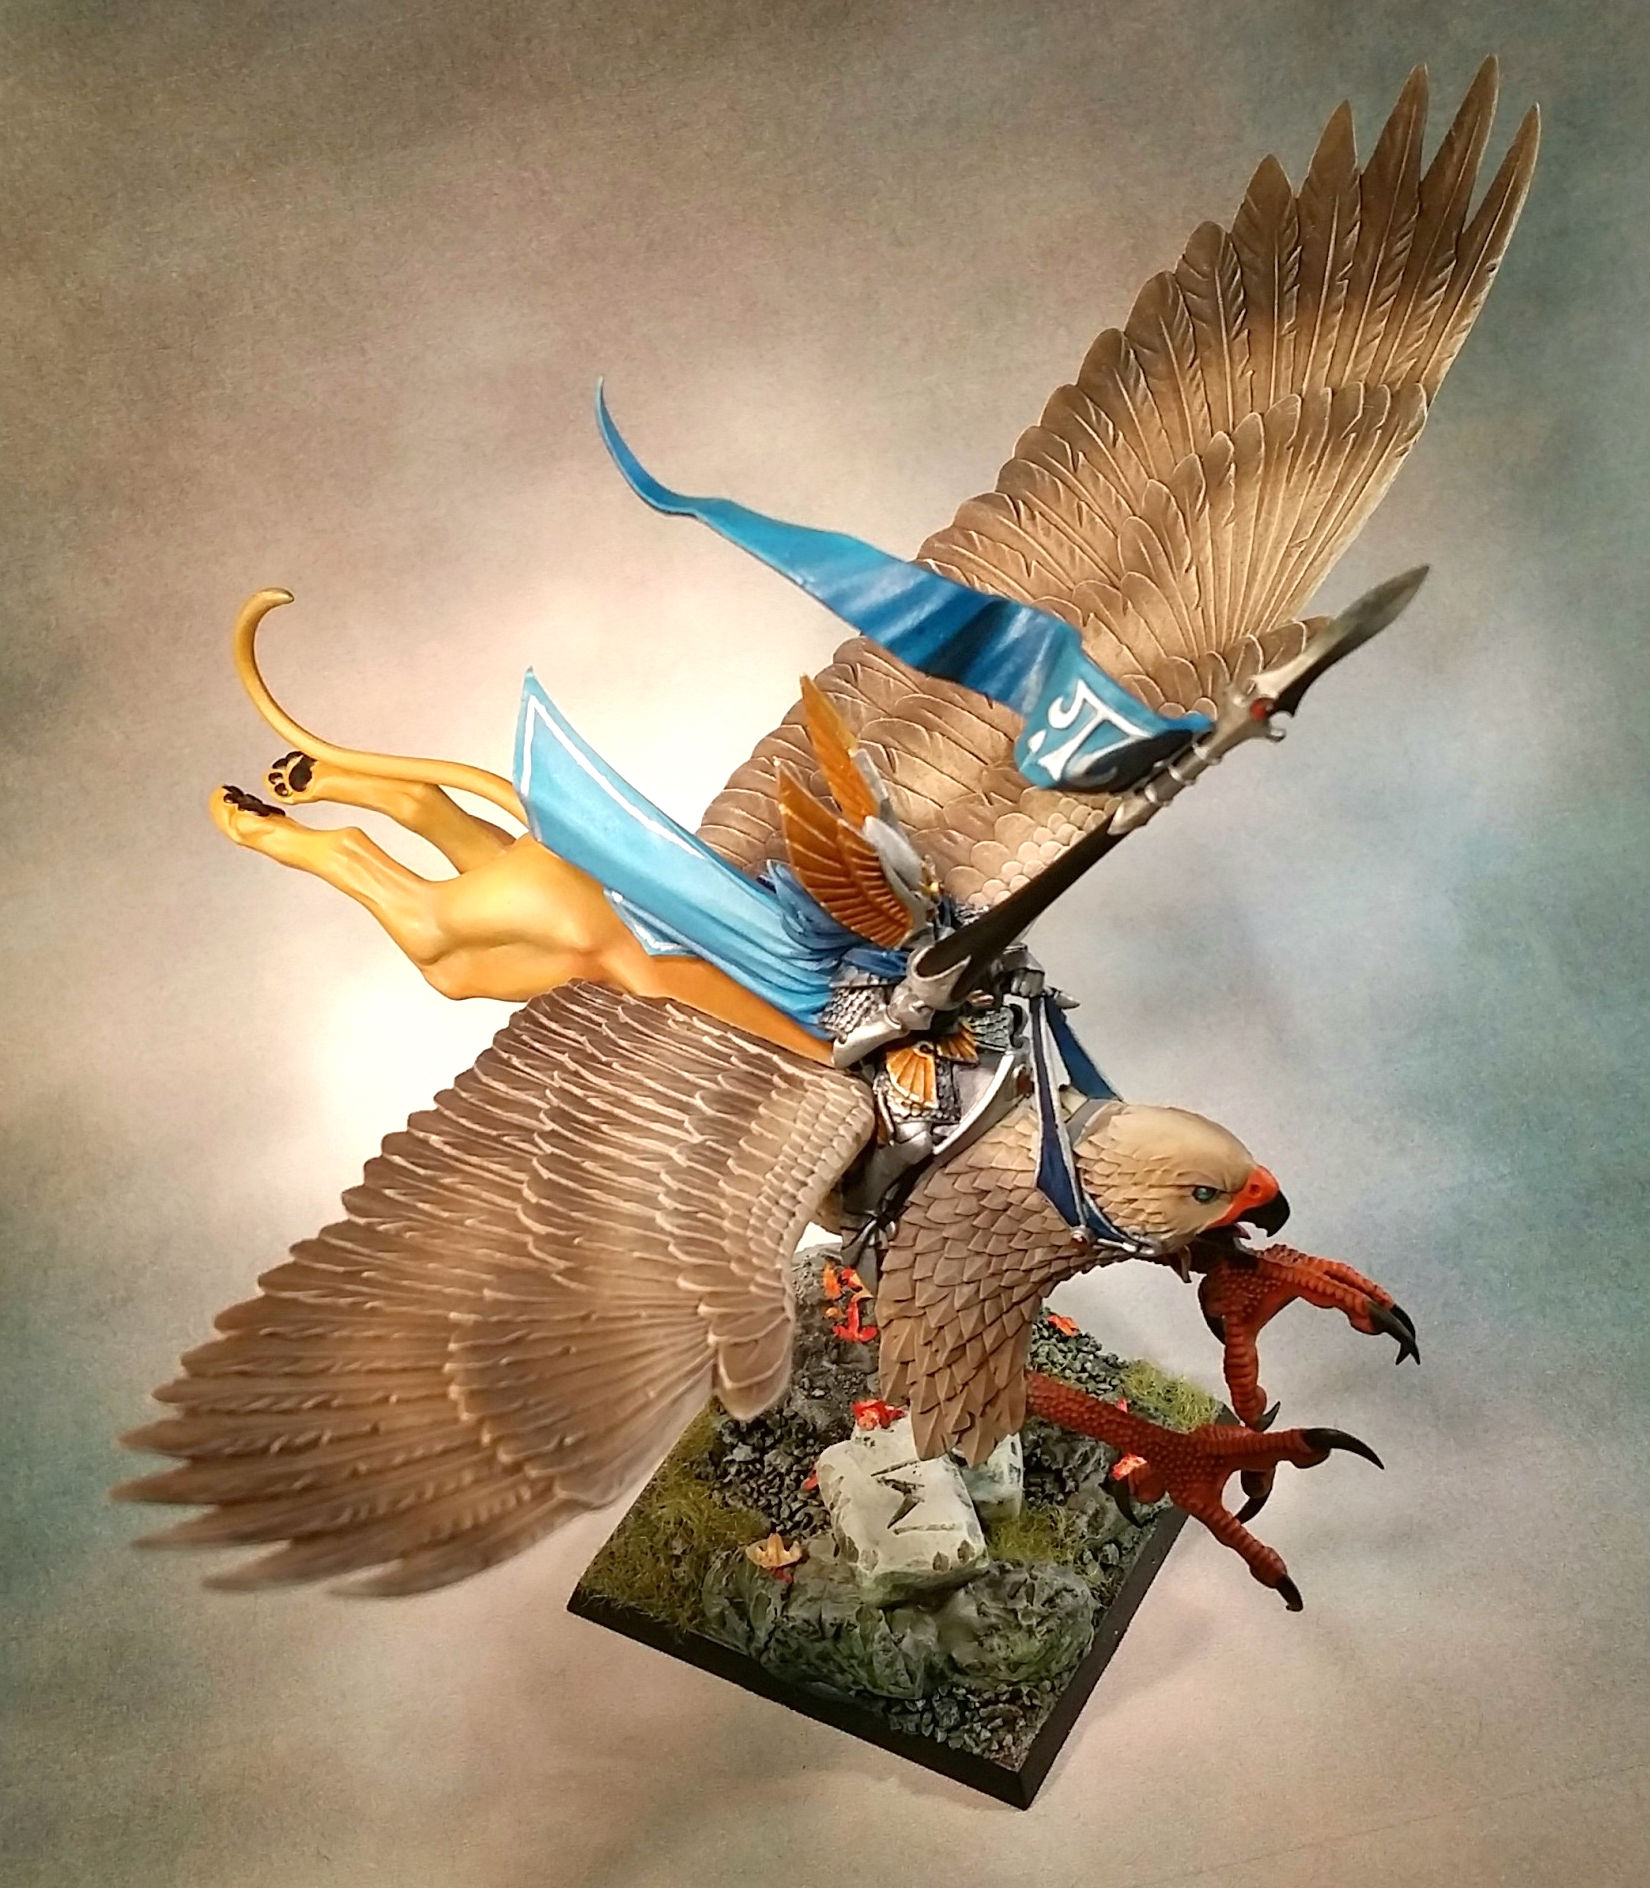
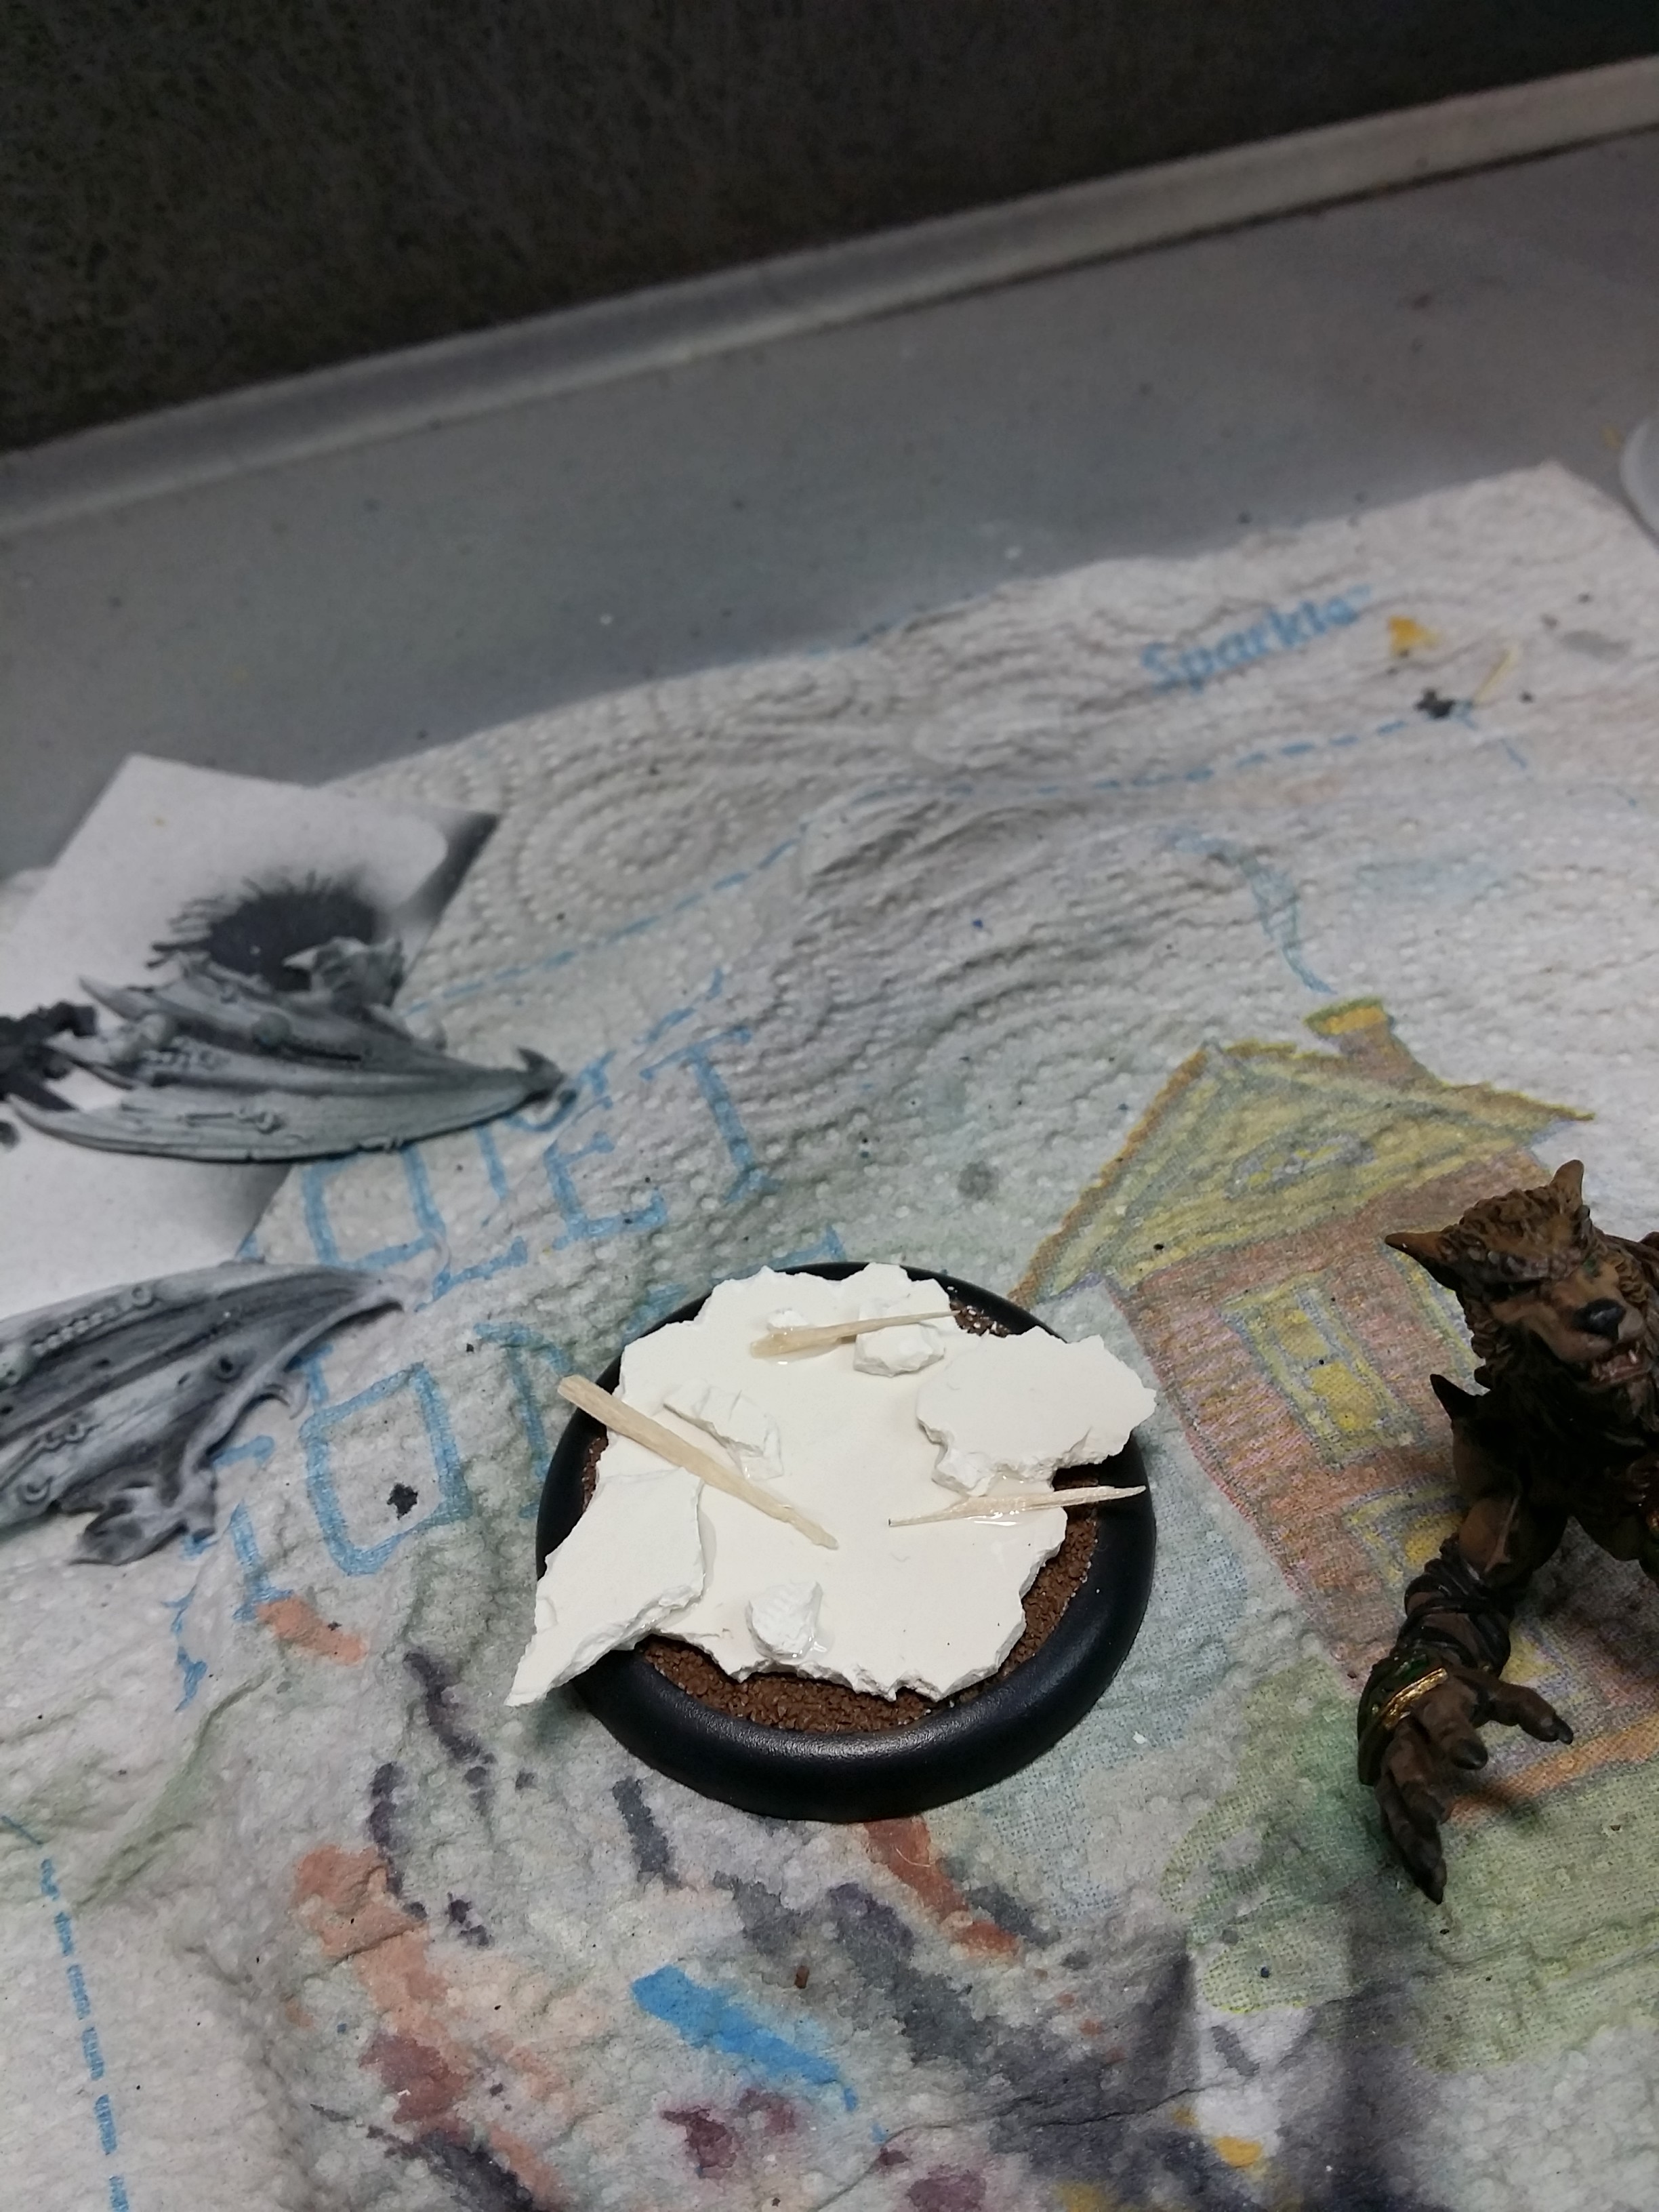
Recently I built Elven ruins bases for the High Elf Prince on Griffon I painted. Here’s how I did it:
1. The first step is to create the rocks and pieces of ruins from Sculpey. I used a Woodland Scenics rock mold to create the rocks by pressing Sculpey into parts of them, squishing it in until the part of the Sculpey not in the rock is pretty flat, and then bending the mold to peel out the newly formed rock. I also created a couple small Sculpey “bricks.” Then bake!
Tools:


Rocks:

2. Next, I carved the Sculpey “bricks” into weathered stone with a craft knife.
Before:

After:

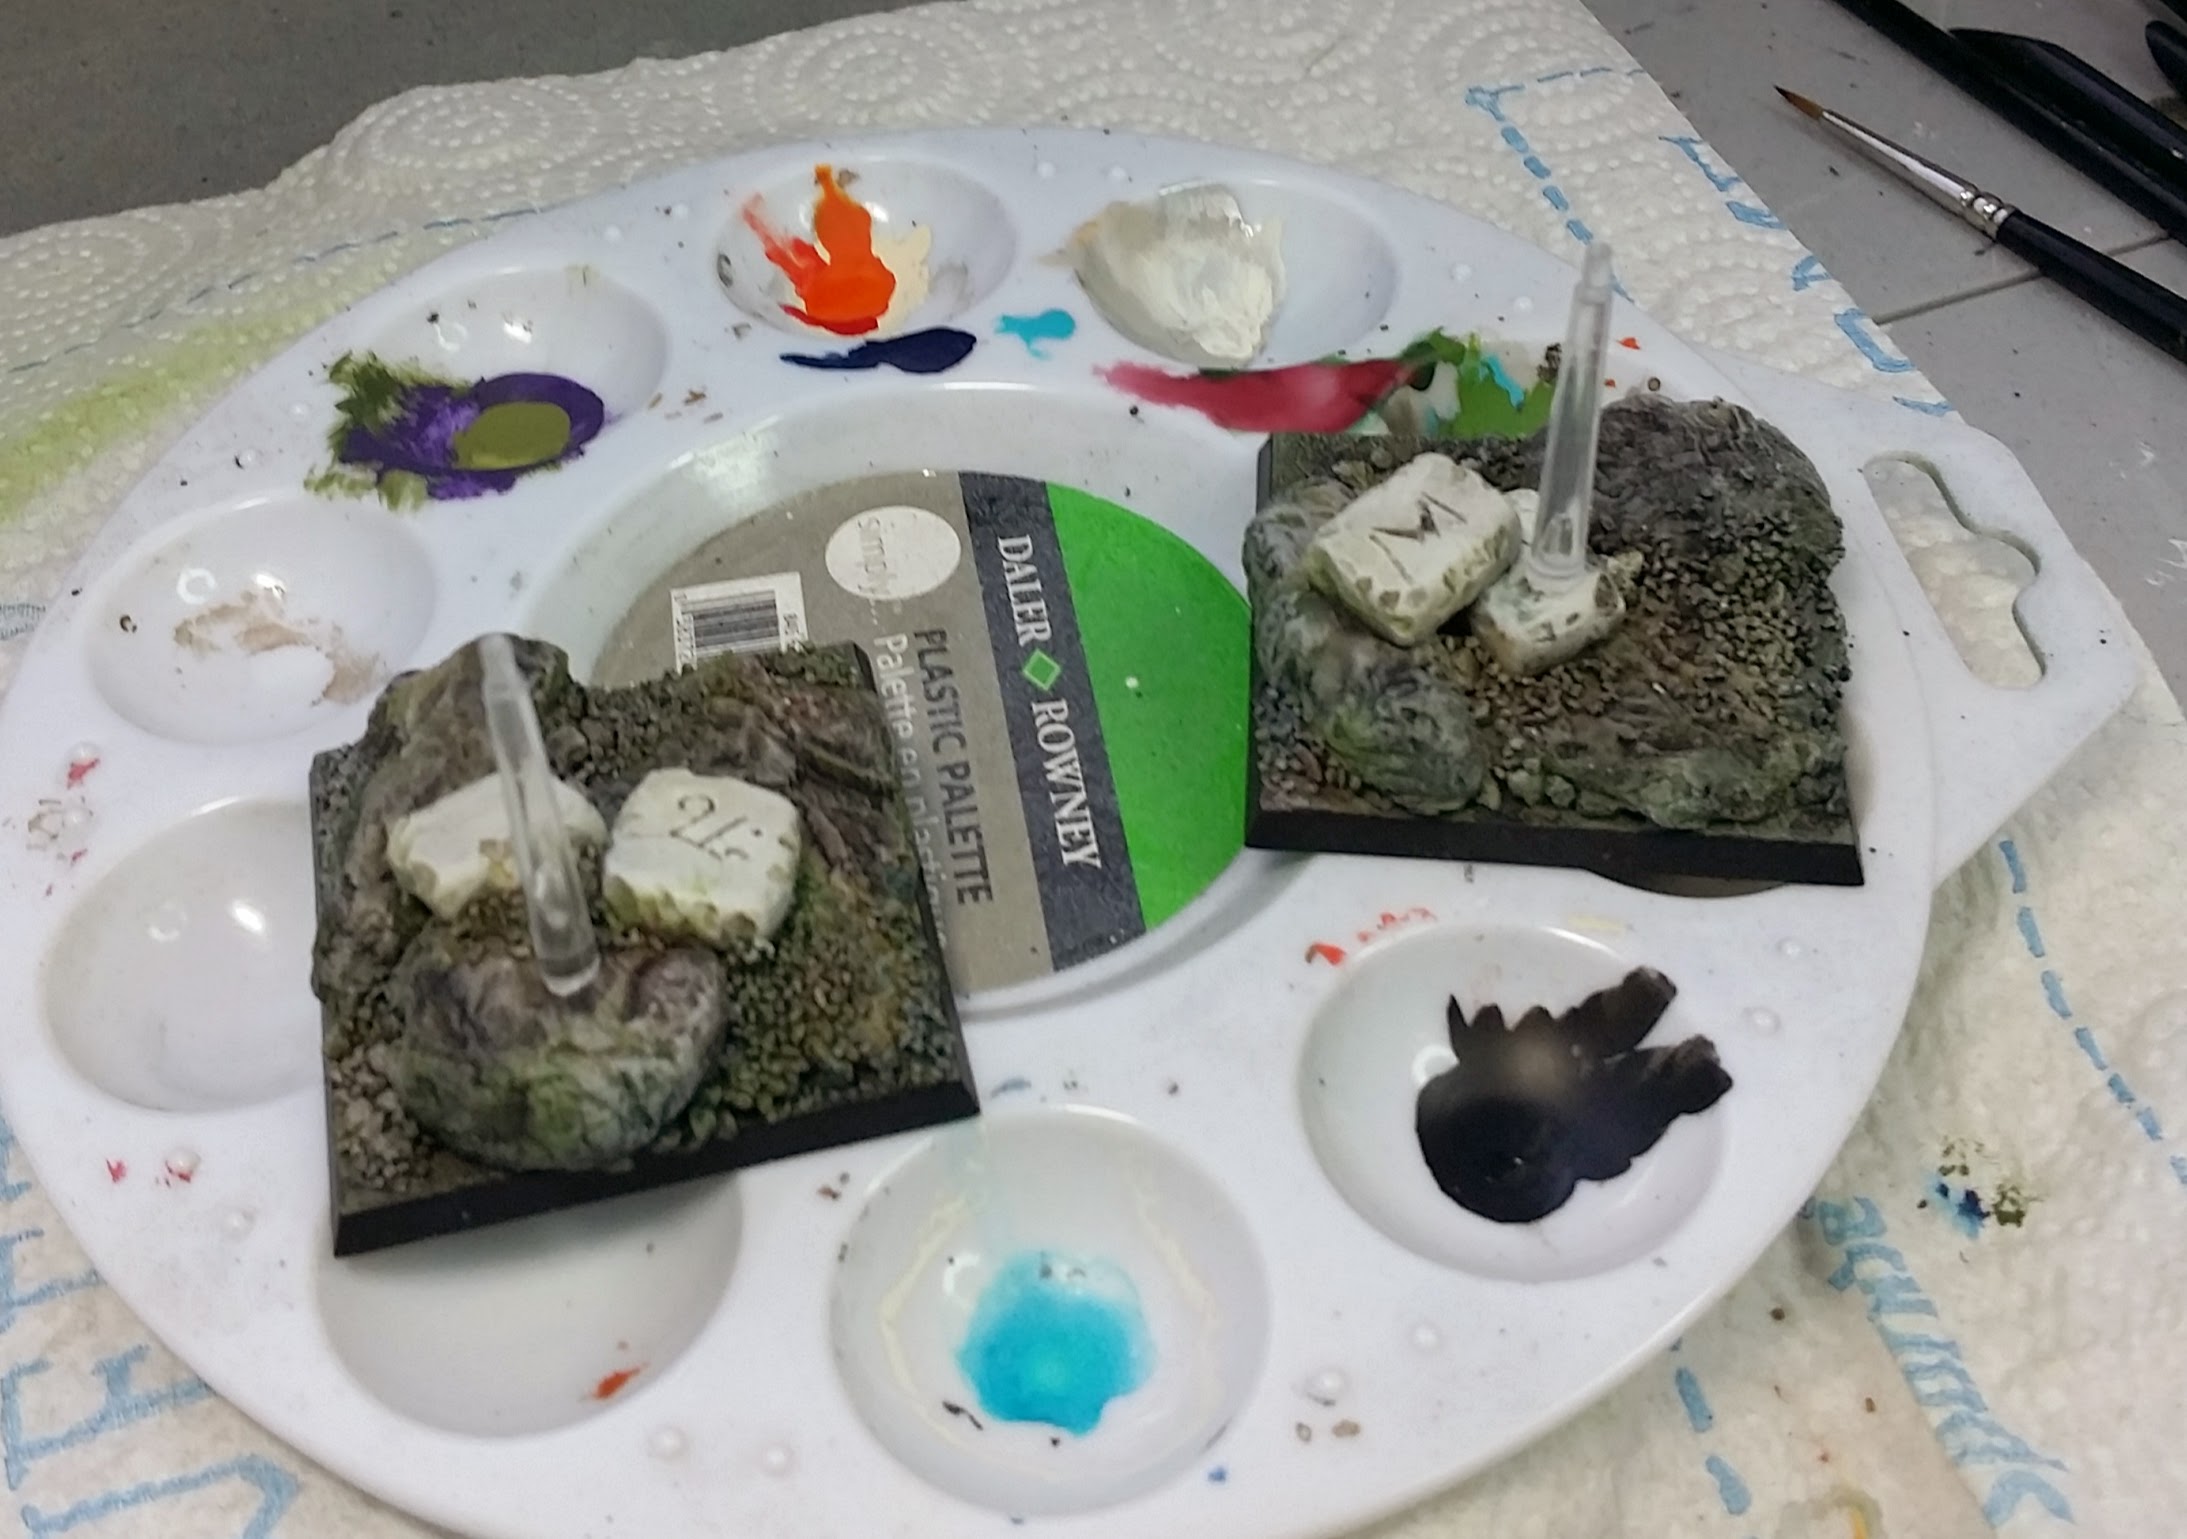
3. The next step is to arrange the stones on the base and glue them on.

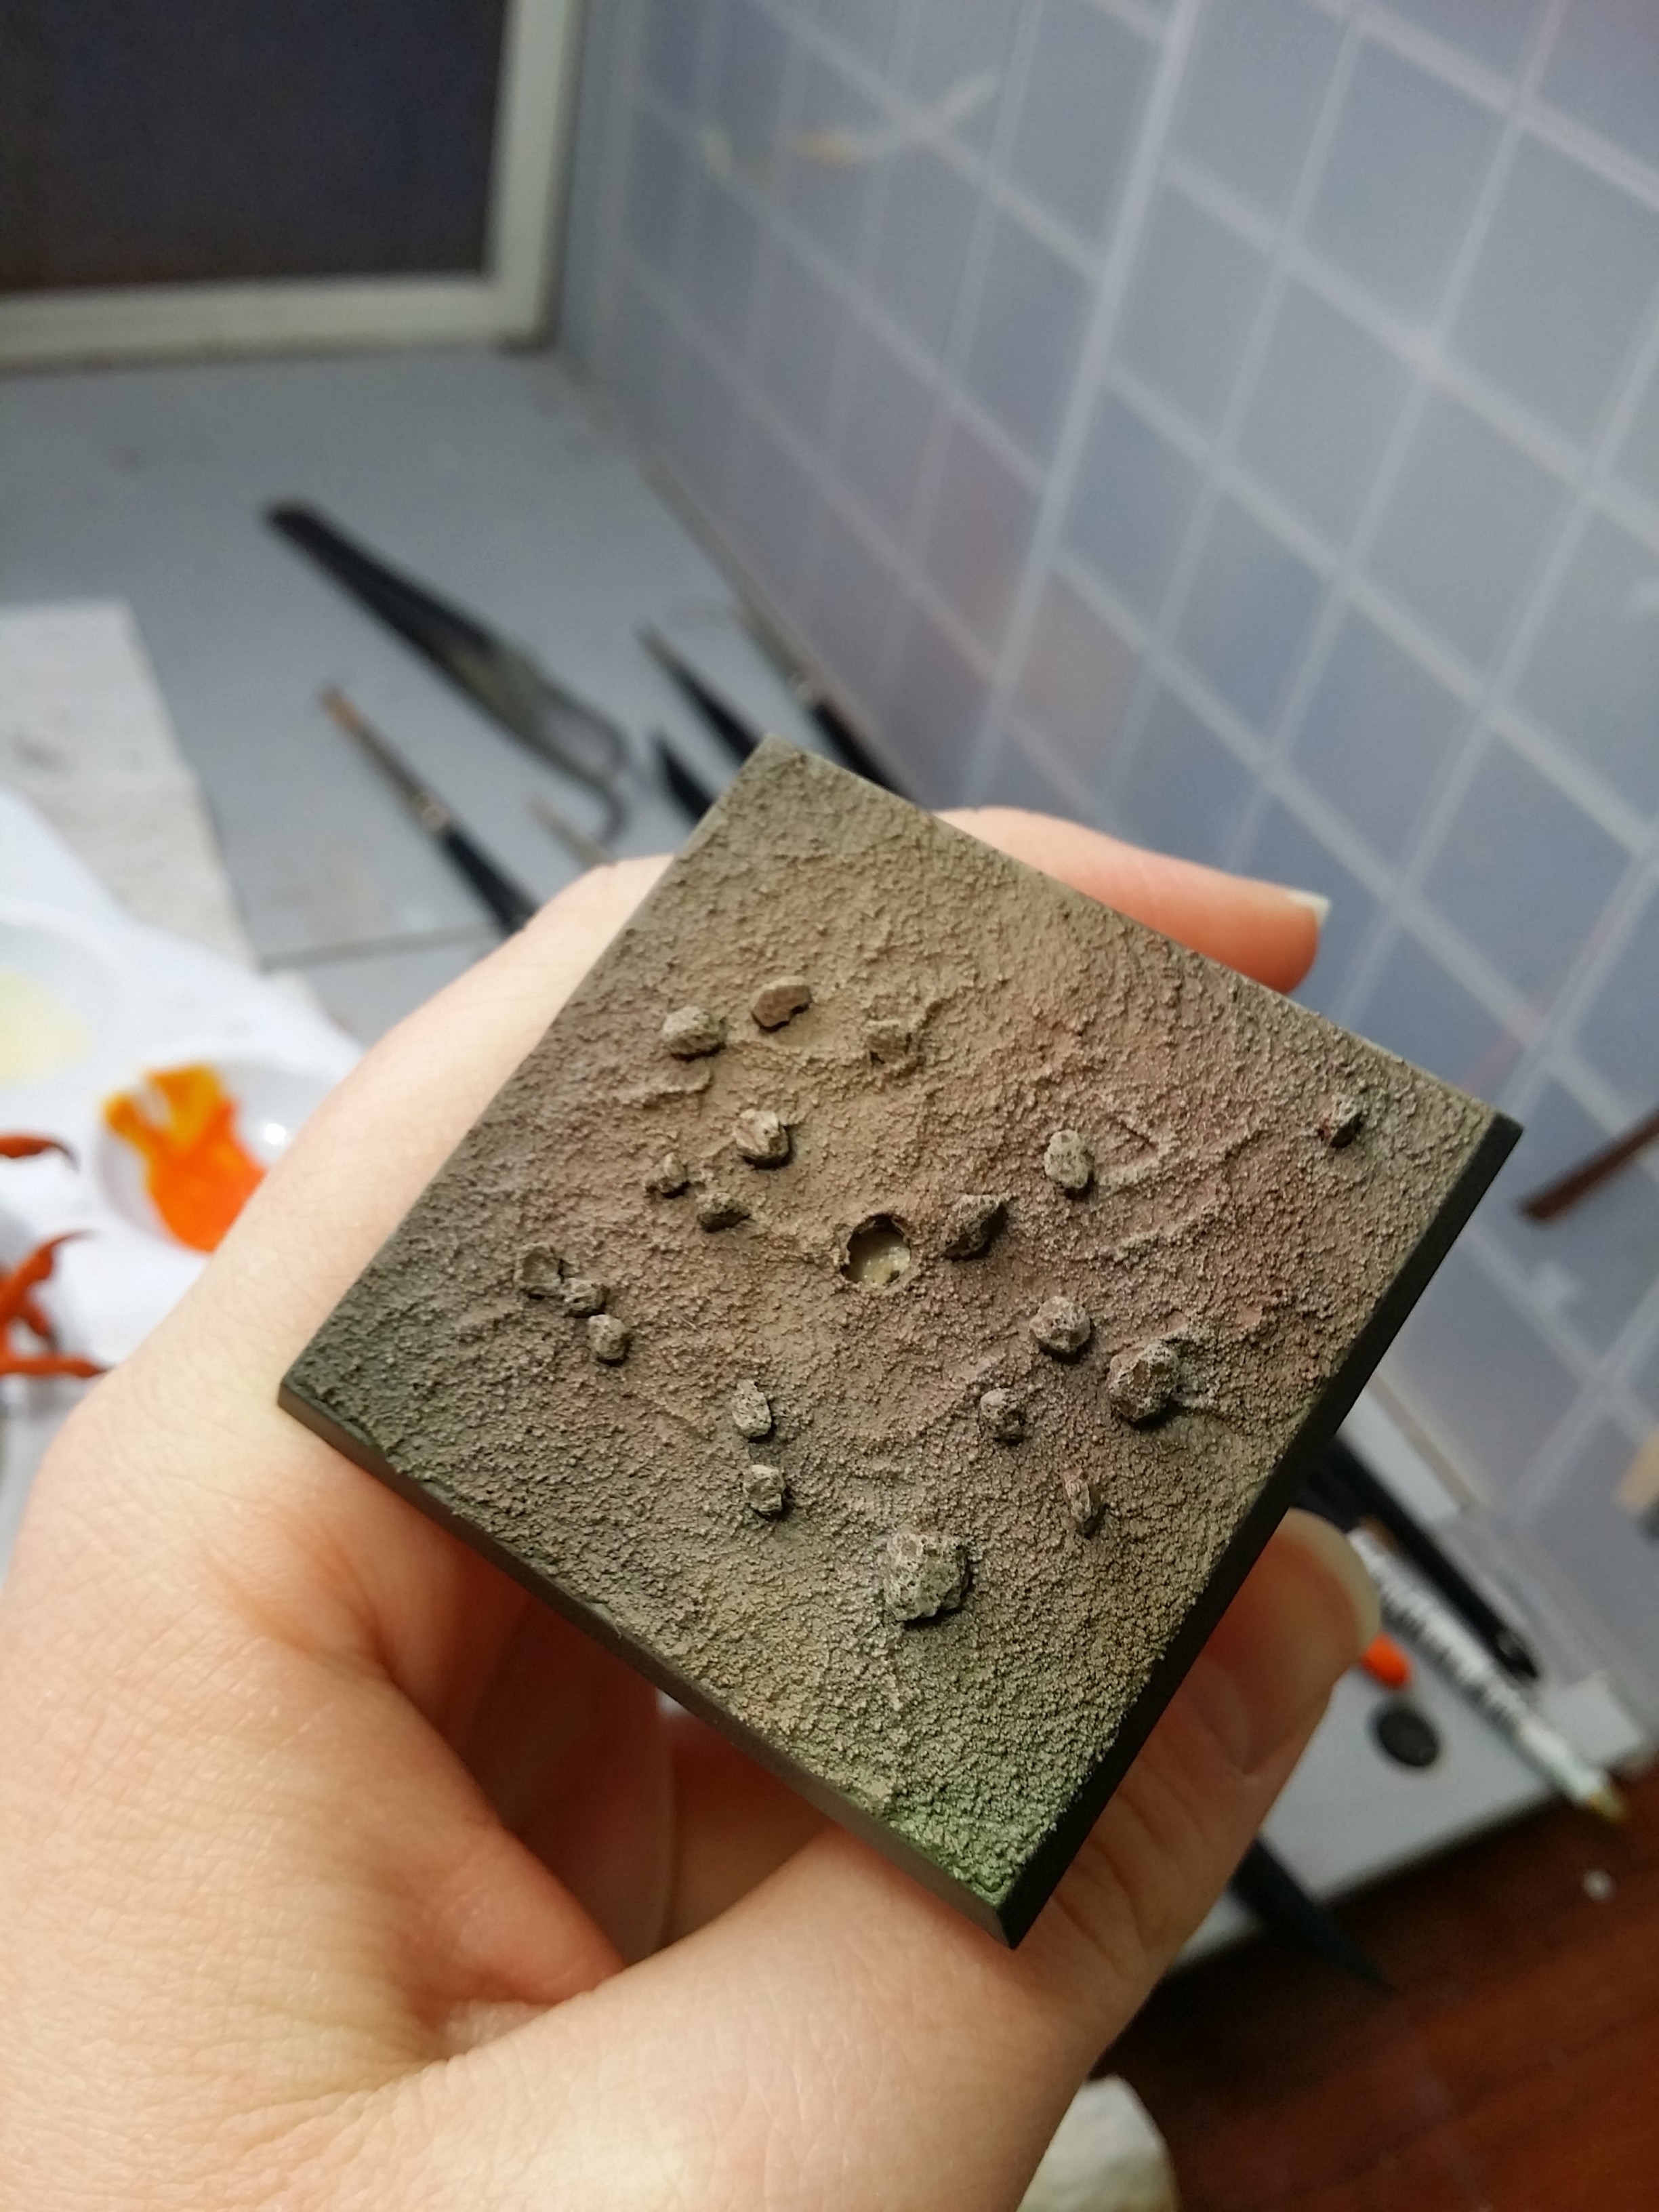
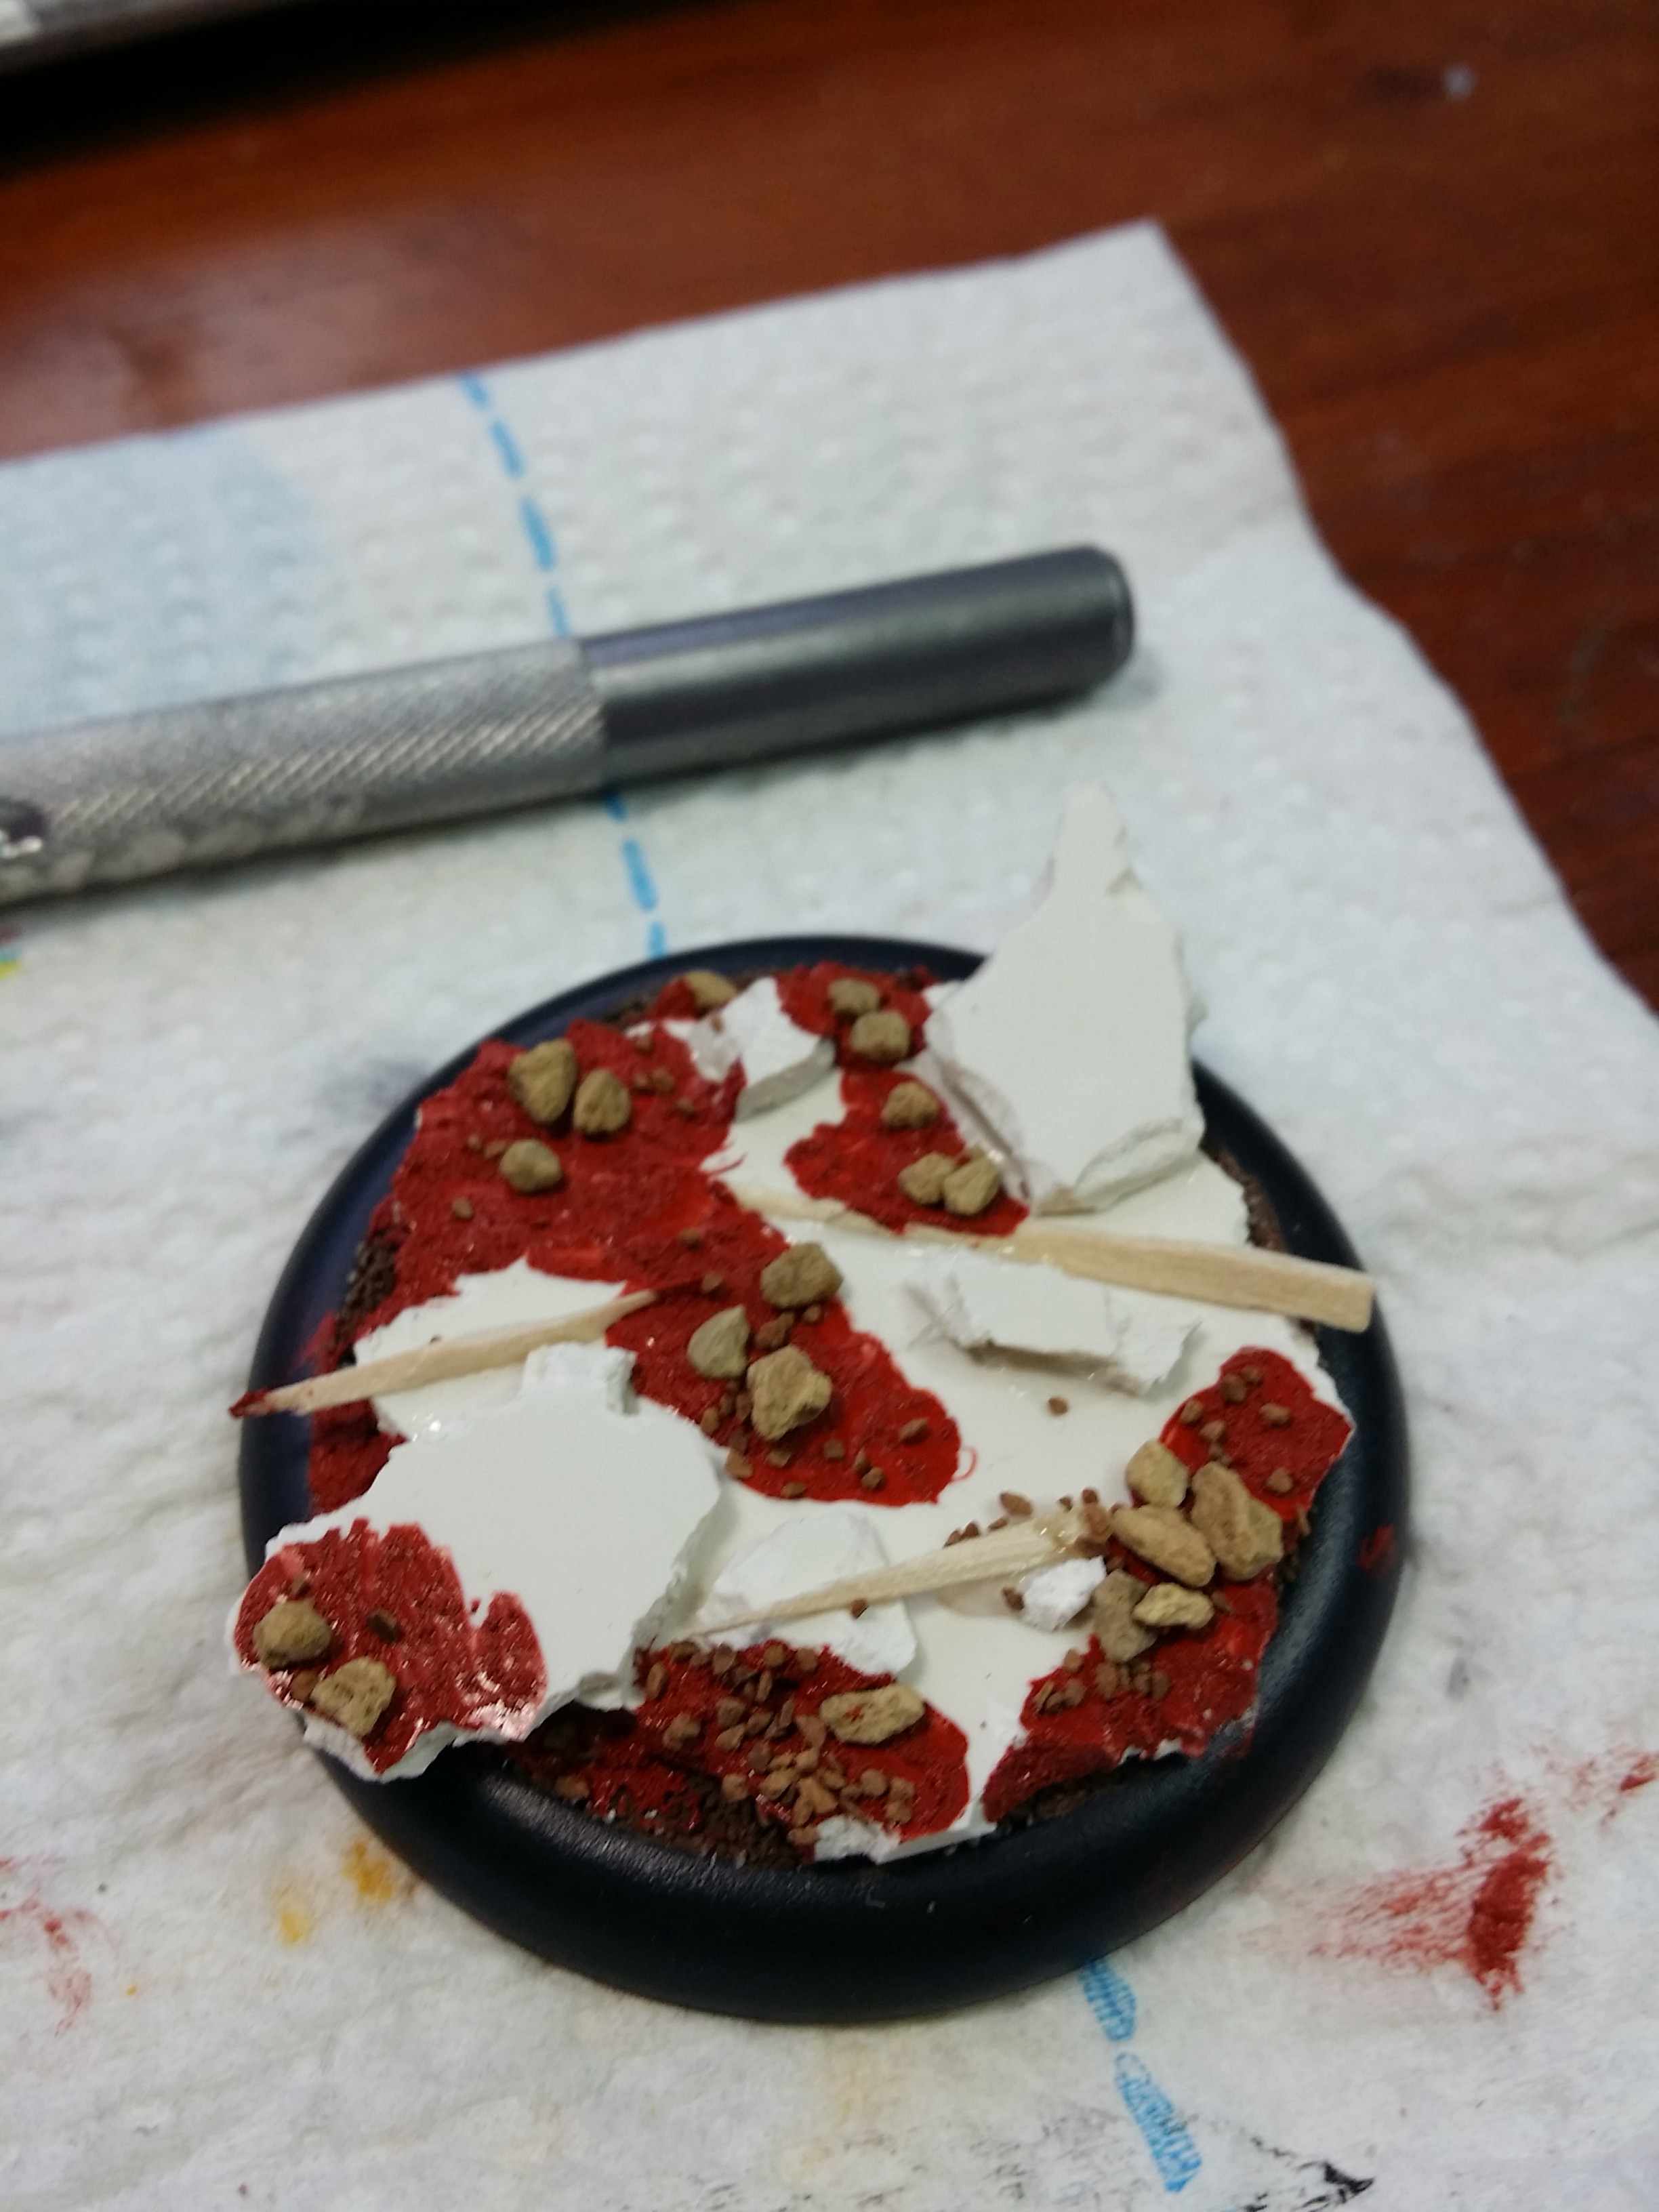
4. Then, I put Vallejo Red Oxide Paste (still love this stuff, although I could do without the red color) in the crevices and around edges. I also put various sizes of Woodland Scenics ballast on areas of the base. Weathered ruins and rocks are certainly accompanied by smaller rocks!

5. Prime the base! I used Vallejo Black Surface Primer.

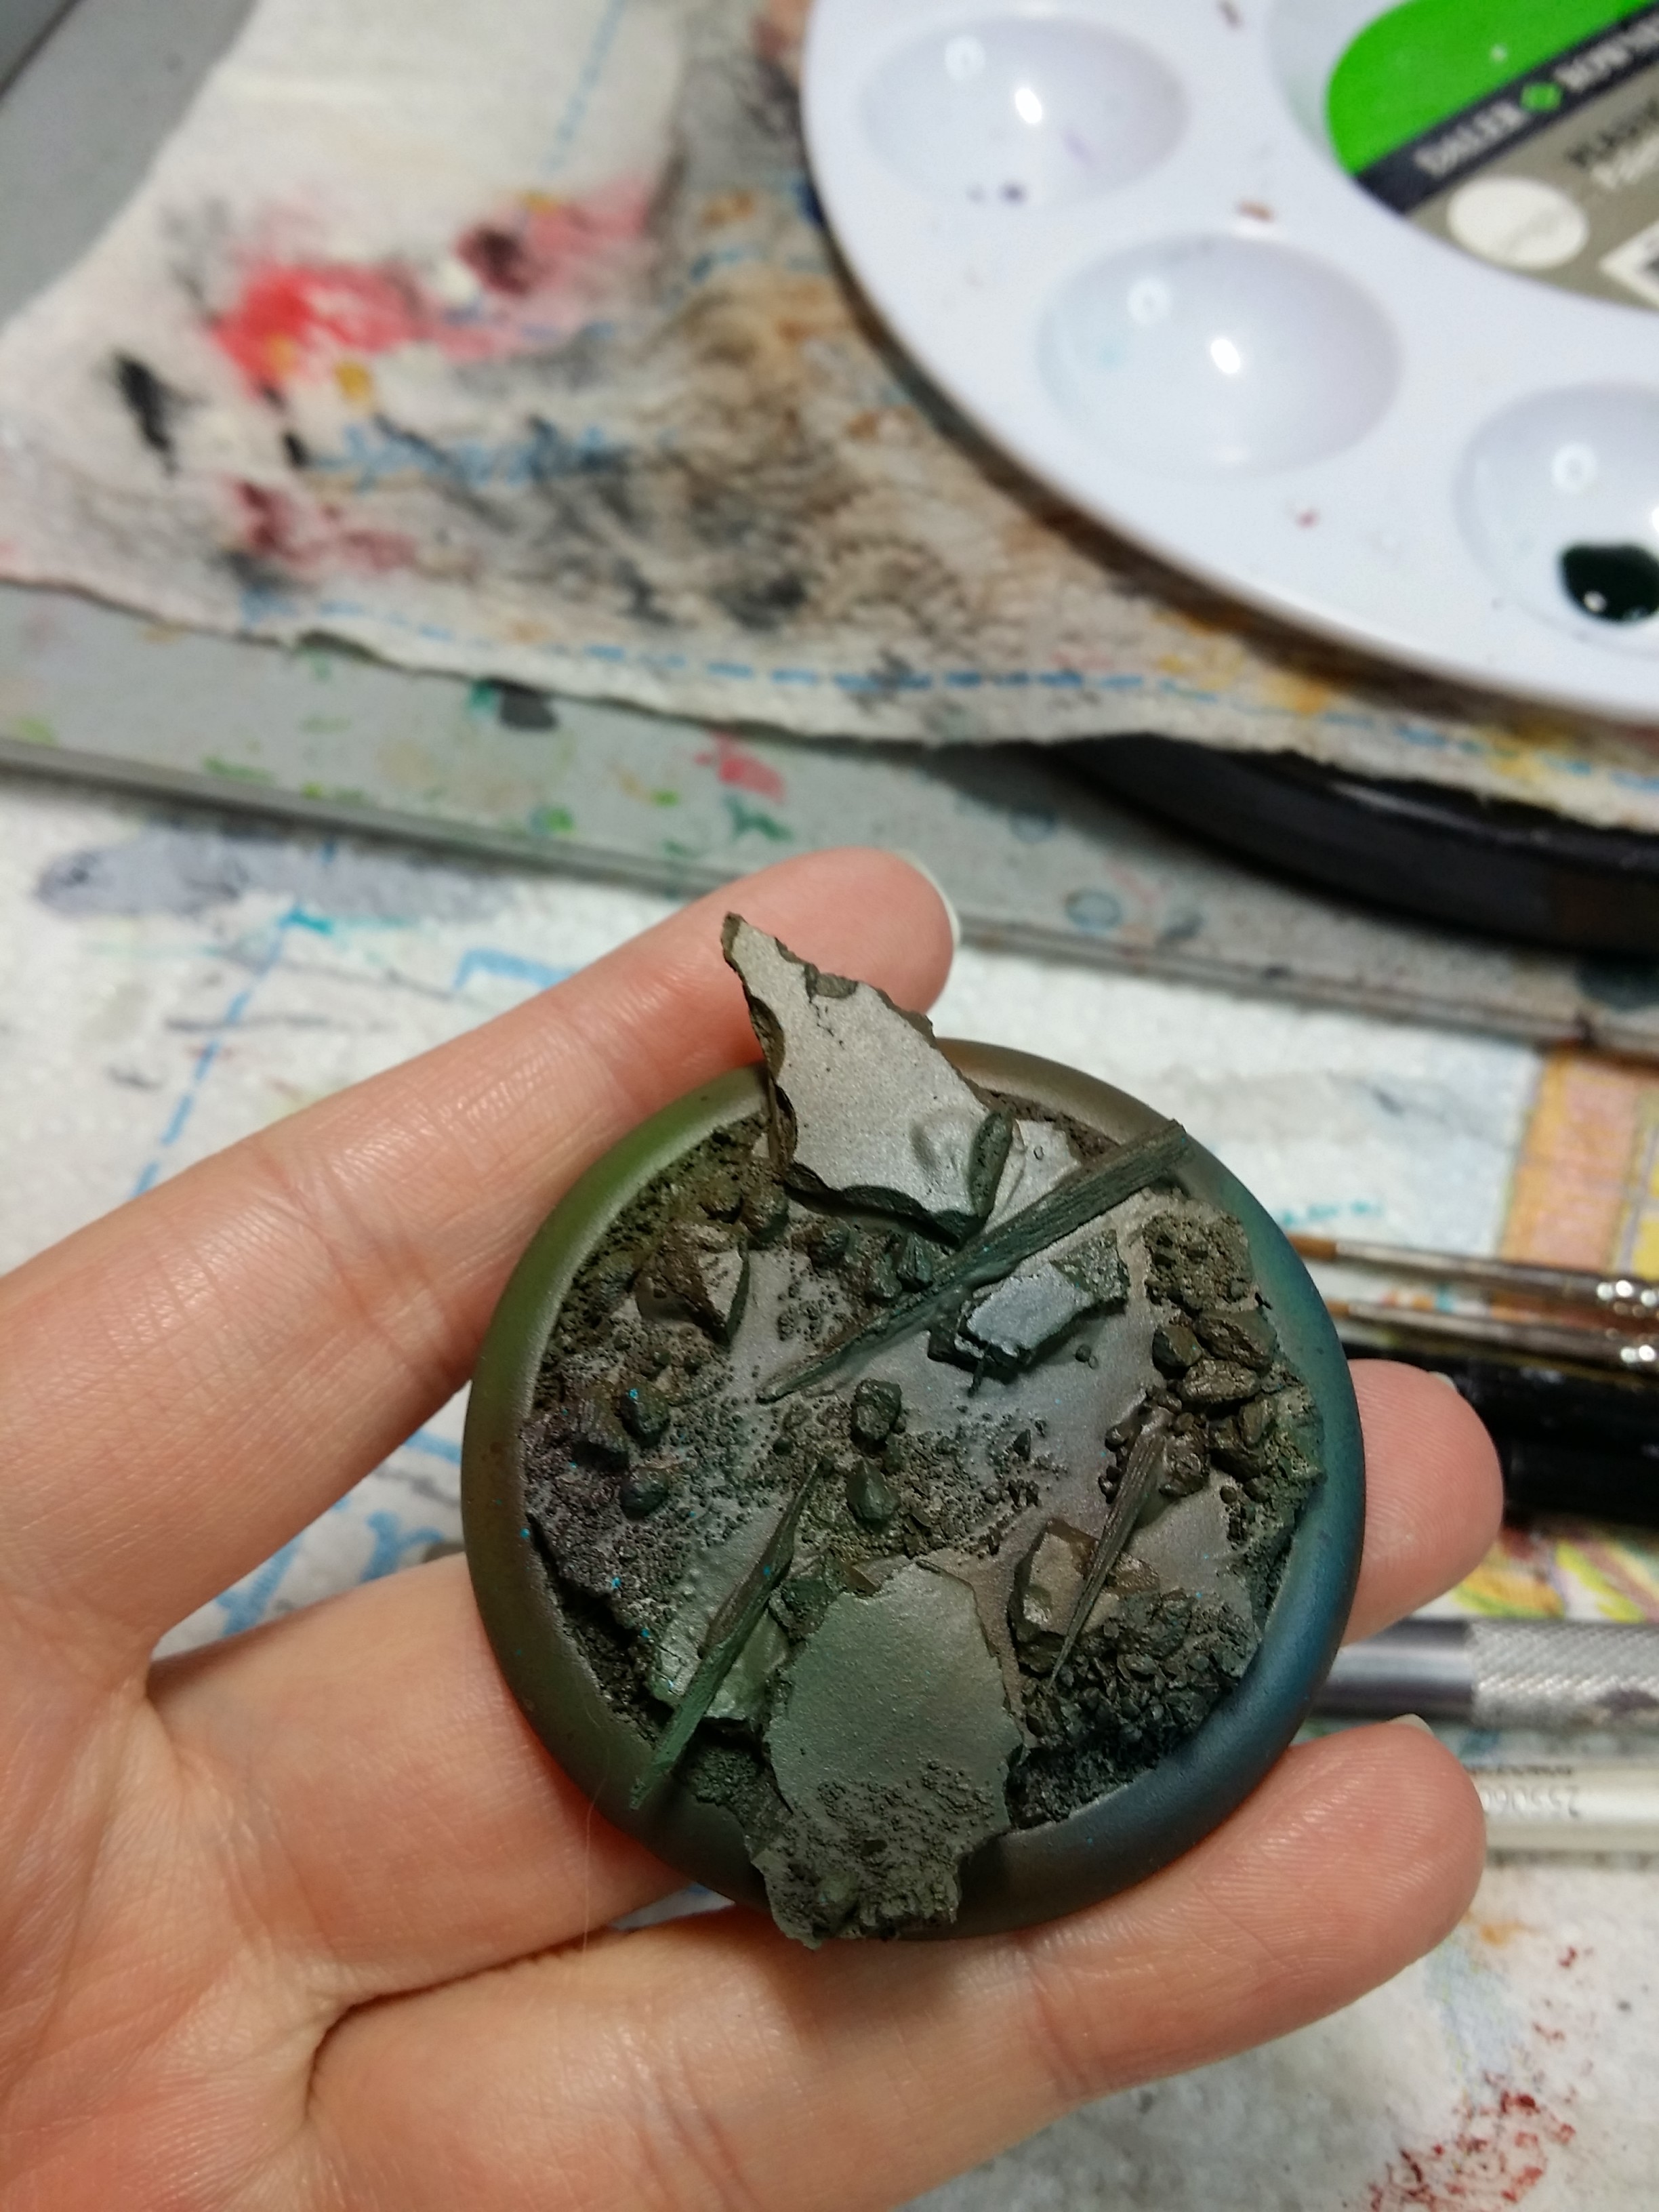
6. Now for the fun part – painting! First, I coated the base in VGC Goblin Green.

7. Next I added some stone colors – RMS Bone Shadow then RMS Cloudy Grey.


8. Next I used RMS Linen White on the ruins.

9. Then I used RMS Golden Shadow for more variation in color.

10. Now it’s time to wash the base. I used several colors – GW Athonian Camoshade, Army Painter Red Tone Ink, Army Painter Blue Tone Ink, Army Painter Green Tone Ink.

11. Next, drybrush the base with the colors used previously, as appropriate.

12. The next step is to put in the flight stand. I started the hole with a pin vice, and then finished it with the craft knife since the pin vice couldn’t make a hole big enough.
13. The last step was to use Vallejo Matte Medium to attach Woodland Scenics flock and Secret Weapon leaves.
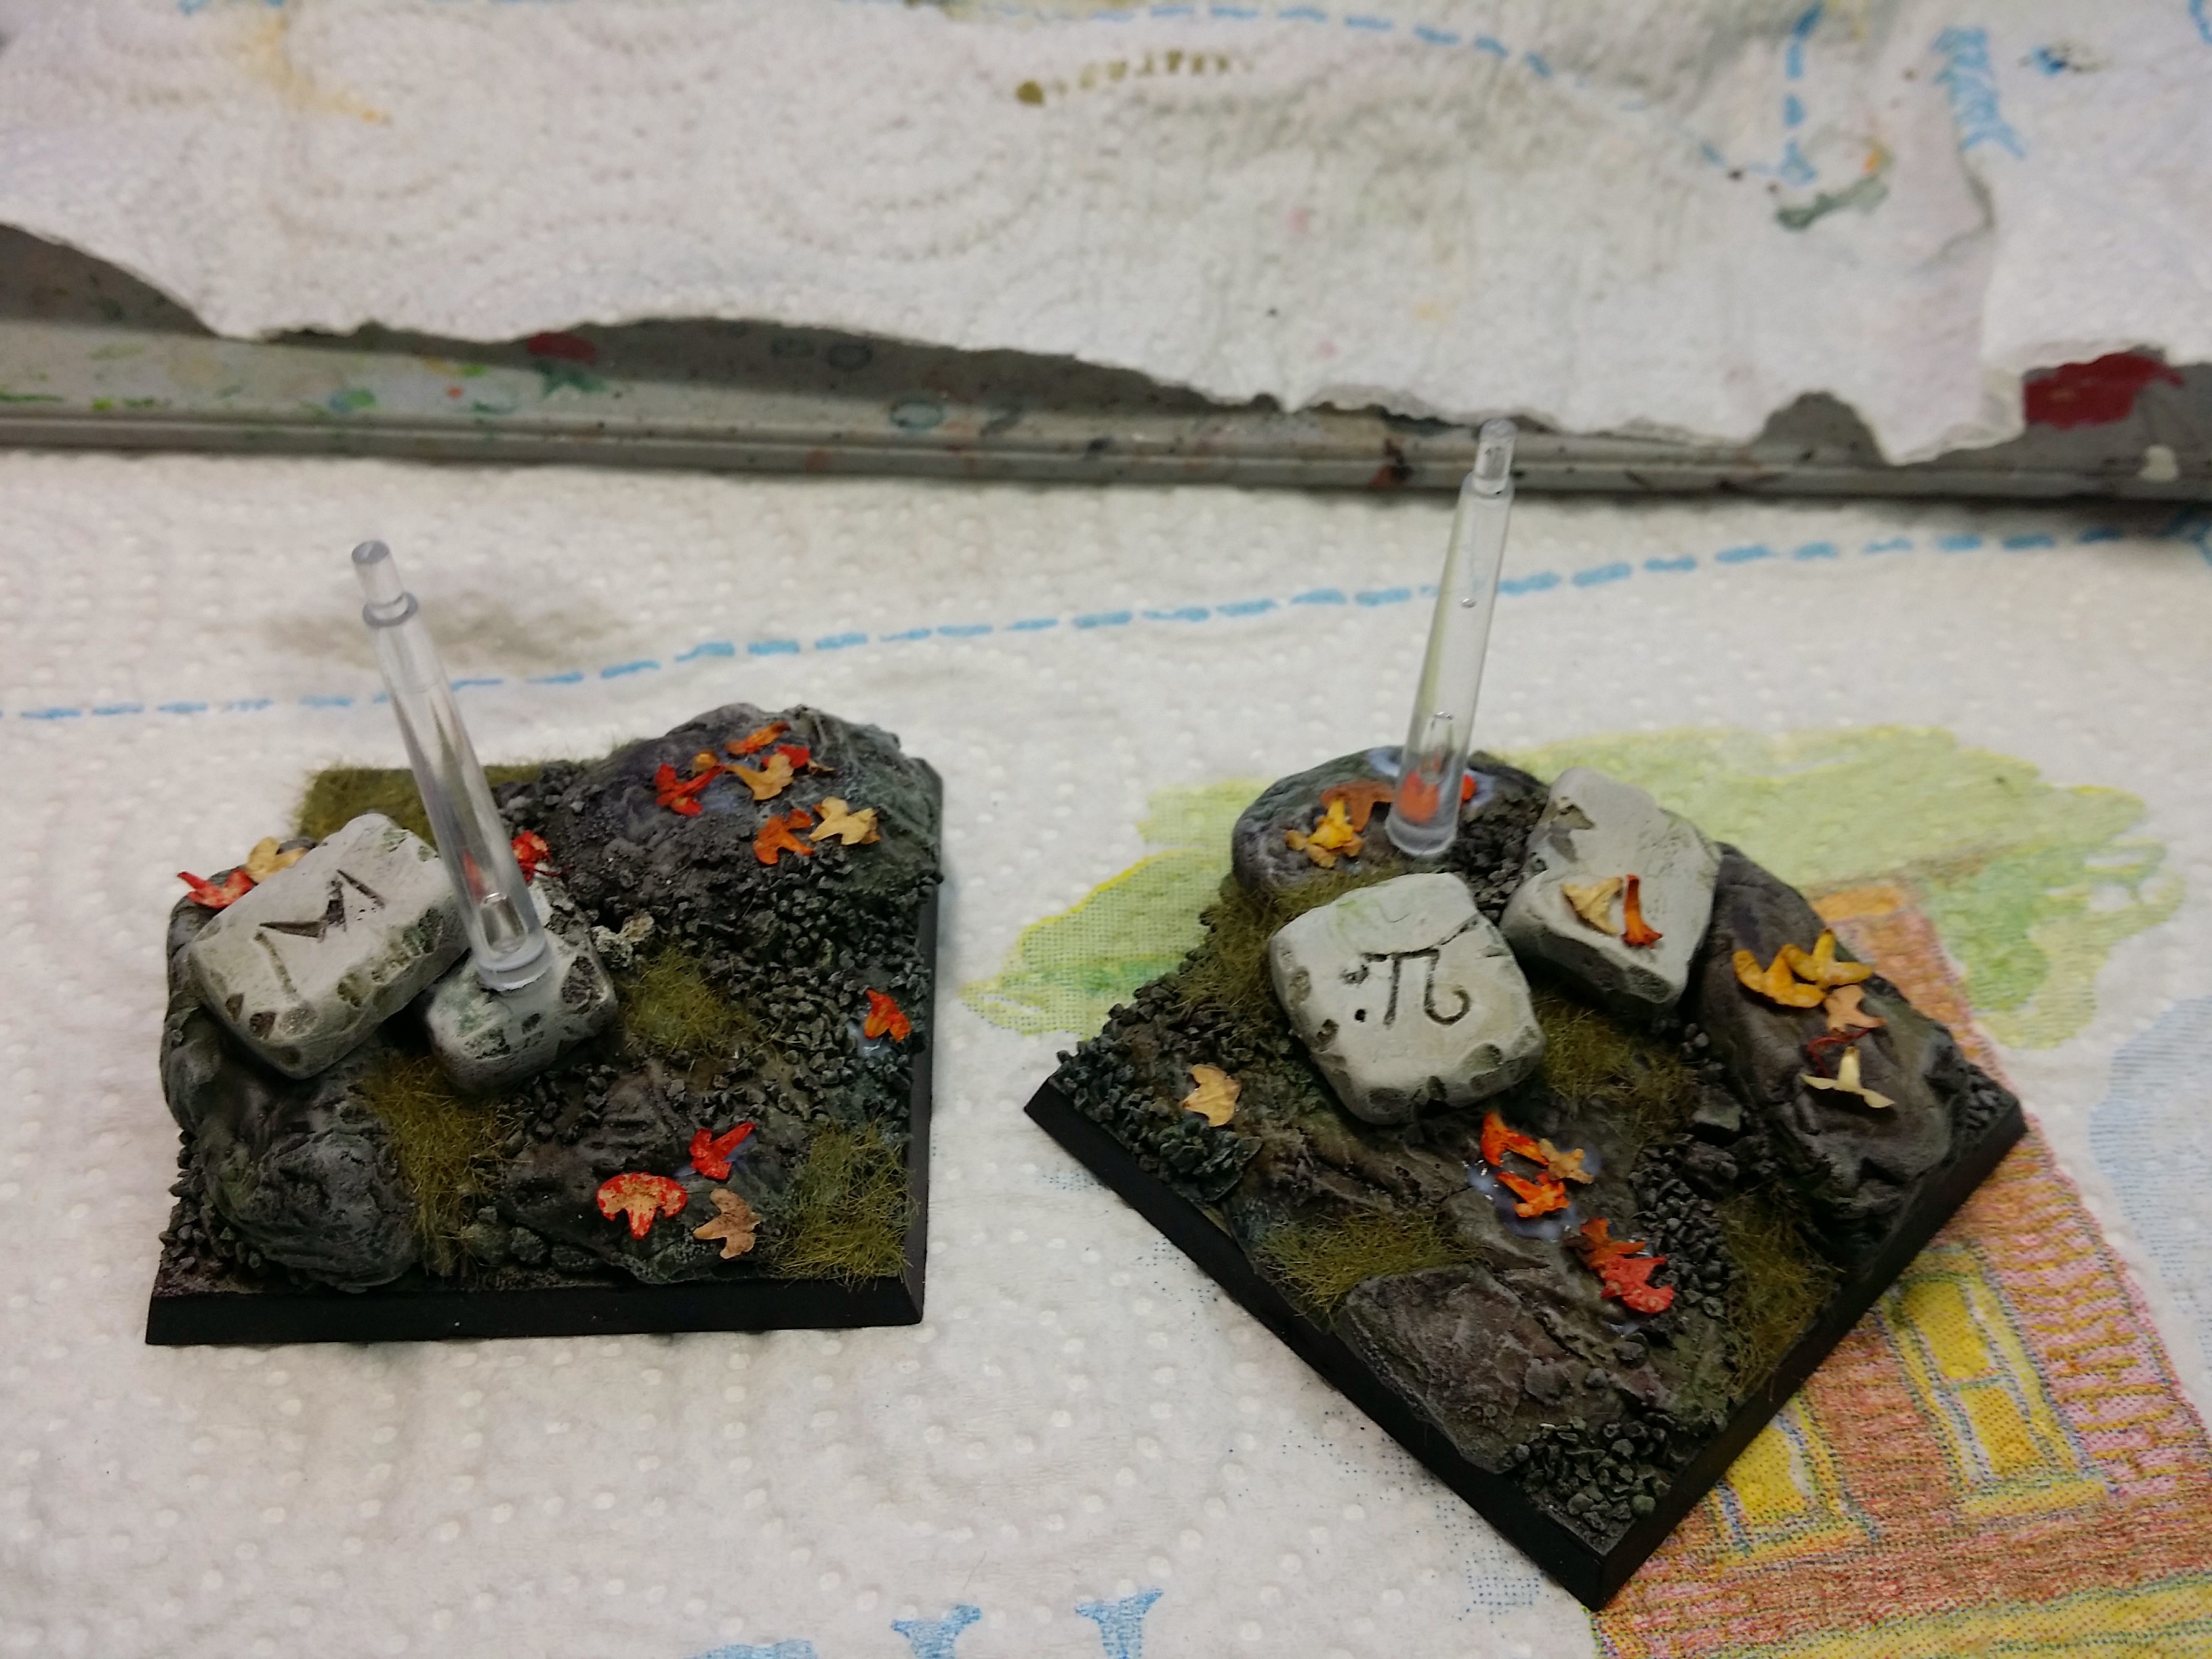
Fin!

Upcoming Projects!!
In the coming weeks I will be painting (and posting about) Reaper Bones Hydras, Reaper Bones Pathfinder Red Dragons, and 3000 points of Warhammer Fantasy Empire (which will be for sale upon completion)!
A growing stack of Empire boxes…!

High Elf Prince on Griffon For Sale!
Here is another High Elf Prince on Griffon that I painted, and it is now for sale!
Standard with Level 3 base. $115


Soon I will get a chance to update my For Sale! page and he will be on it. Also, I will post about how I made his base.
If you are interested in purchasing this model please contact me at MGMPaint@Gmail.com or fill out the contact form below!
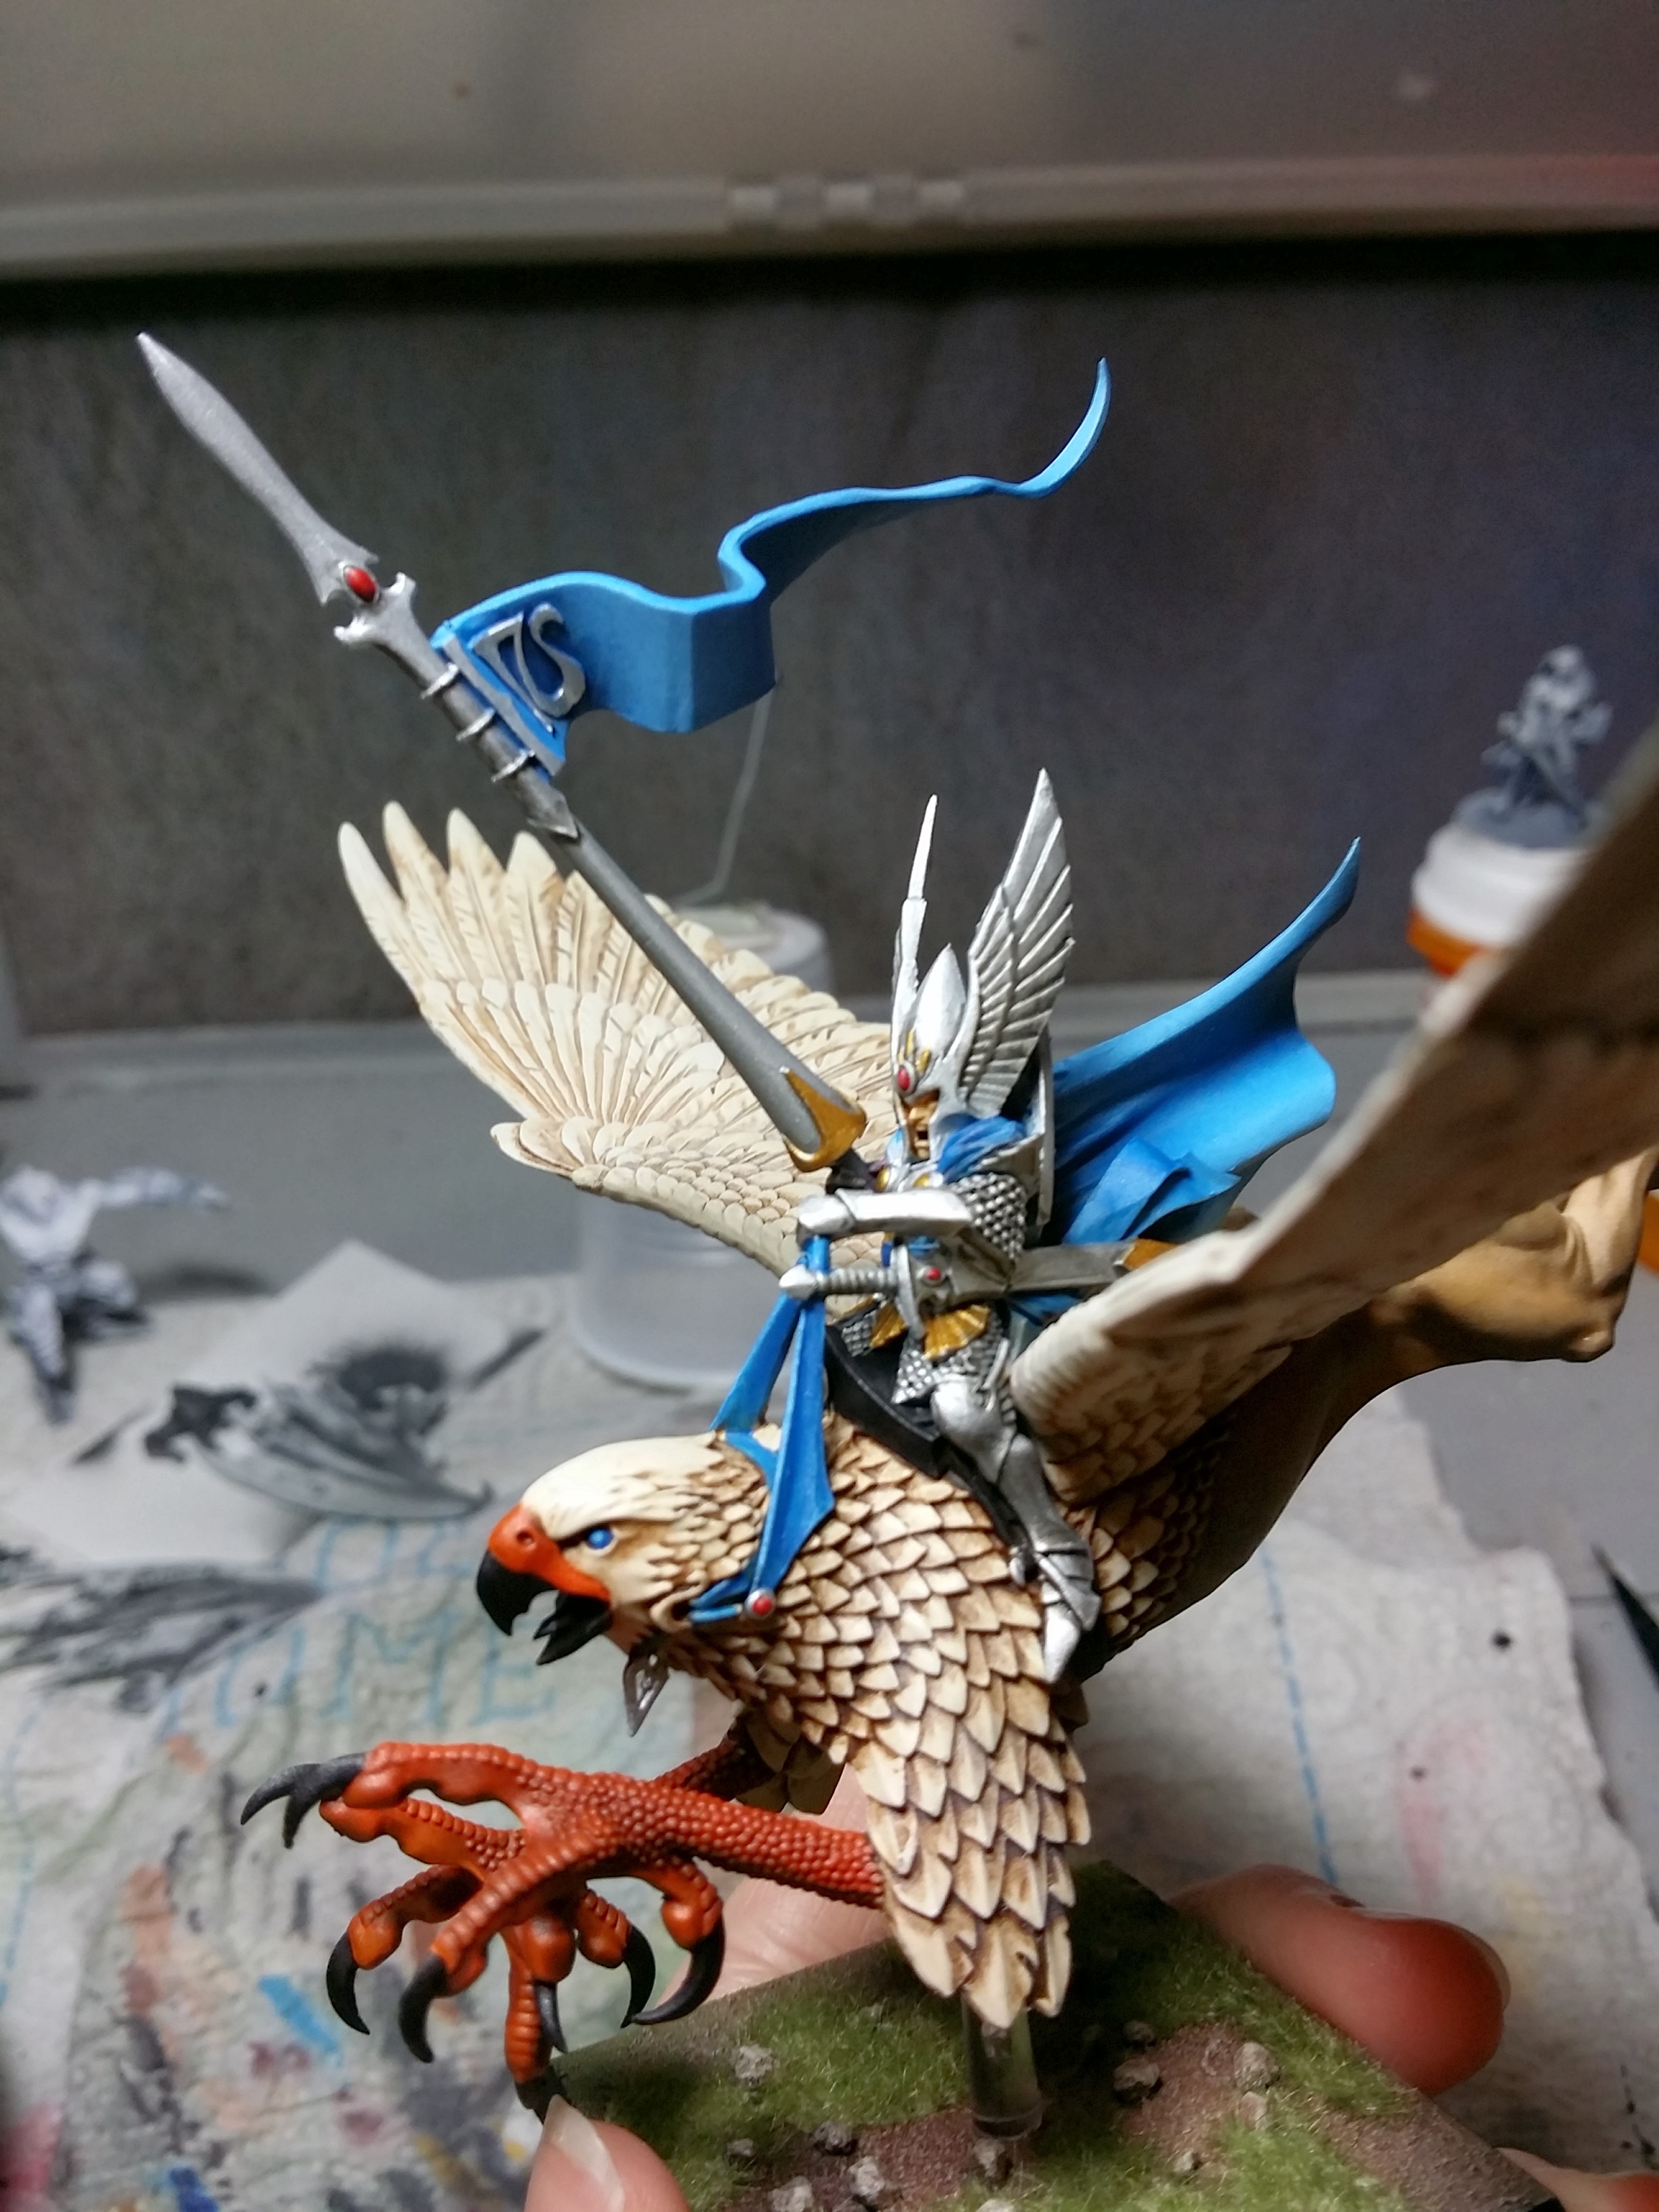
Quick Tabletop High Elf Prince on Griffon
This is just a quick-and-dirty (but not actually dirty!) how-to for a tabletop level High Elf Prince on Griffon from the Island of Blood boxed set.
First, clean the mould lines, assemble, fill gaps, etc. as desired. Next, prime with zenithal lighting. This will give you basic, strong lights and darks to start with.

Next it’s a good idea to get the base started so it can dry while you paint the griffon. I used Vallejo Red Oxide Paste and added a little large-ish ballast while the paste was still wet (it’s an excellent glue). You could just as easily coat the base with PVA glue and apply sand.

Now you need to select a light, medium, and dark shade for the flank of the griffon. I used RMS Golden Highlight, RMS Golden Shadow, and RMS Olive Skin Shadow. For the quickest work, use an airbrush to apply the paints. If you don’t have one, then a large brush will go a long ways to speeding things along. As long as you maintain your brush tips, even very large brushes can paint very tiny details. Details as small as eyes can be painted with the tip of a size 3 W&N Series 7, so the flank of a High Elf griffon should be no problem. Also, paint the base coat on the feathers. I used RMS Creamy Ivory.

The next step is to wash the feathers on the wings. You could also wash the feathers on the body at this point, although I didn’t do that until later in the process when I painted this model. I used a watercolor wash, but you could use a premade wash, watered down acrylic paint, or an oil wash. All will have results that are a little different, but all should still turn out fine. If you plan to use an oil wash, make sure to remember to satin varnish before you apply it so you can effectively clean it up after.
Here’s my watercolor wash before clean-up:

After I cleaned up the watercolor wash, it was time to drybrush the wings. I used RMS Linen White, which is a little lighter than the original base of Creamy Ivory, but not a stark white.

At this point, check your base. If it’s dry, then it’s time to start applying paint to it. I airbrushed it, but if you don’t have that option then make sure to use a large brush. Make sure to switch away from your really nice brushes so the rough texture of the base doesn’t tear up the bristles! I covered my base in VMA Black, then RMS Olive Skin Shadow. I also applied a little VGC Goblin Green and RMS Sandy Brown to make it more interesting.
Now it’s time to work on the details of the griffon. First, paint the legs and beak a color of your choice. I used RMS Explosion Orange. After, wash the legs and beak. I used Army Painter Strong Tone Ink. I really like the Army Painter inks for making quick, neat work of things like this. I feel like they apply a lot easier than GW washes, and they stay where you put them.

After, I applied VMA Black to the tip of the beak and the talons.

At this point I washed the rest of the feathers, but it would have been fine to do that earlier as well.

Drybrush the body feathers the same as the wing feathers, and now it’s time to get to the tiny High Elf Prince. If you’re airbrushing, mask off the top of the griffon under the cloak. I used a couple small strips of blue painter’s tape. Because of the zenithal priming, a shadow color really isn’t necessary on the cloak and banner, so pick a mid-tone and a highlight. I used RMS Sapphire Blue and RMS Sky Blue. Apply these colors to the cloak, banner, reigns, griffon’s eyes, and the rest of the cloth on the prince. I washed the tiny bits of cloth on his body with Army Painter Blue Tone Ink before highlighting for a little extra contrast.
Next, apply a skin color to the prince’s face and wash. I used VGC Elf Skin and Army Painter Strong Tone Ink. After that, apply a silver to the armor and lance. I used VMA Aluminum.
When that paint has dried, wash the armor. I used a thinned VMA Black as a wash.
While that dries, drybrush your base. I used RMS Terran Khaki.
When your wash has dried, clean up the silver metal where necessary. Then apply gold where you choose. Also, paint in the gems on the elf and any other tiny details that are left.
Apply flock to the base, attach the model, and you are done!


Picture of him will go up in the gallery soon!
Rocky base for Feral Warpwolf
I had a Feral Warpwolf sitting on my shelf that was just waiting for a base, and he had been waiting for that base for going on a year…no idea how that happened! So I decided to just go ahead and get that taken care of. I had some spare sculpey bits and some wooden craft sticks sitting around, as well as some leaves for basing that I really love.
First, I tore the edges of the sculpey and stacked a few bits together. I also broke off bits of some craft sticks. I then assembled all of this with some super glue. PVA would probably be fine as well, but I accidentally bought a HUGE bottle of super glue that turned out to be 30 minutes set time (I didn’t read the label thoroughly…), so I use it for basing a lot.
After the glue set, I used Vallejo Red Oxide Paste to fill gaps, smooth transitions, add texture, and glue additional rocks on.
Then I began airbrushing. First was a mix of RMS Woodstain Brown and RMS Golden Shadow. It doesn’t matter too much at this point to be neat.

Then I started adding color, because straight grey or brown is so boring! Also, nothing in nature is truly just one color, a brown rock is more than just brown if you really look at it. I used VGC Goblin Green next.

And RMS Bloodstain Red, then VGC Falcon Turquoise…
After that I washed it with GW Agrax Earthshade to tie it all back together.

Here is the wash dried:

Then I began drybrushing, first with RMS Aged Bone.

Next, I drybrushed several more colors – RMS Rust Brown, VMC Azure, VGC Goblin Green, RMS Golden Shadow.

Then it was time to black out the edges, drill holes for the pins in the Feral Warpwolf’s feet, and attach the model. Once that was done, I put Vallejo Matte Medium on the base wherever I thought it looked like it needed fallen leaves, and then applied Secret Weapon Summer Color Mix fallen leaves to those areas.


Now that it finally has a base, this model will be listed for sale soon!
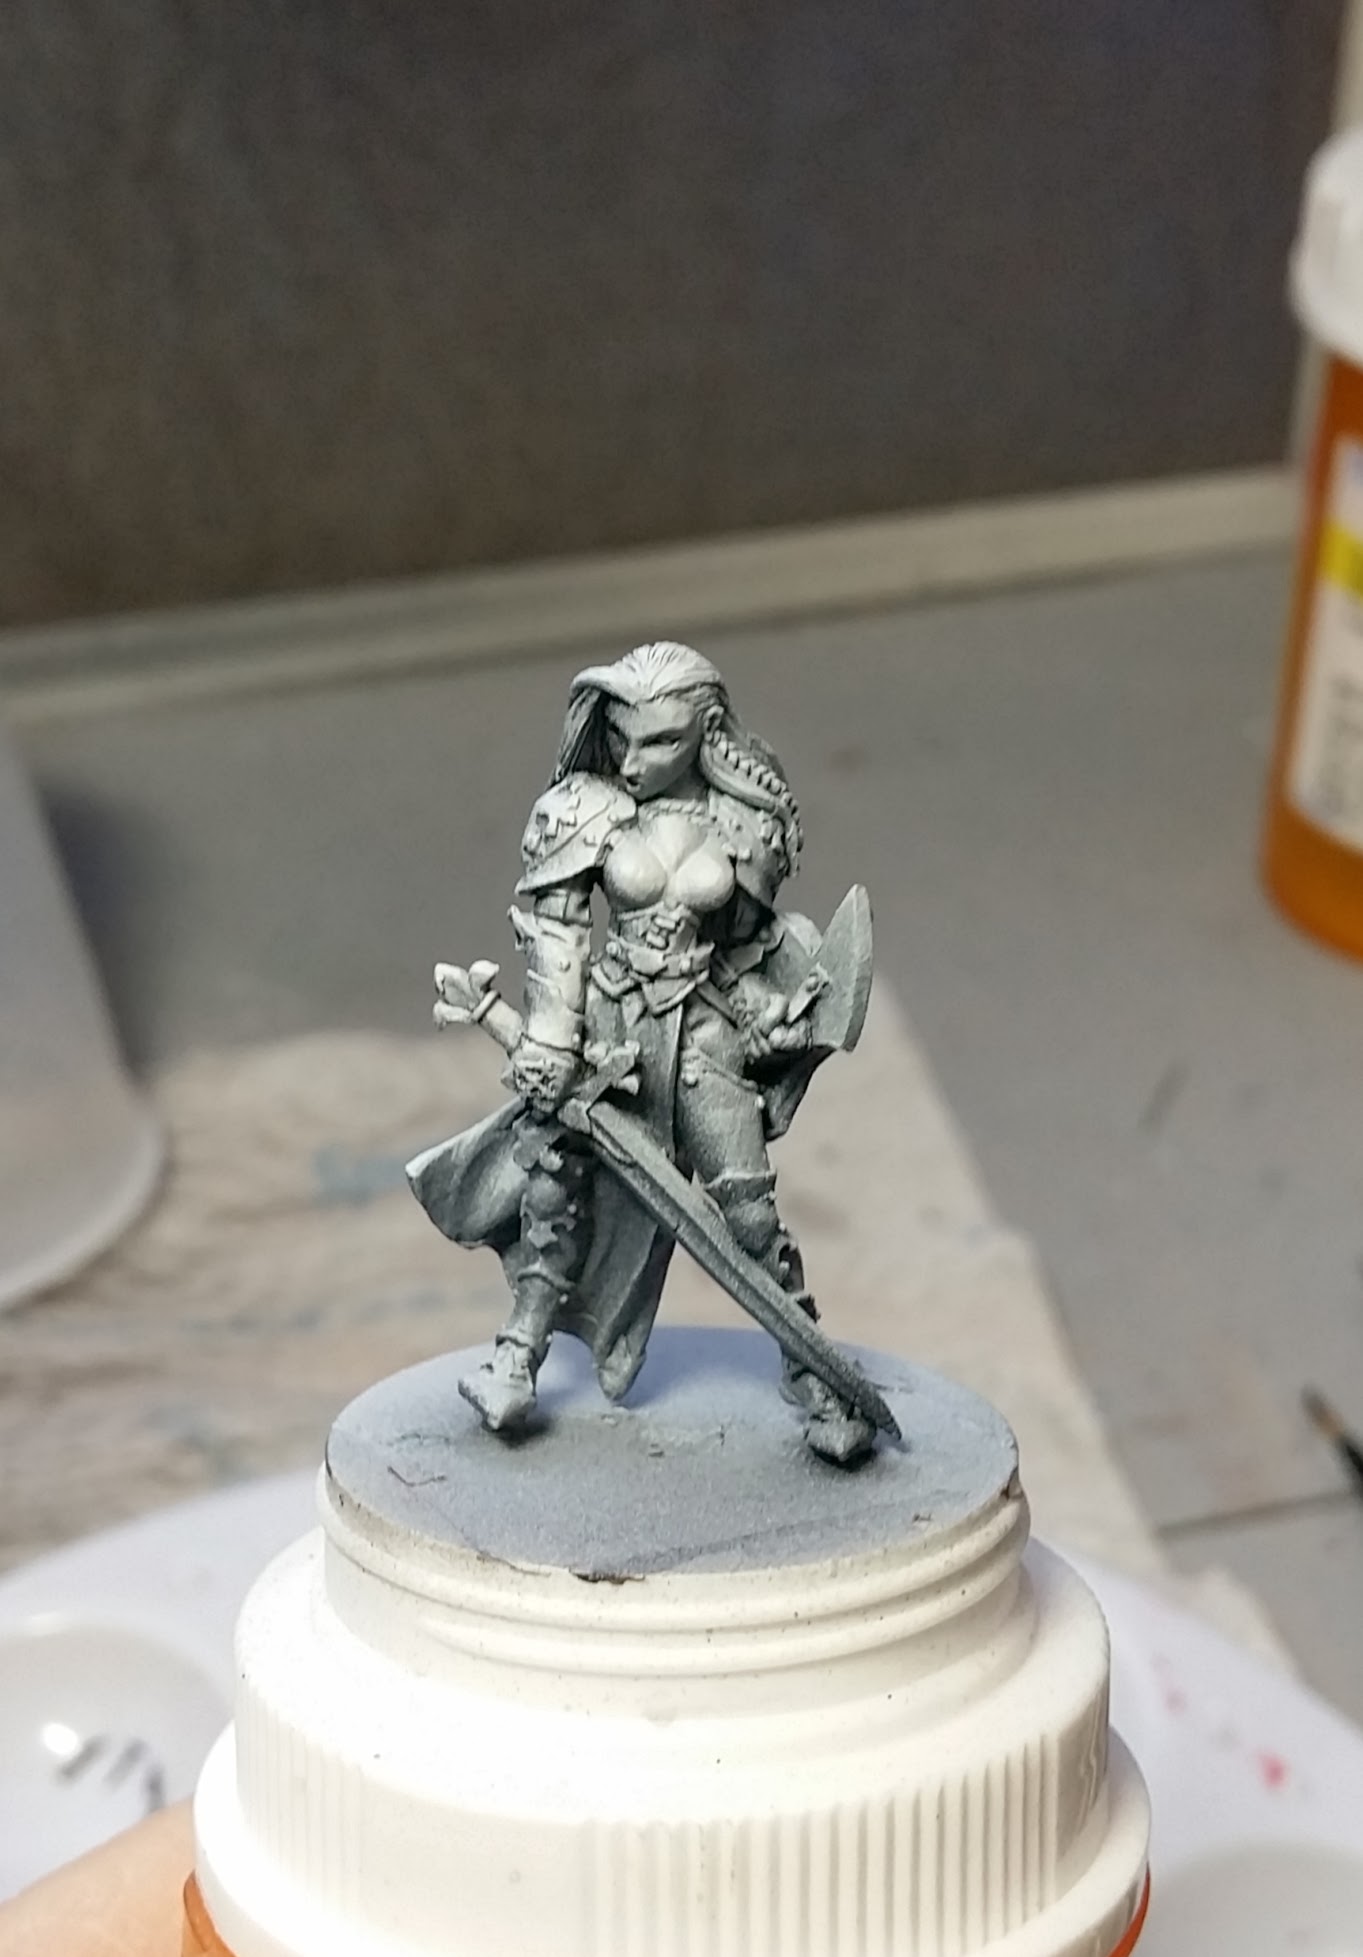
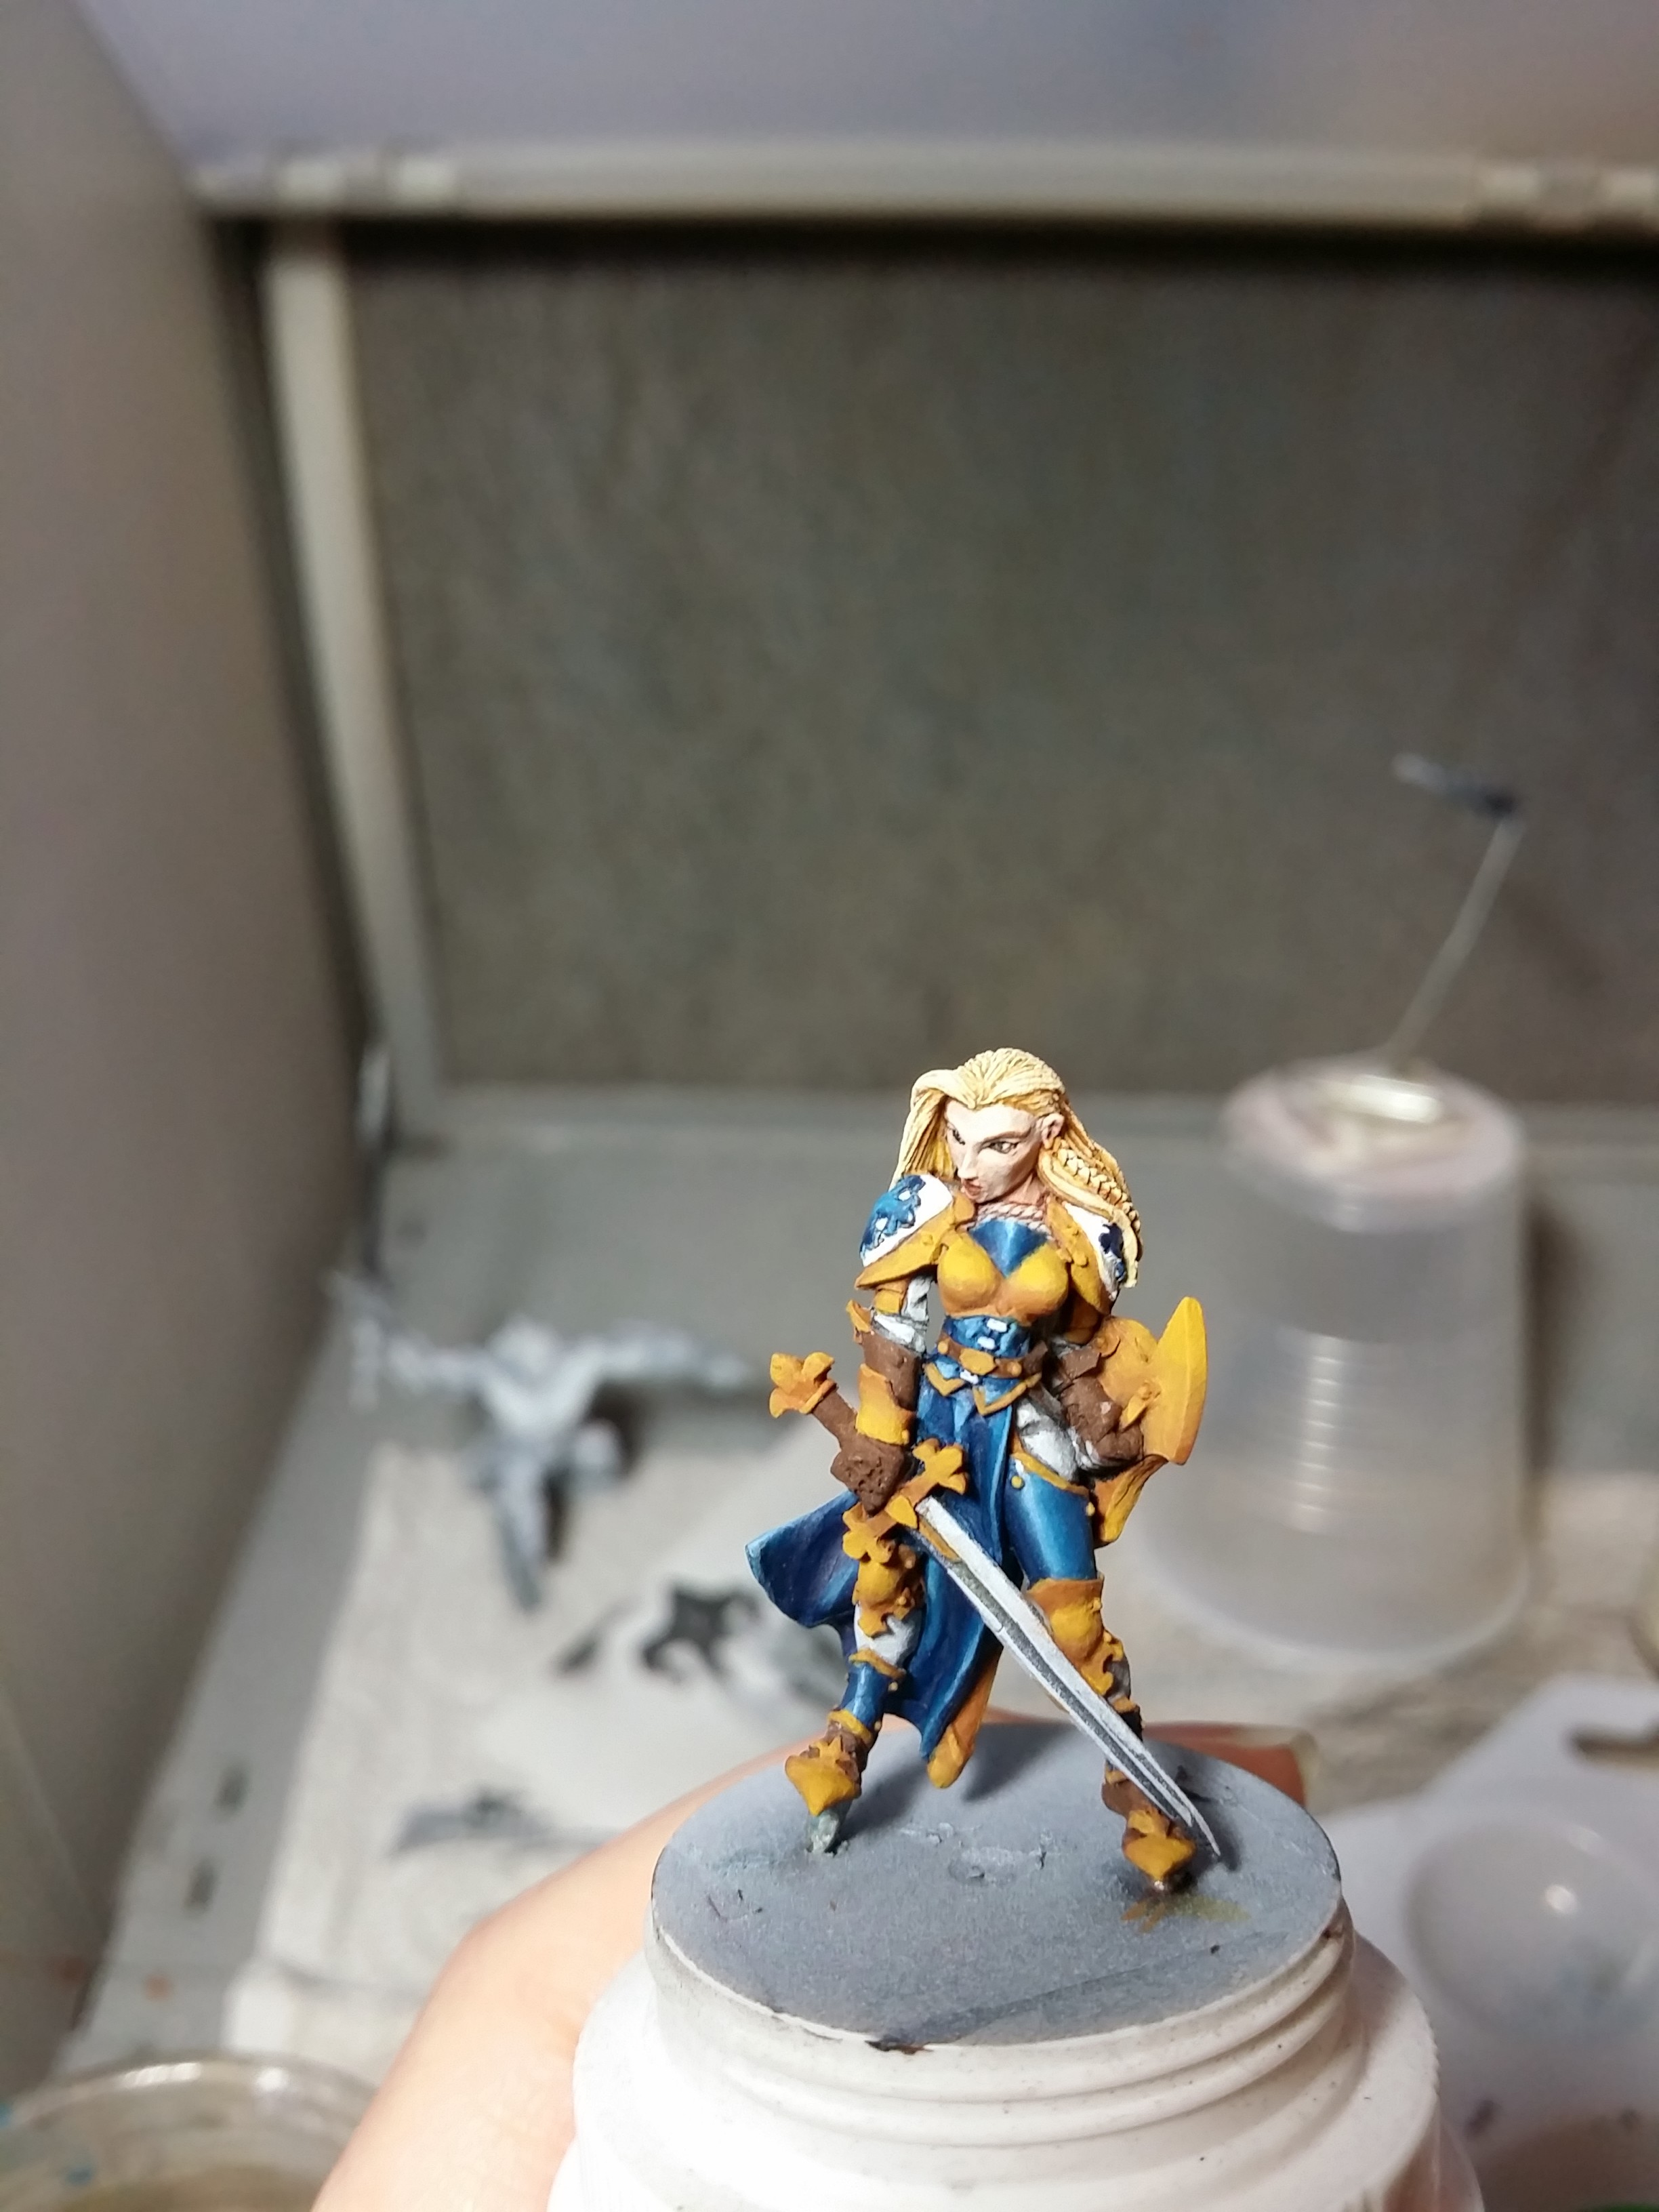
Reaper Finari Female Paladin
Recently, I painted Reaper Finari Female Paladin. This was the metal version of the model. As usual, it was primed with Vallejo Surface Primer. I primed it with zenithal lighting, which is something I’ve been doing a lot more lately, and I find it can be very helpful.
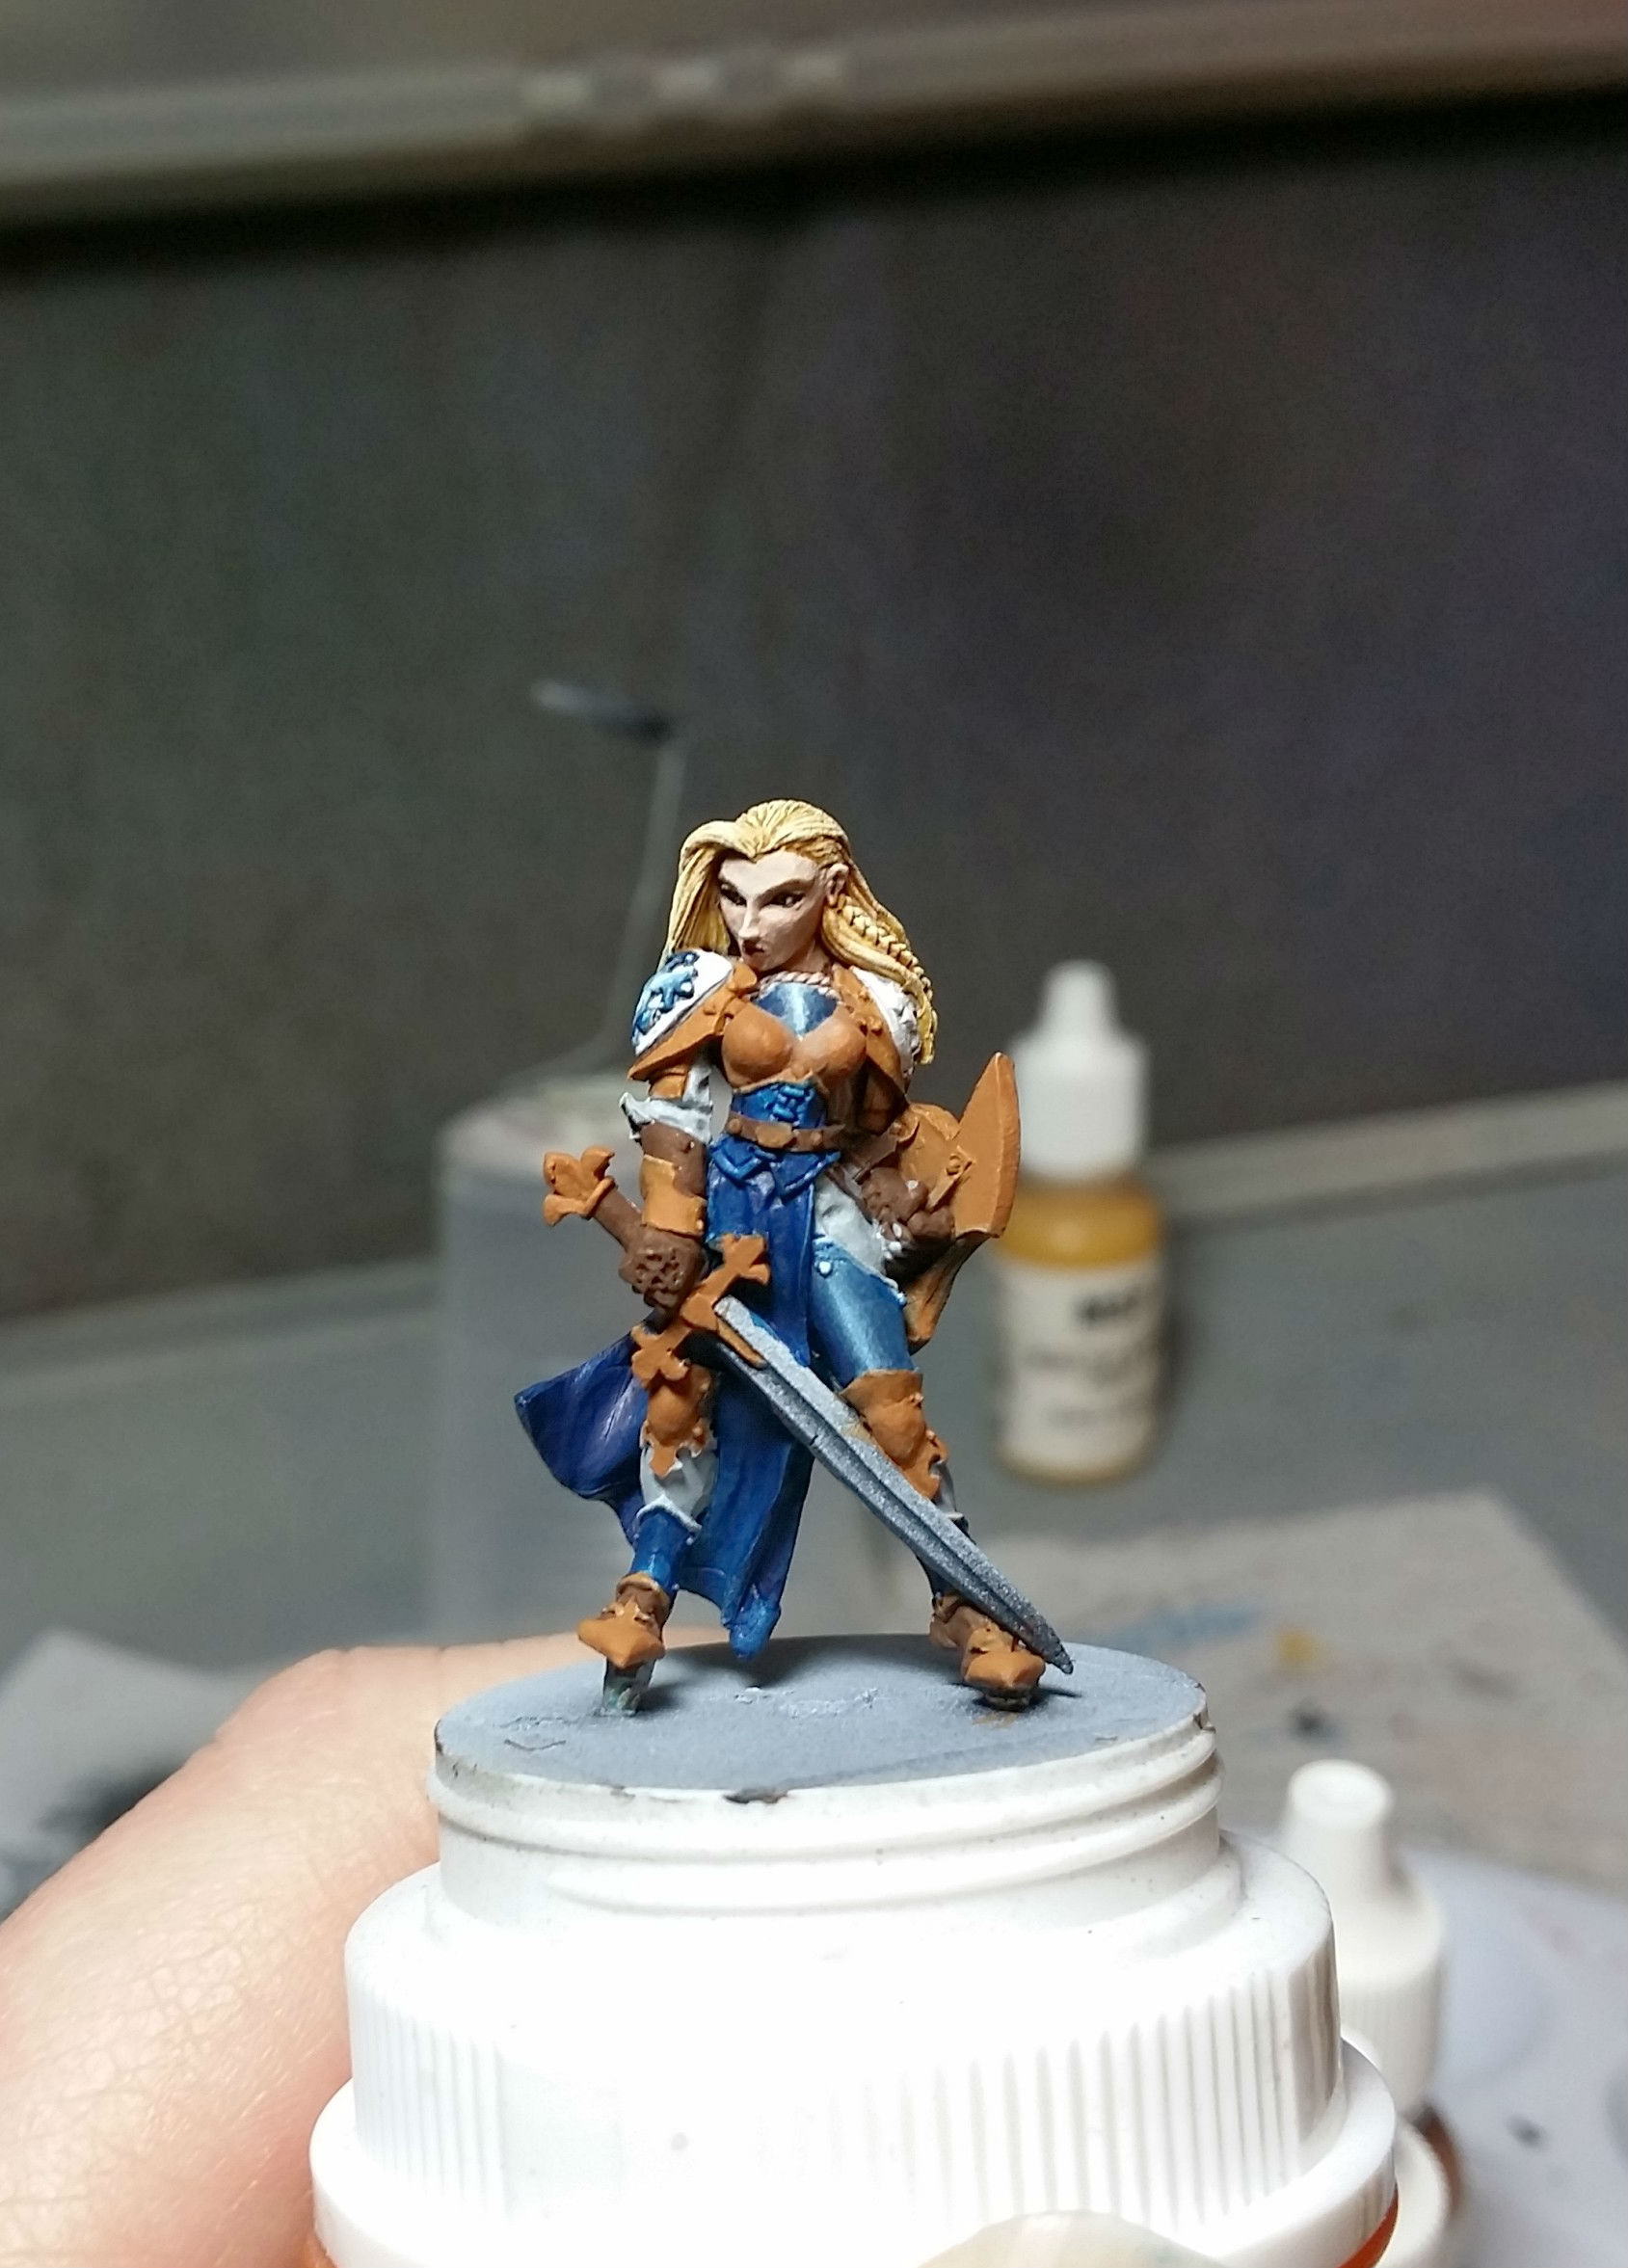
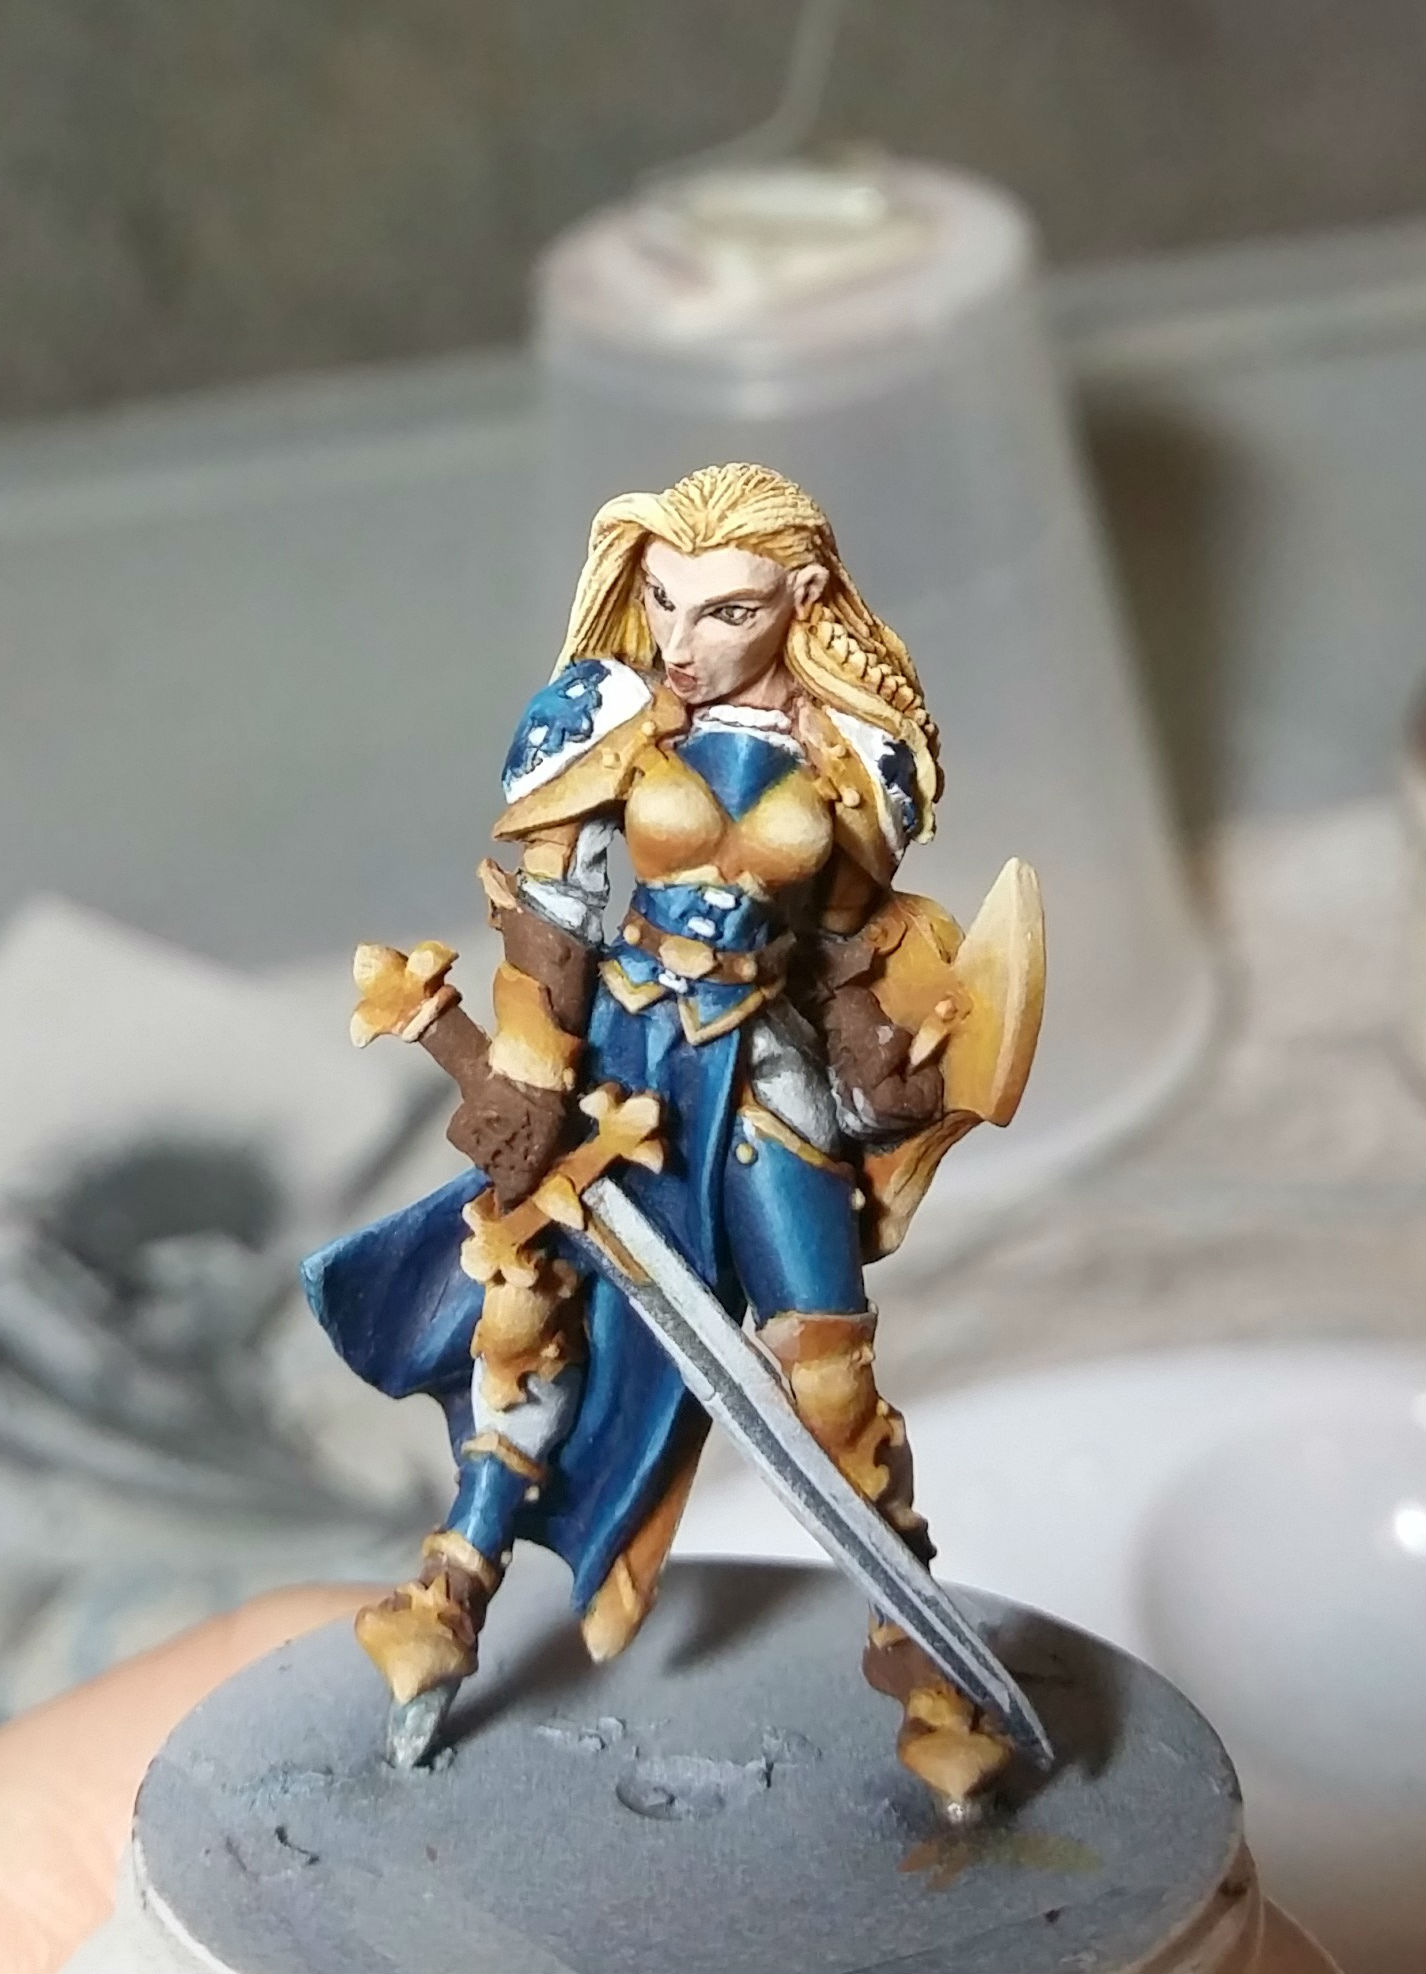
Using RMS Fair Skin and RMS Fair Highlight and RMS Flesh Wash (as a glaze) I painted her face. I also used RMS Golden Blonde on her hair.

After that I washed her hair with GW Seraphim Sepia.


Next, her hair was drybrushed with RMS Golden Blonde, and then drybrushed again with a mix of RMS Golden Blonde and RMS Linen White. I also painted in her eyes.


After, I basecoated the various parts of the model with RMS Oiled Leather, RMS Muddy Brown, or VMC Dark Prussian Blue.

After that I began the blue NMM.
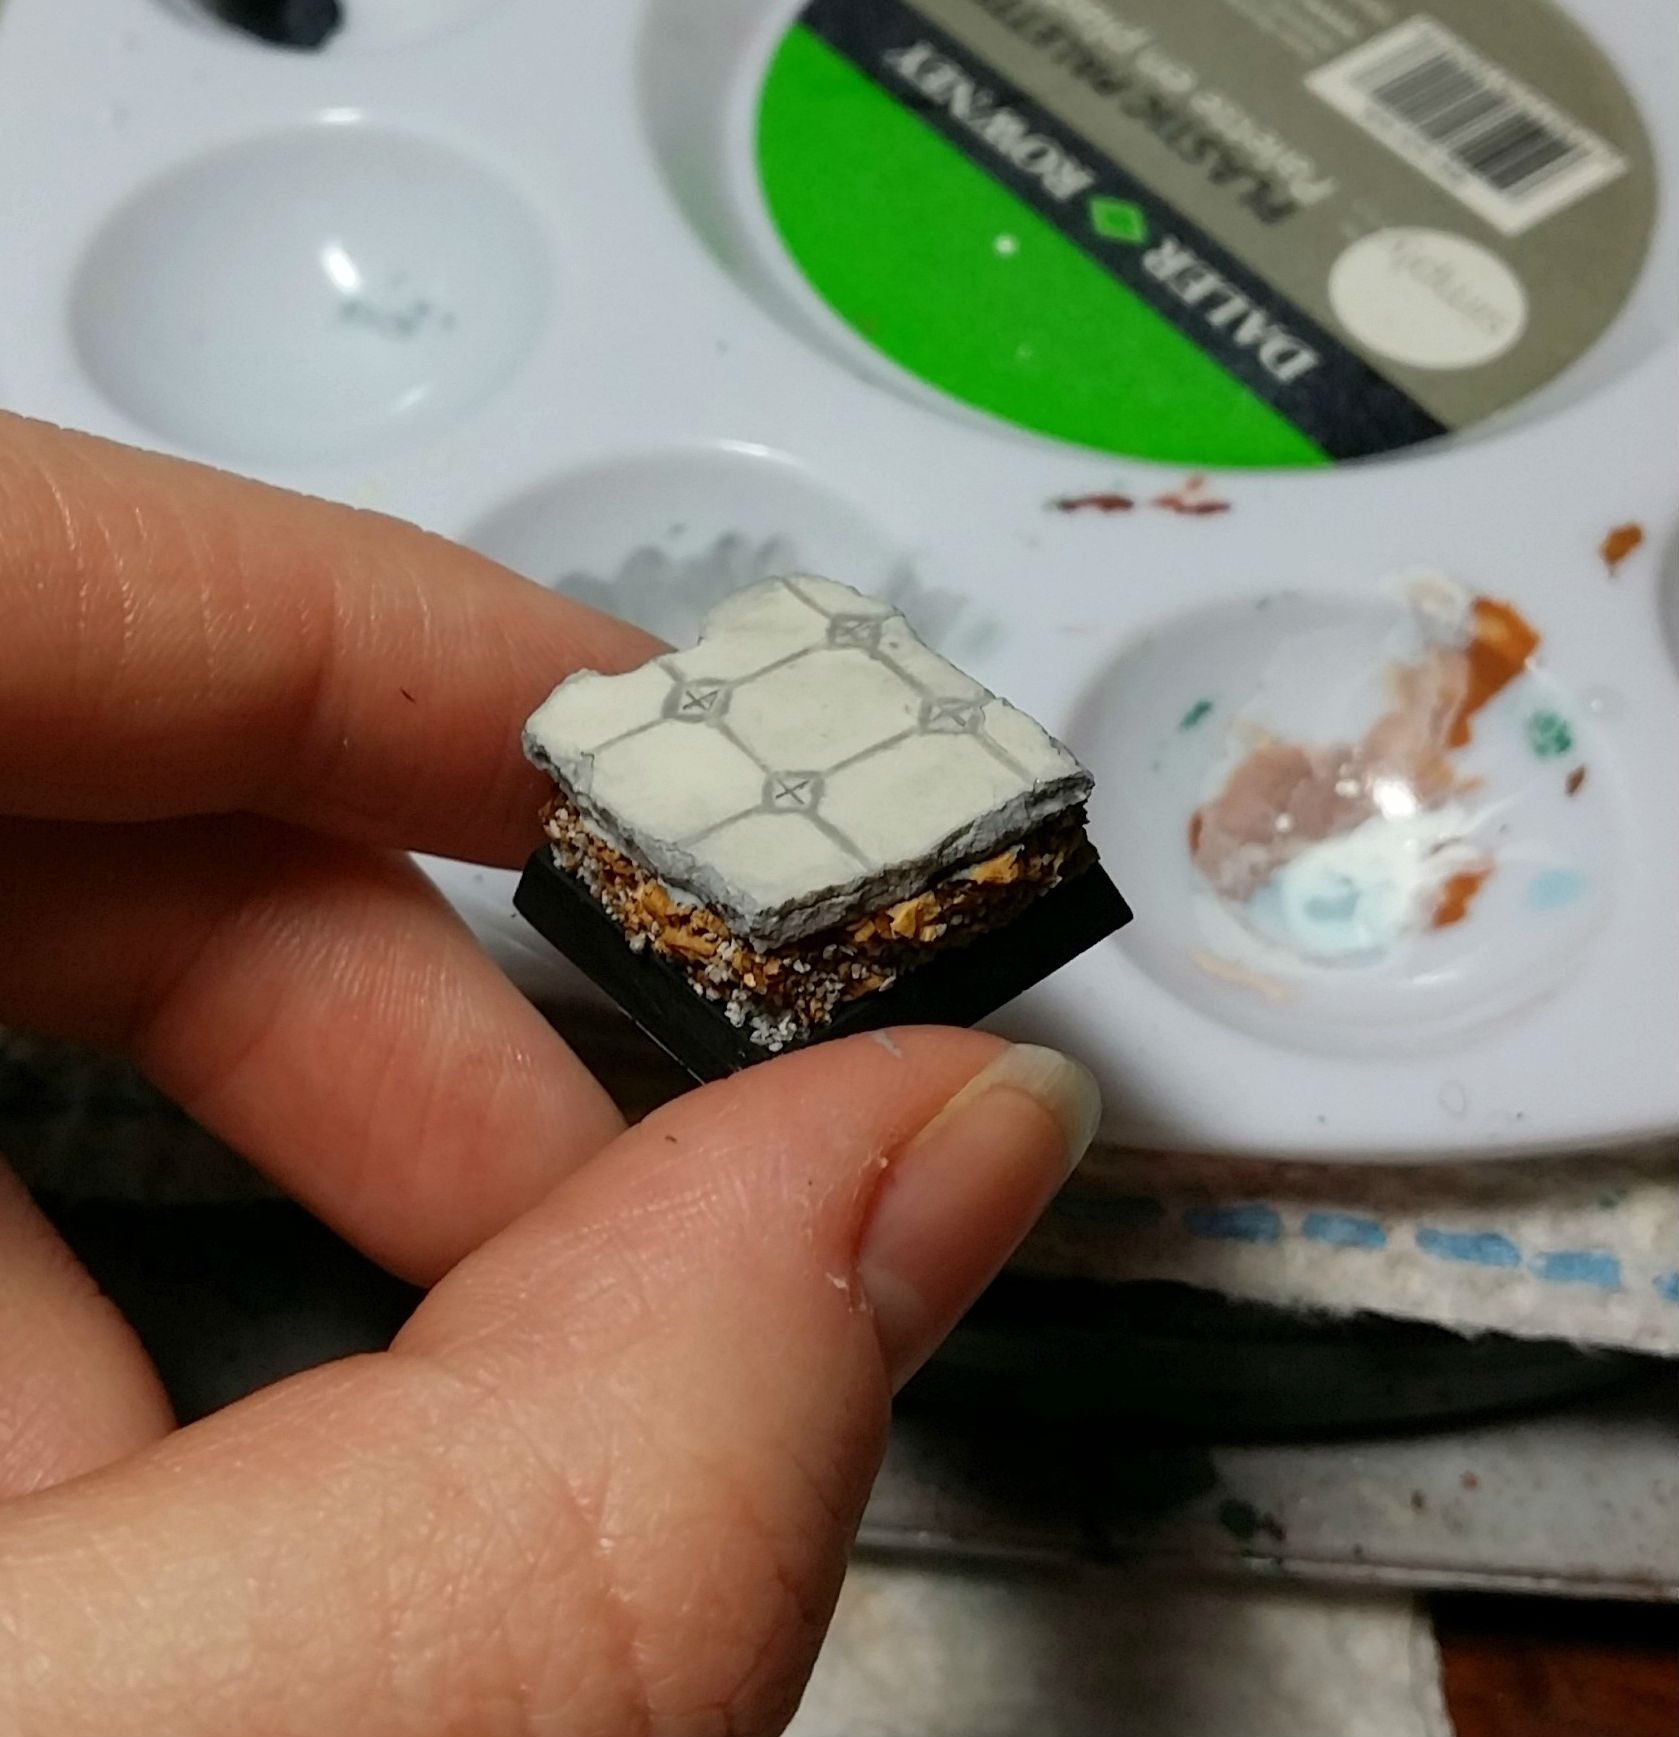
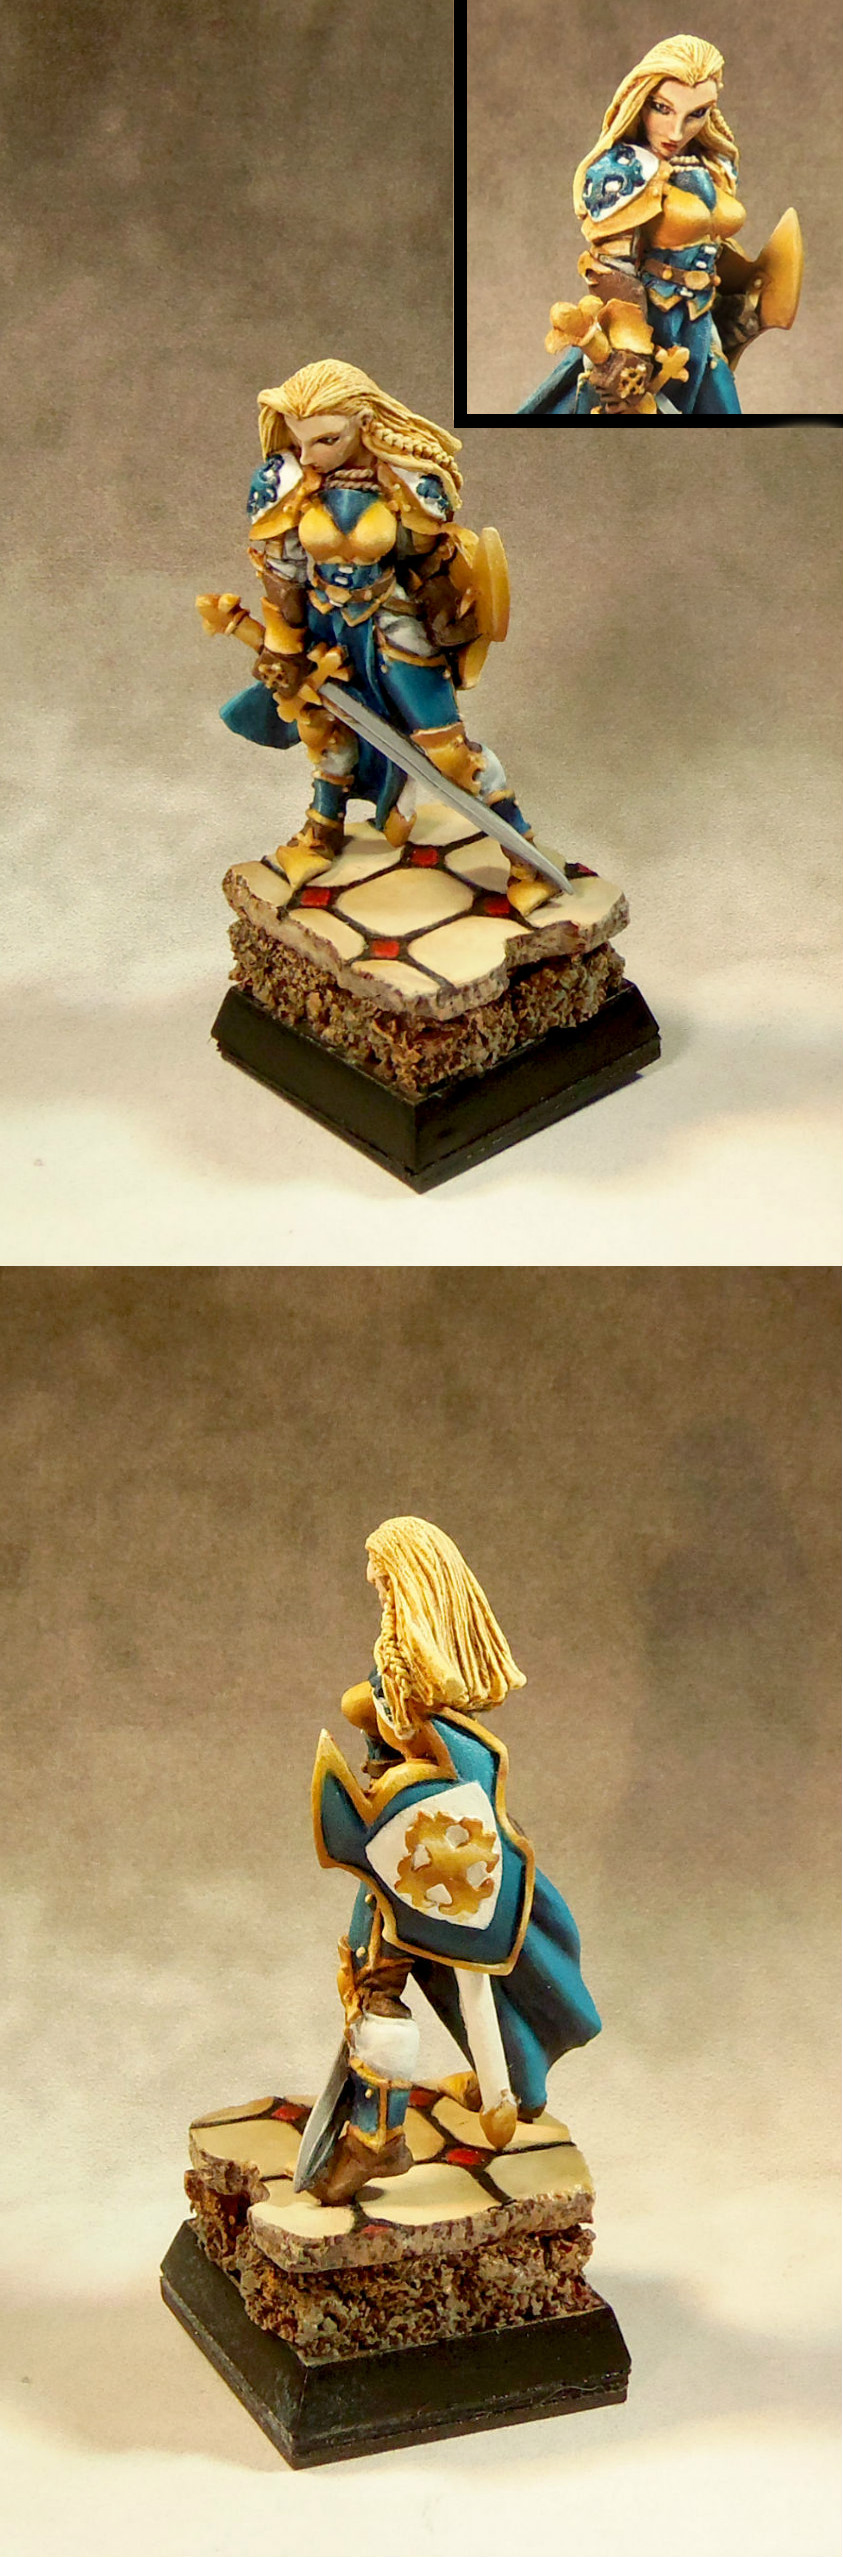
The base is carved sculpey tiles mounted on cork.
First it was basecoated VMA Mahagony.
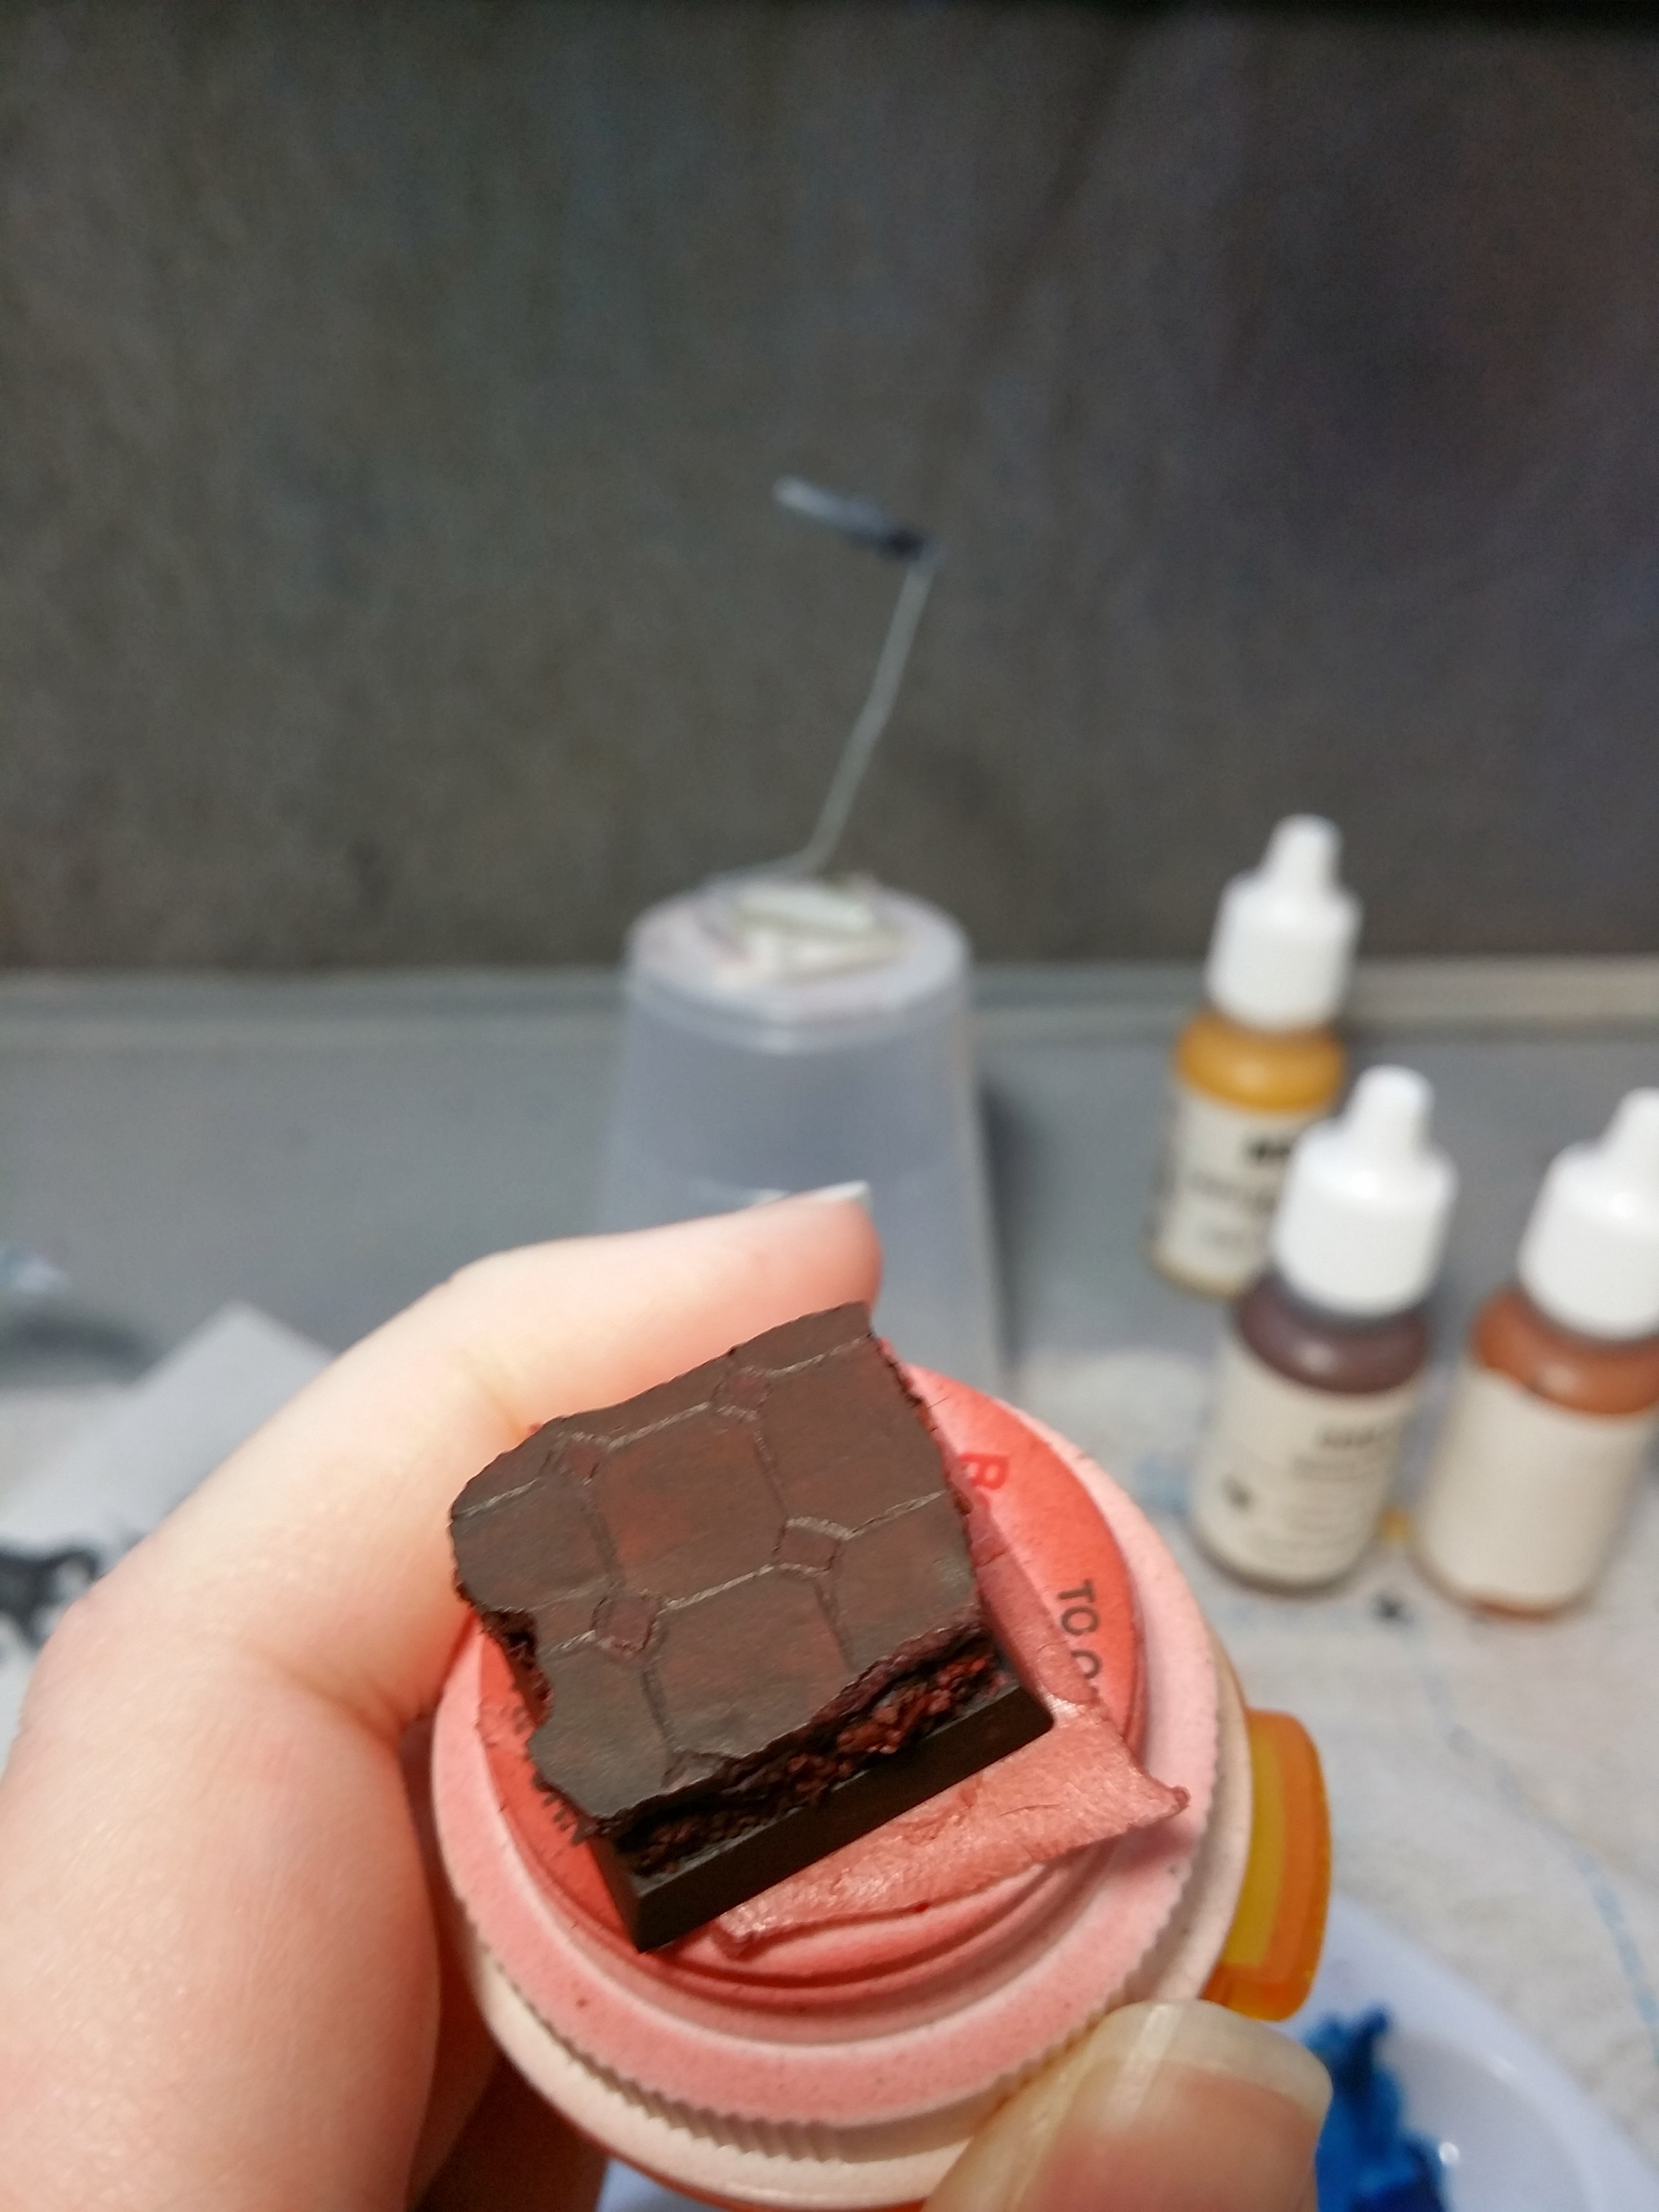
Then I began lightening it up.

And more.

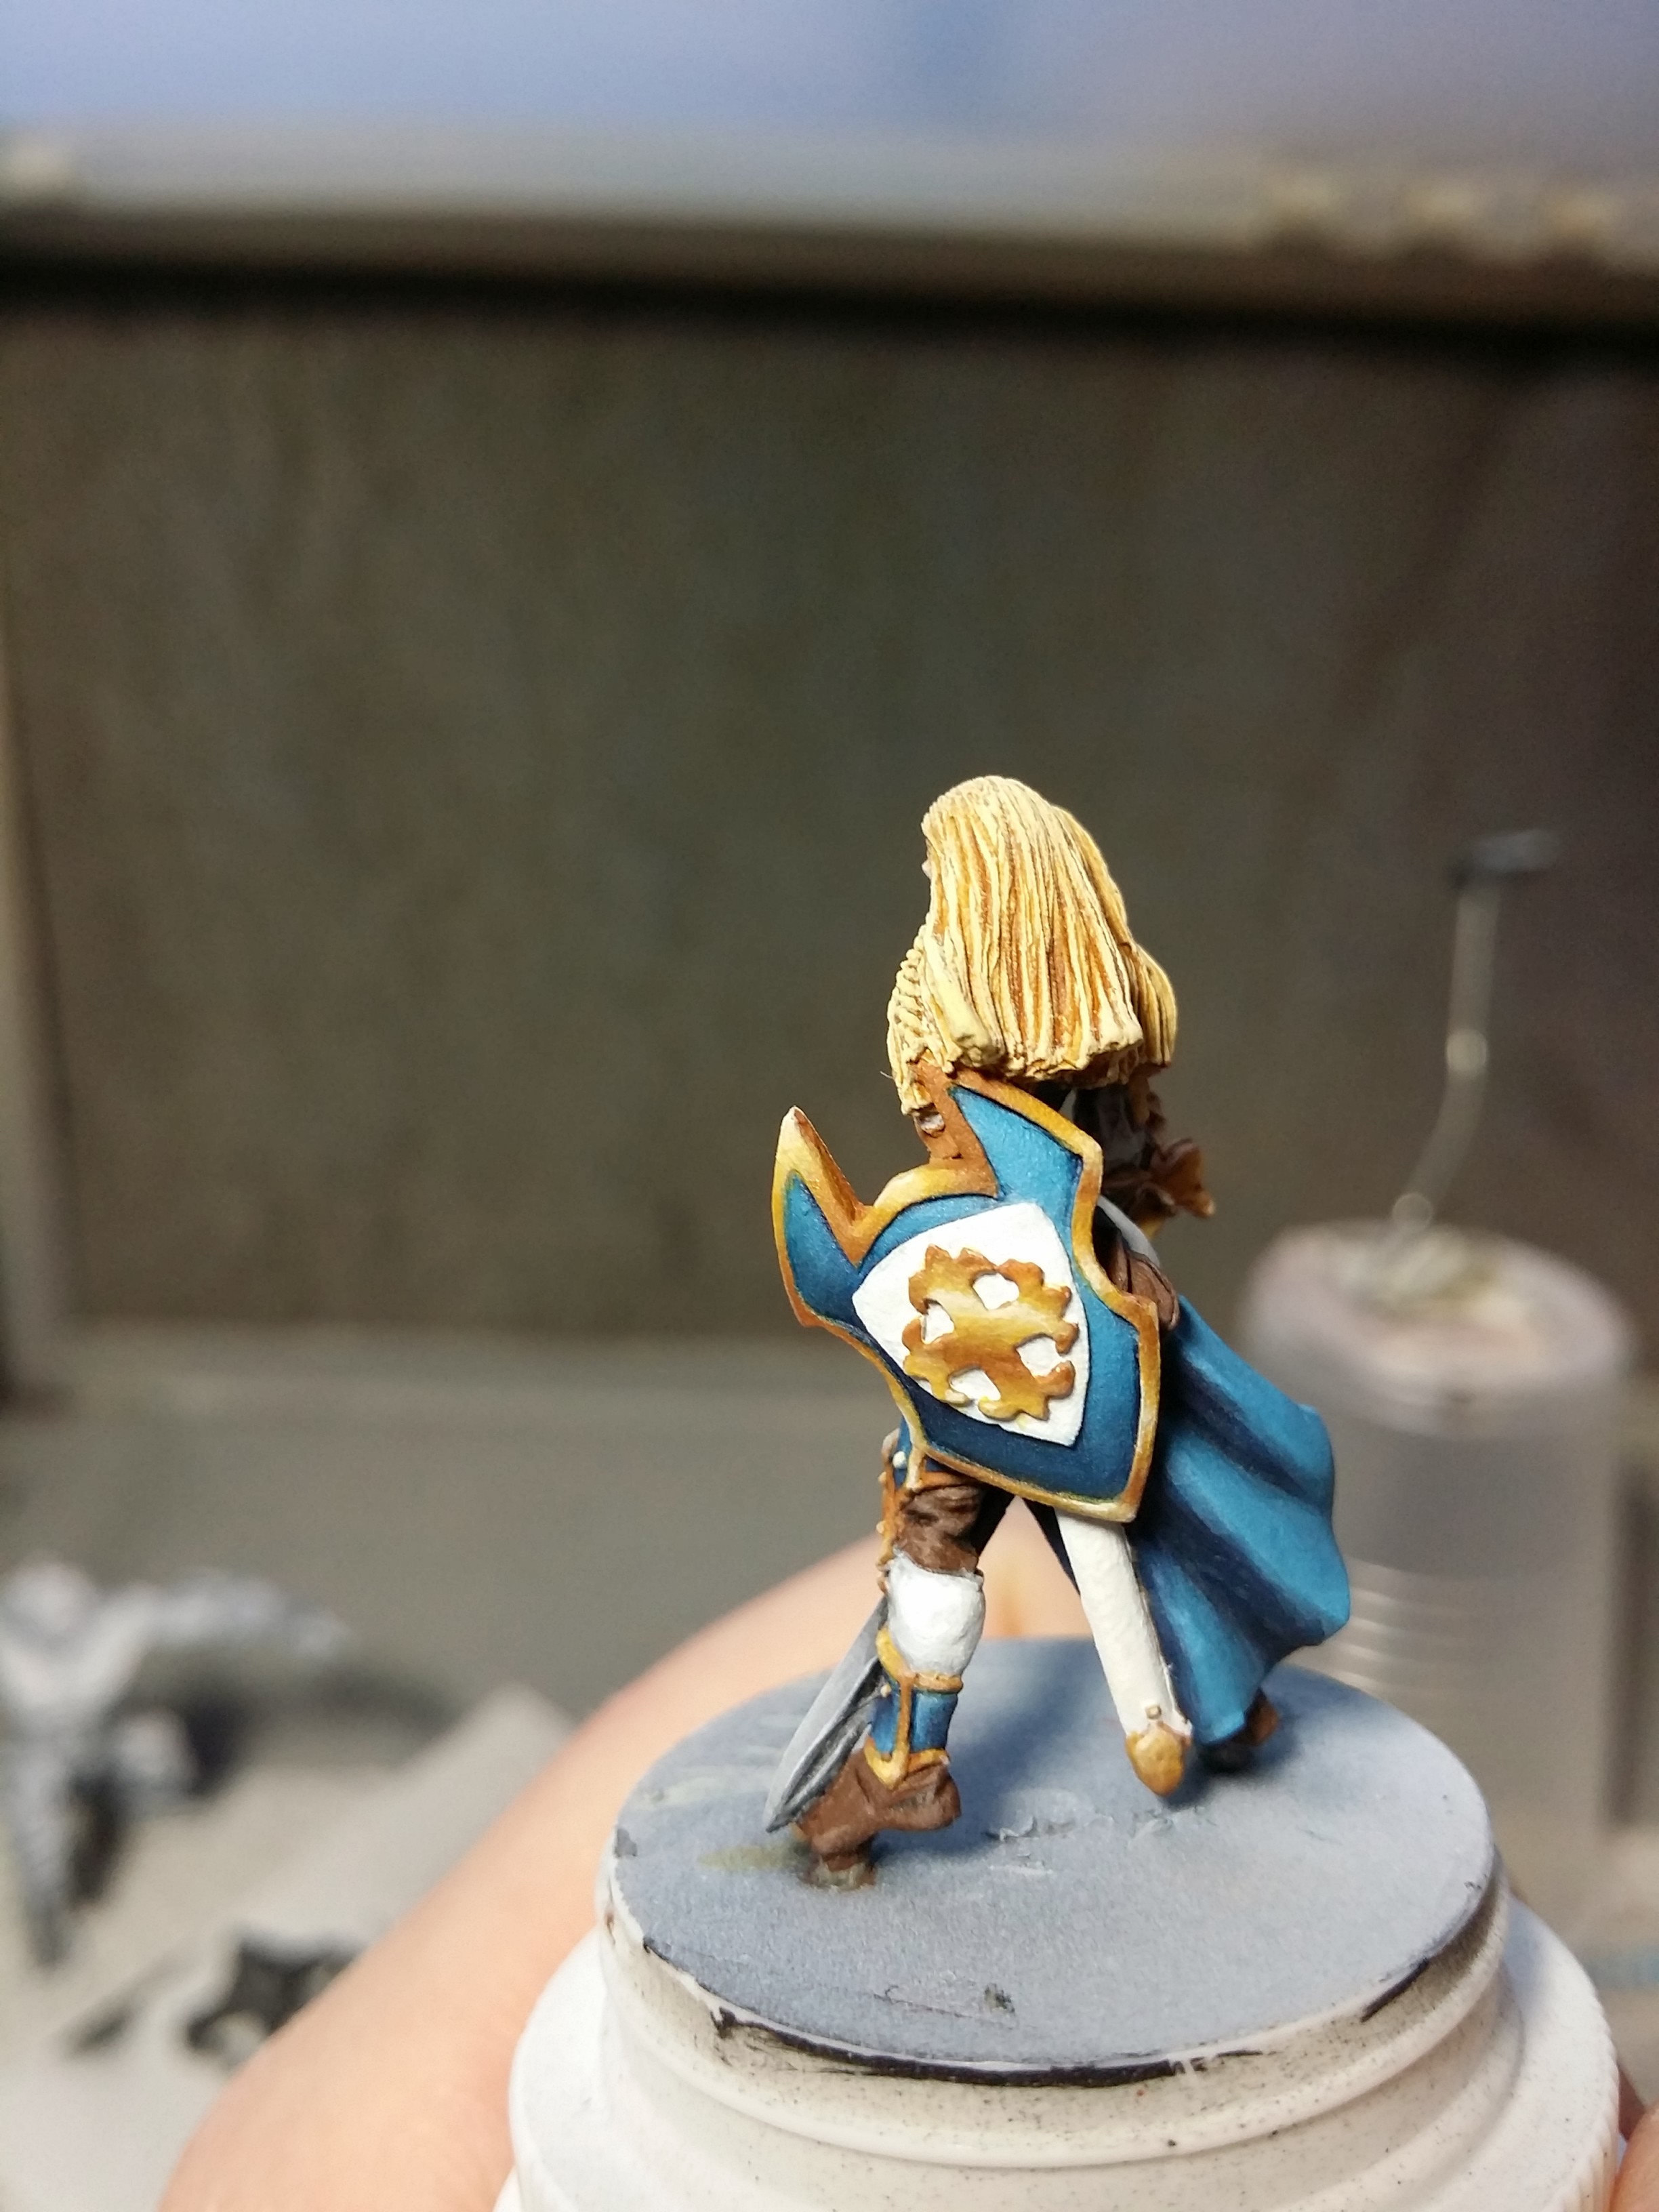
Next, I highlighted the blue cloak and finished the blue NMM.


Then it was time to begin the gold NMM.
And more.
Then I finished the base.

And worked more on the gold NMM and the steel NMM of the sword, and did the leather bits.


And here she is finished!
Stone and Skull Scibor Resin bases
Recently, I painted a set of 18 resin Scibor bases for a unit of Dwarfs that I painted previously.
The first thing I did was wrap some craft sticks in painter’s tape, and then put the bases on the stick for airbrushing. This is probably the easiest way to hold them for airbrushing, and it can really help speed up the process.
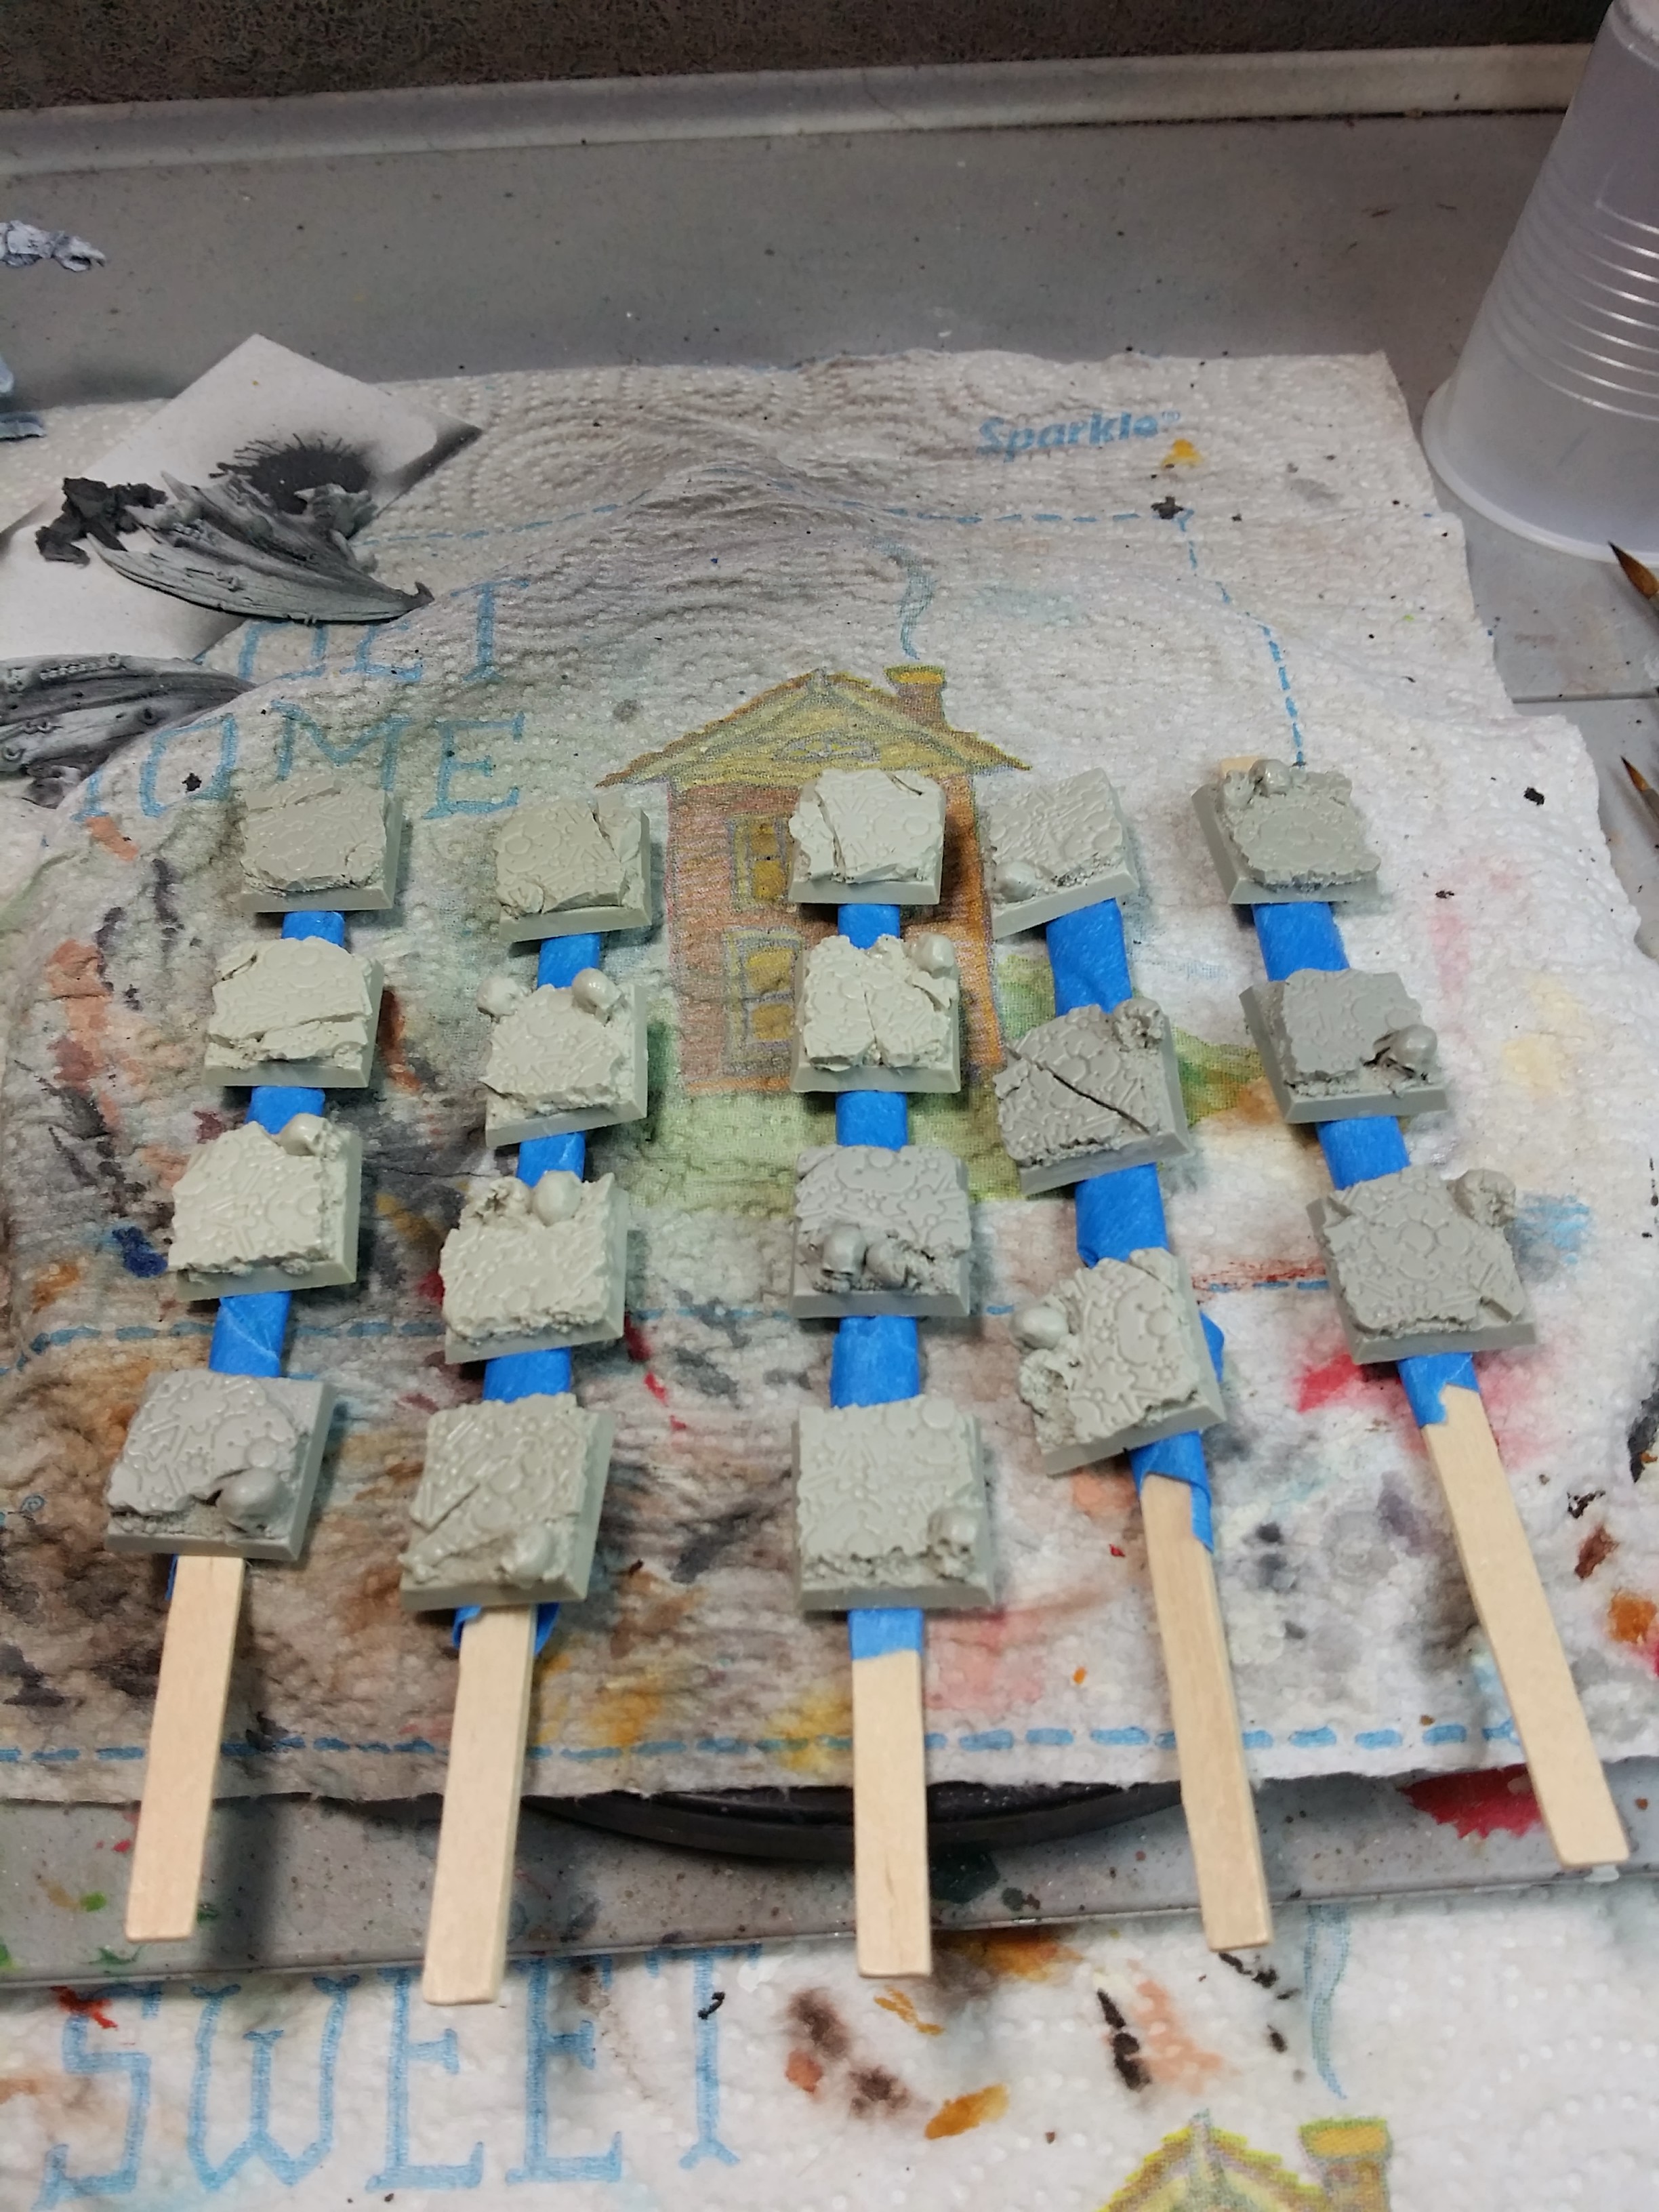
Then, I primed them with black Vallejo Surface Primer.

Next, they were drybrushed with a medium grey.
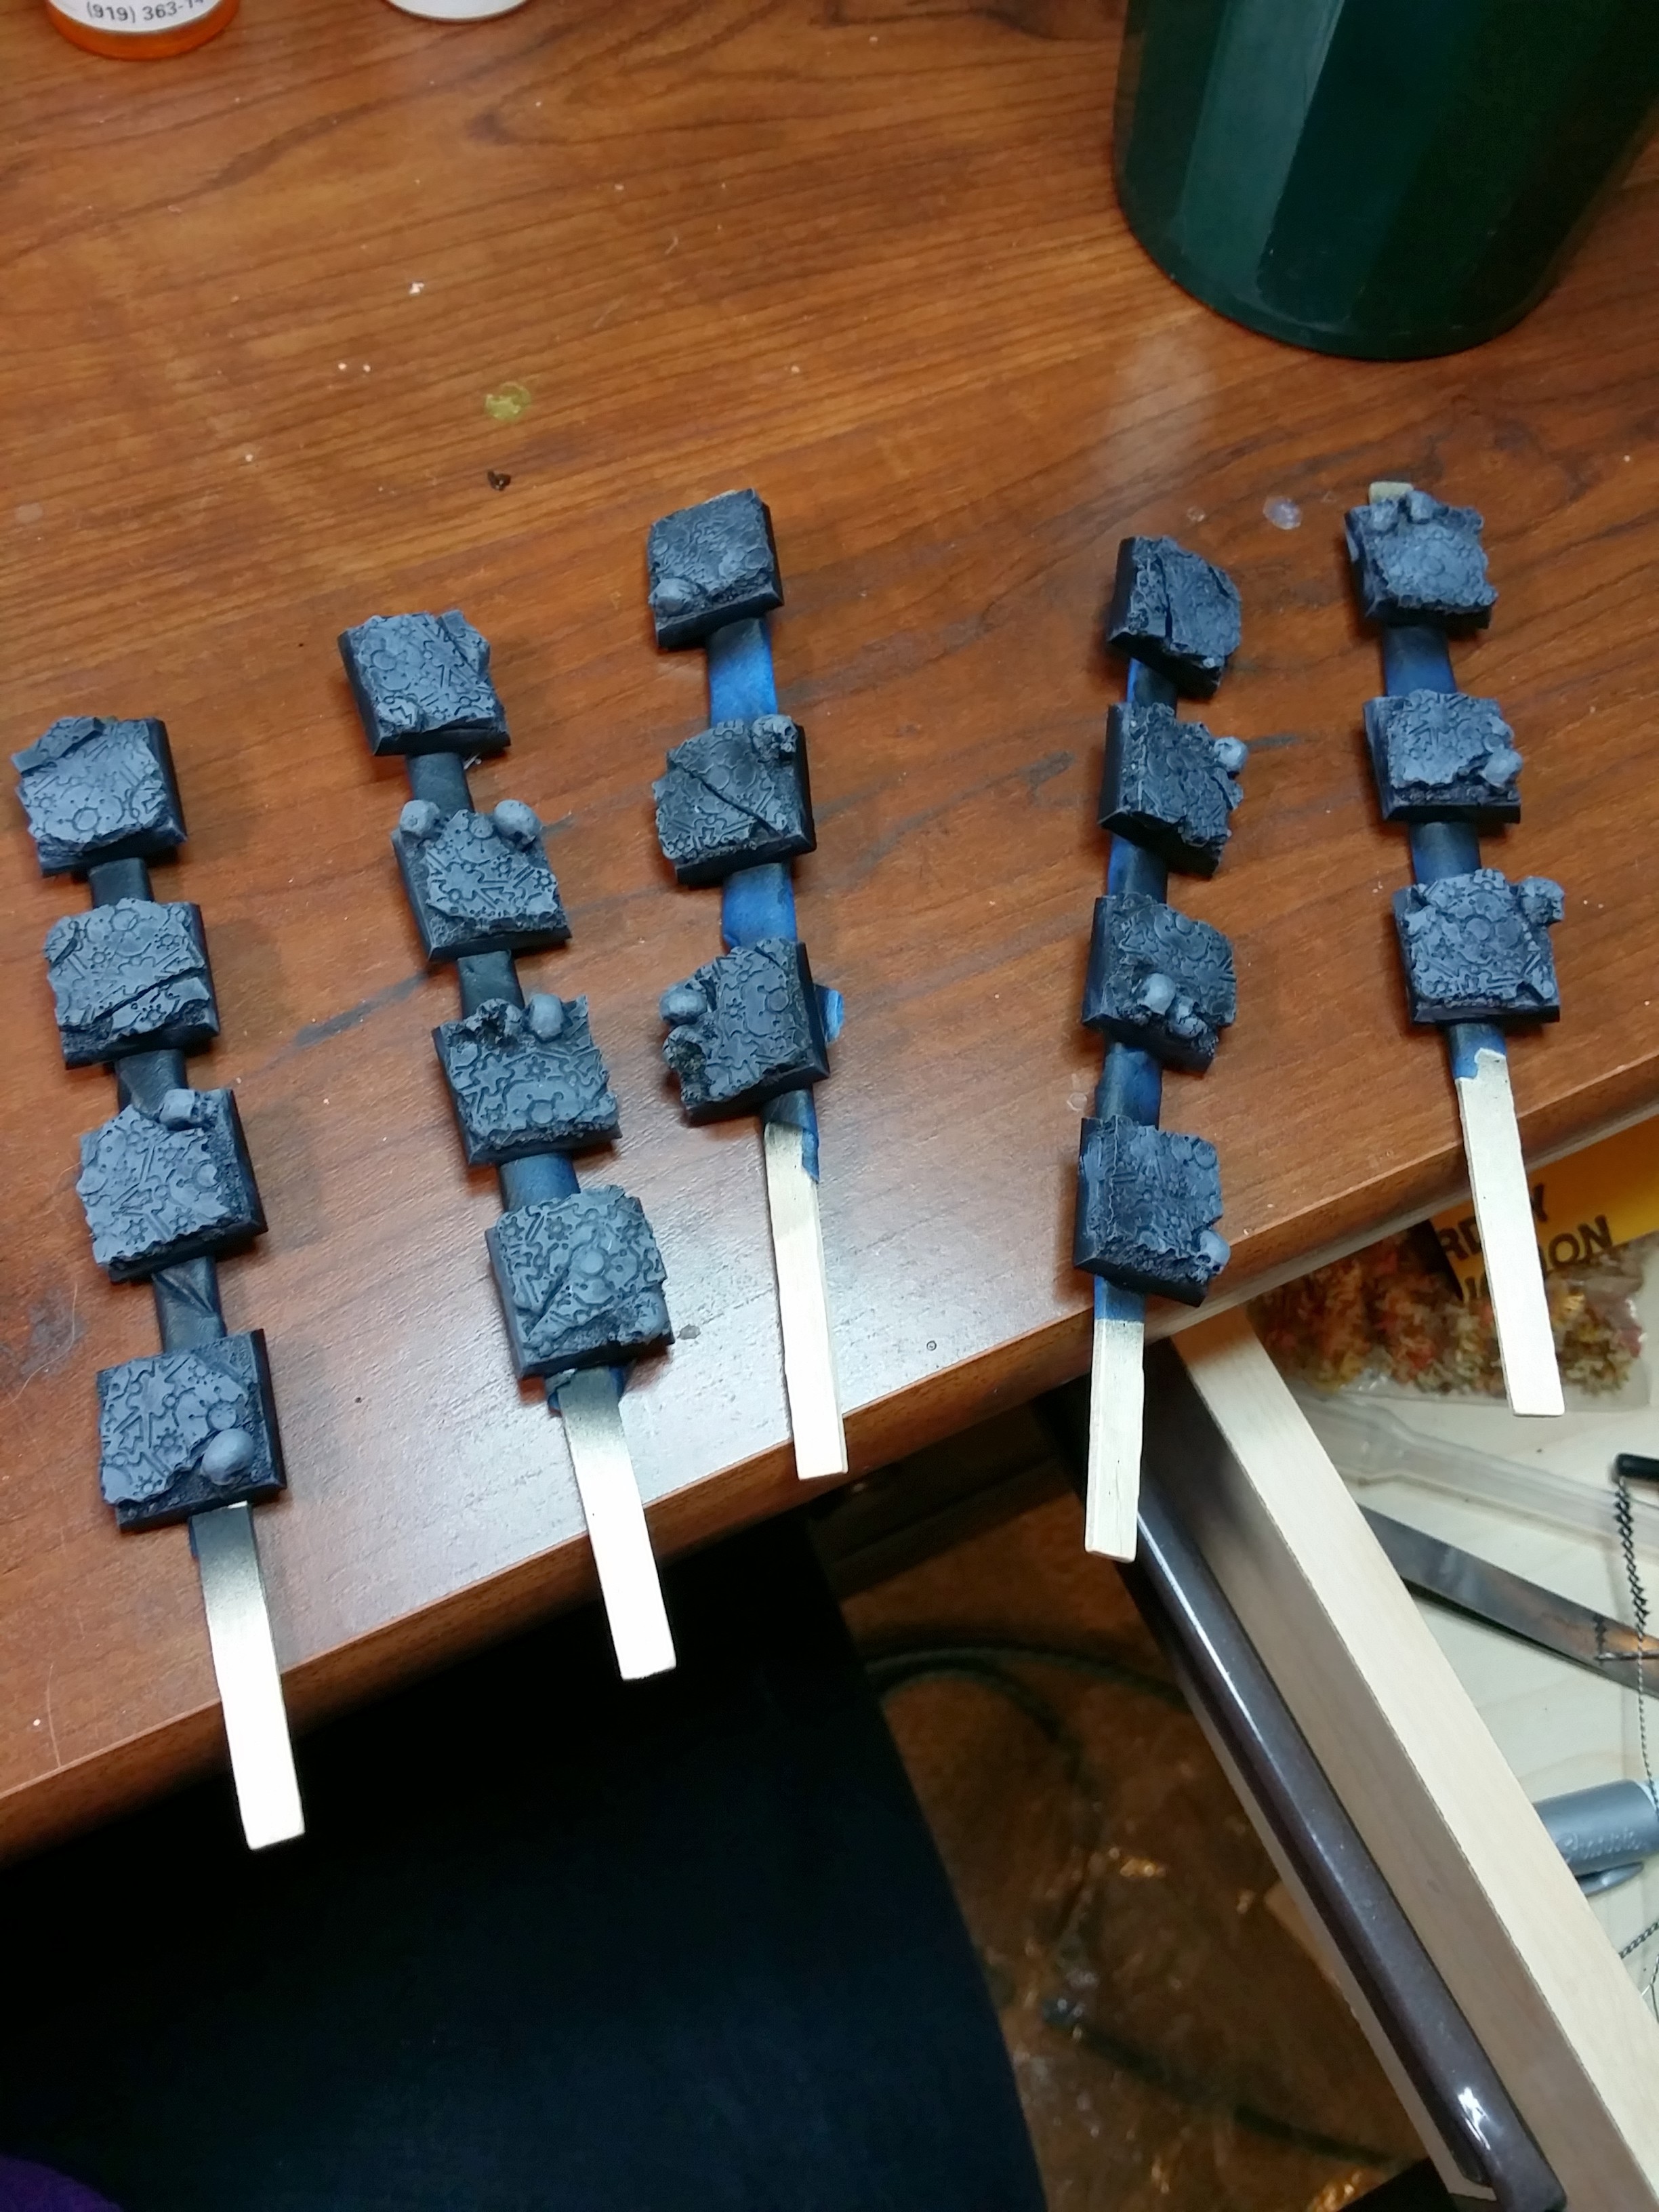
After, they were washed first with Army Painter Green Tone ink…

Then with Army Painter Purple Tone ink. Adding many layers of unexpected colors can help create depth and interest. Many other colors would be fine to use, just go with what feels right to you. I wanted the overall result to be cool colors with the skulls really standing out, so I thought blue, purple, and green would be great hues to include. The Dwarfs have quite a bit of blue on their own though, so I left that color out of the bases.

Then they were drubrushed again with RMS Cloudy Grey.

Next, the skulls alone were heavily drybrushed with RMS Cloudy Grey to pick them out.

Then the skulls were drybrushed heavily with a mix of RMS Cloudy Grey and RMS Amber Gold to gradually bring them to their final color, but still keep them tied into the base overall.

Then, the bases were washed in some areas with GW Agrax Earthshade and GW Seraphim Sepia, and the skulls were drybrushed with RMS Yellowed Bone.

The skulls were then washed with GW Seraphim Sepia.

After that I picked out some areas of the stone with a light drybrush of VMC Light Sea Grey, which has quickly become one of my favorite paints.

After that all that was left was to black out the edges and take them off the sticks.

Then attach the Dwarfs!

This whole process was very fast and very simple, but the results speak for themselves!
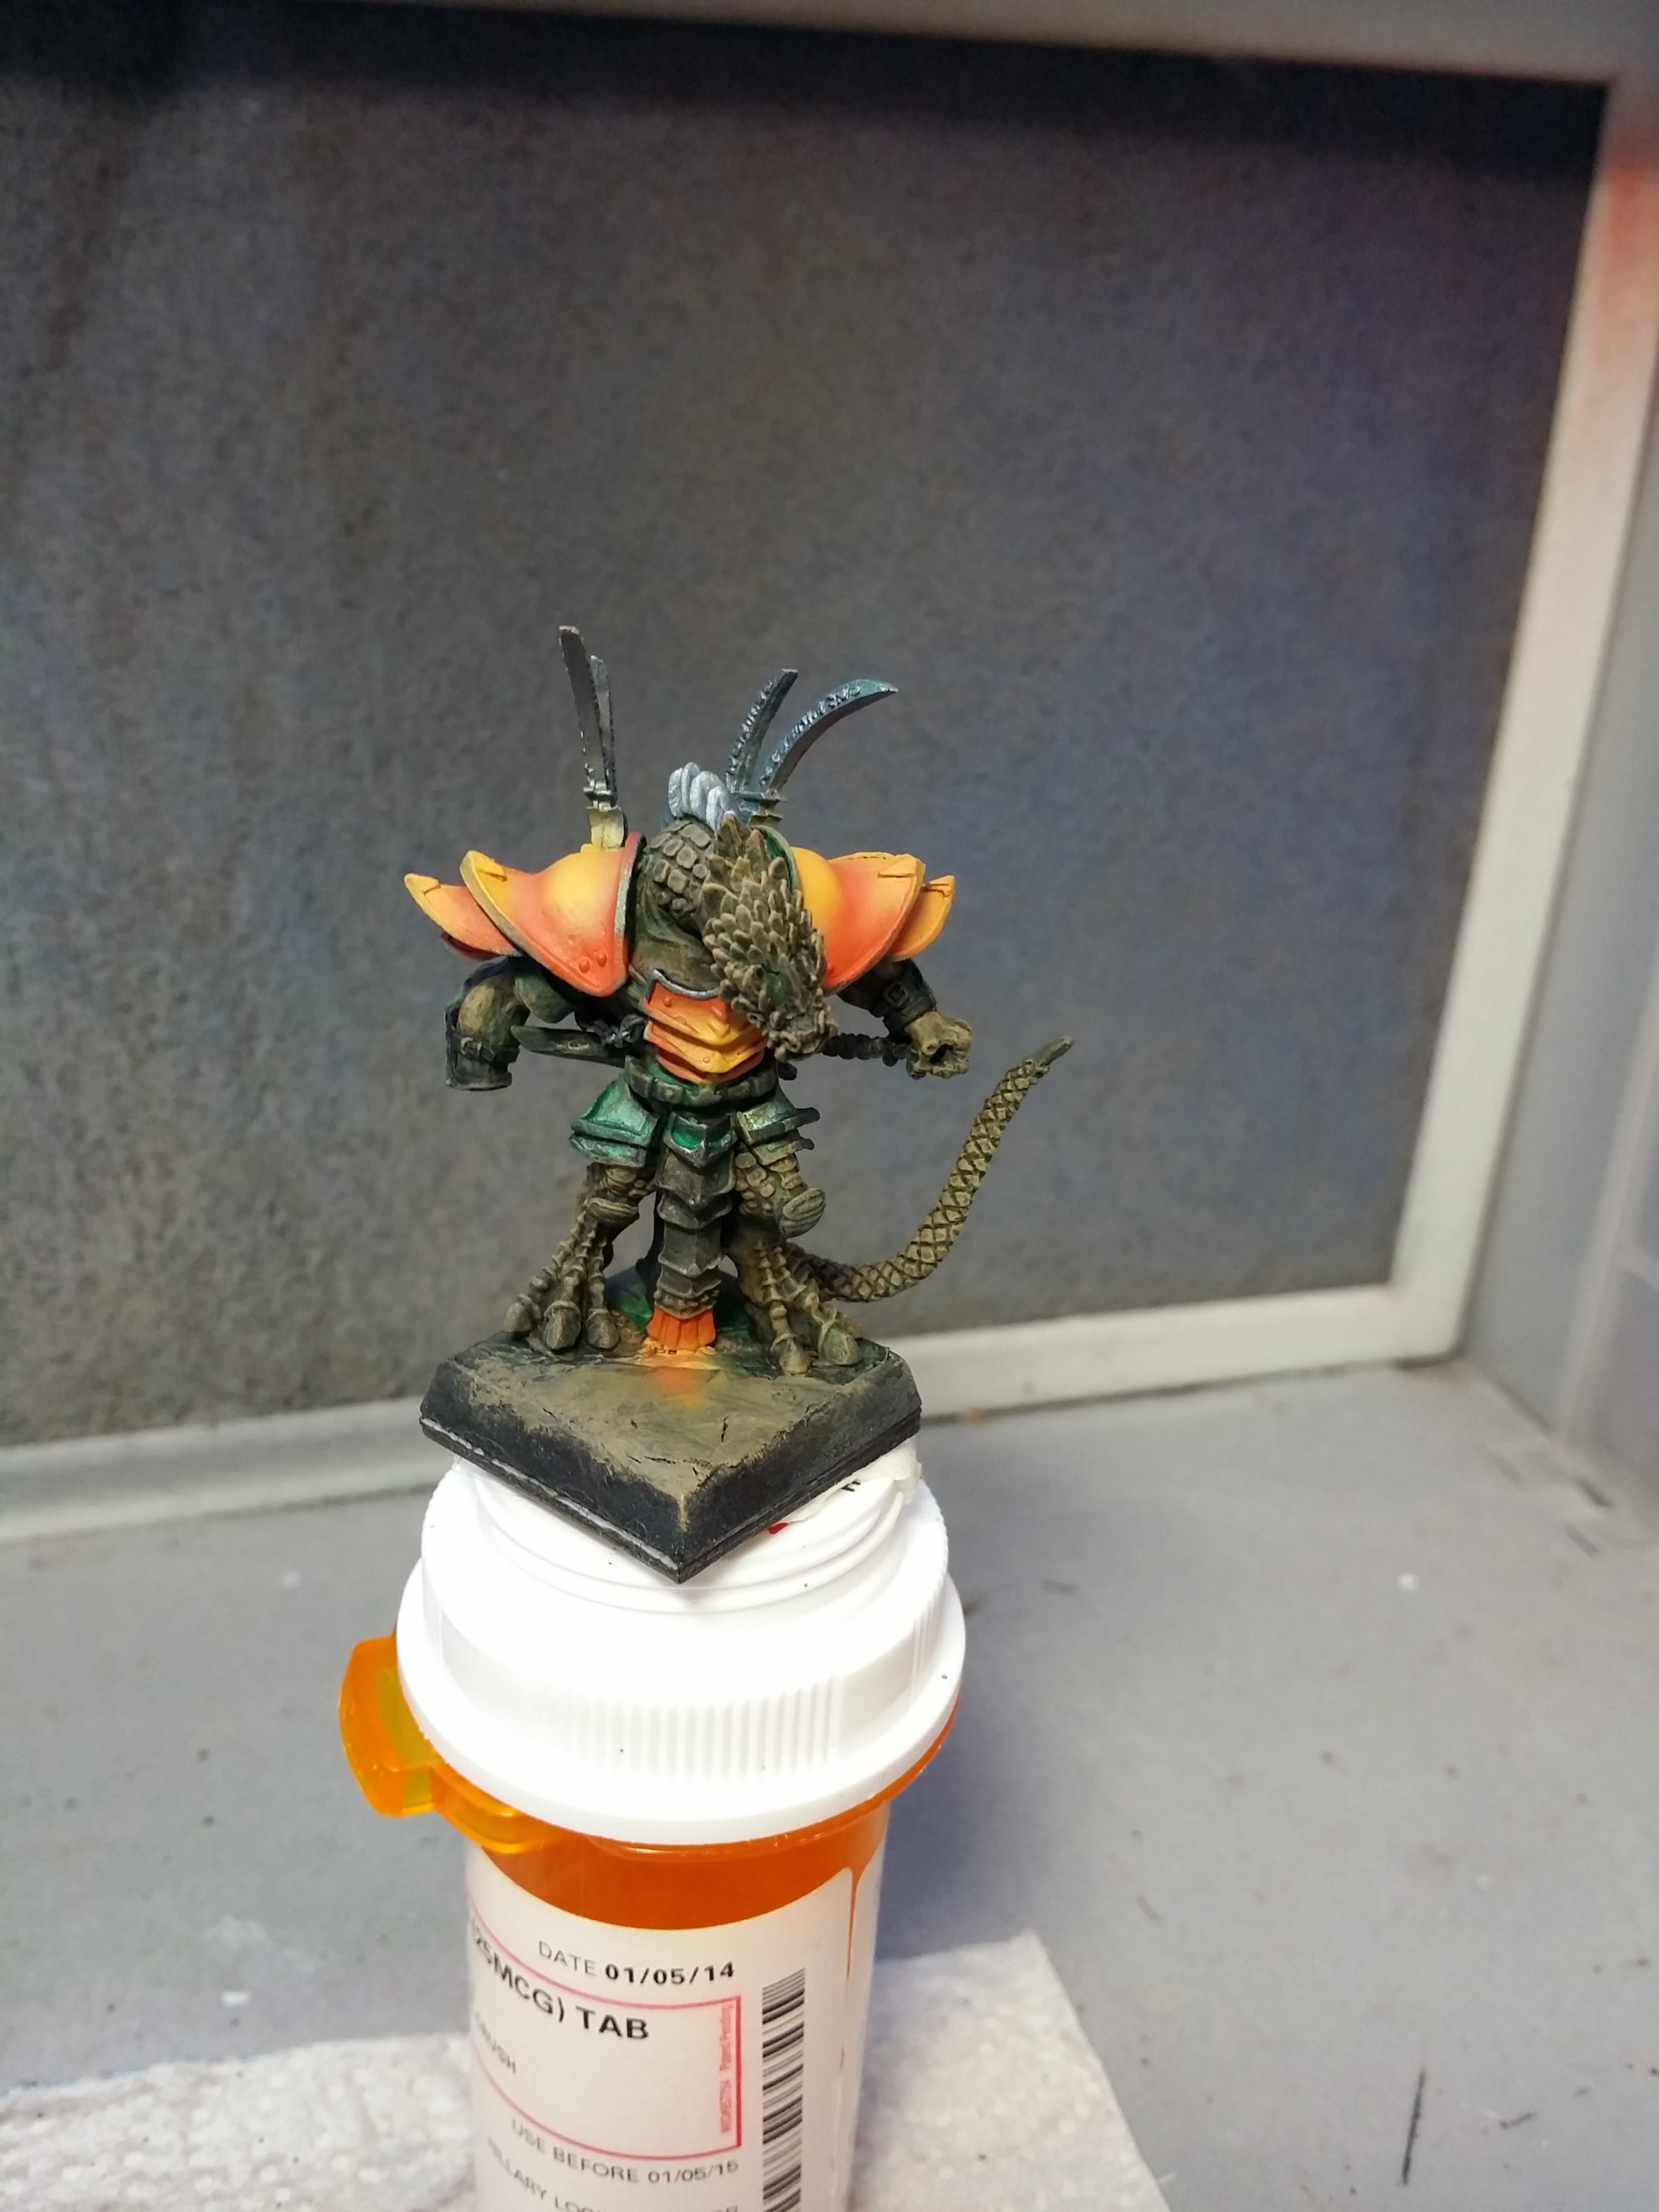
Reaper Reptus Warlord Khong-To
This model was actually pretty fun, aside from the fiddly wrist joint that really needs careful pinning.
The skin/scales was first painted RMS Peacock Green.

Next, it was drybrushed RMS Olive Skin Shadow. The goal was for the skin/scales to have a bronze-like appearance per the character description given to me. This model is to be used as a D&D character.

After that it was washed with thinned RMS Peacock Green, drybrushed RMS Stormy Grey, drybrushed again with Olive Skin Shadow, and drybrushed to highlight with RMS Olive Skin.

After that the skin was washed with GW Agrax Earthshade.

After that it was time for the armor. The upper armor areas were airbrushed first with RMS Rust Brown, and the highlighted with RMS Palomino Gold.
Next, the lower armor areas were airbrushed RMS Ritterlich Blue, then RMS Viper Green as a highlight.

Then the armor edges, spikes, and back armor plates were painted VMC Brass.

After that it was time to finish up details and paint his base.
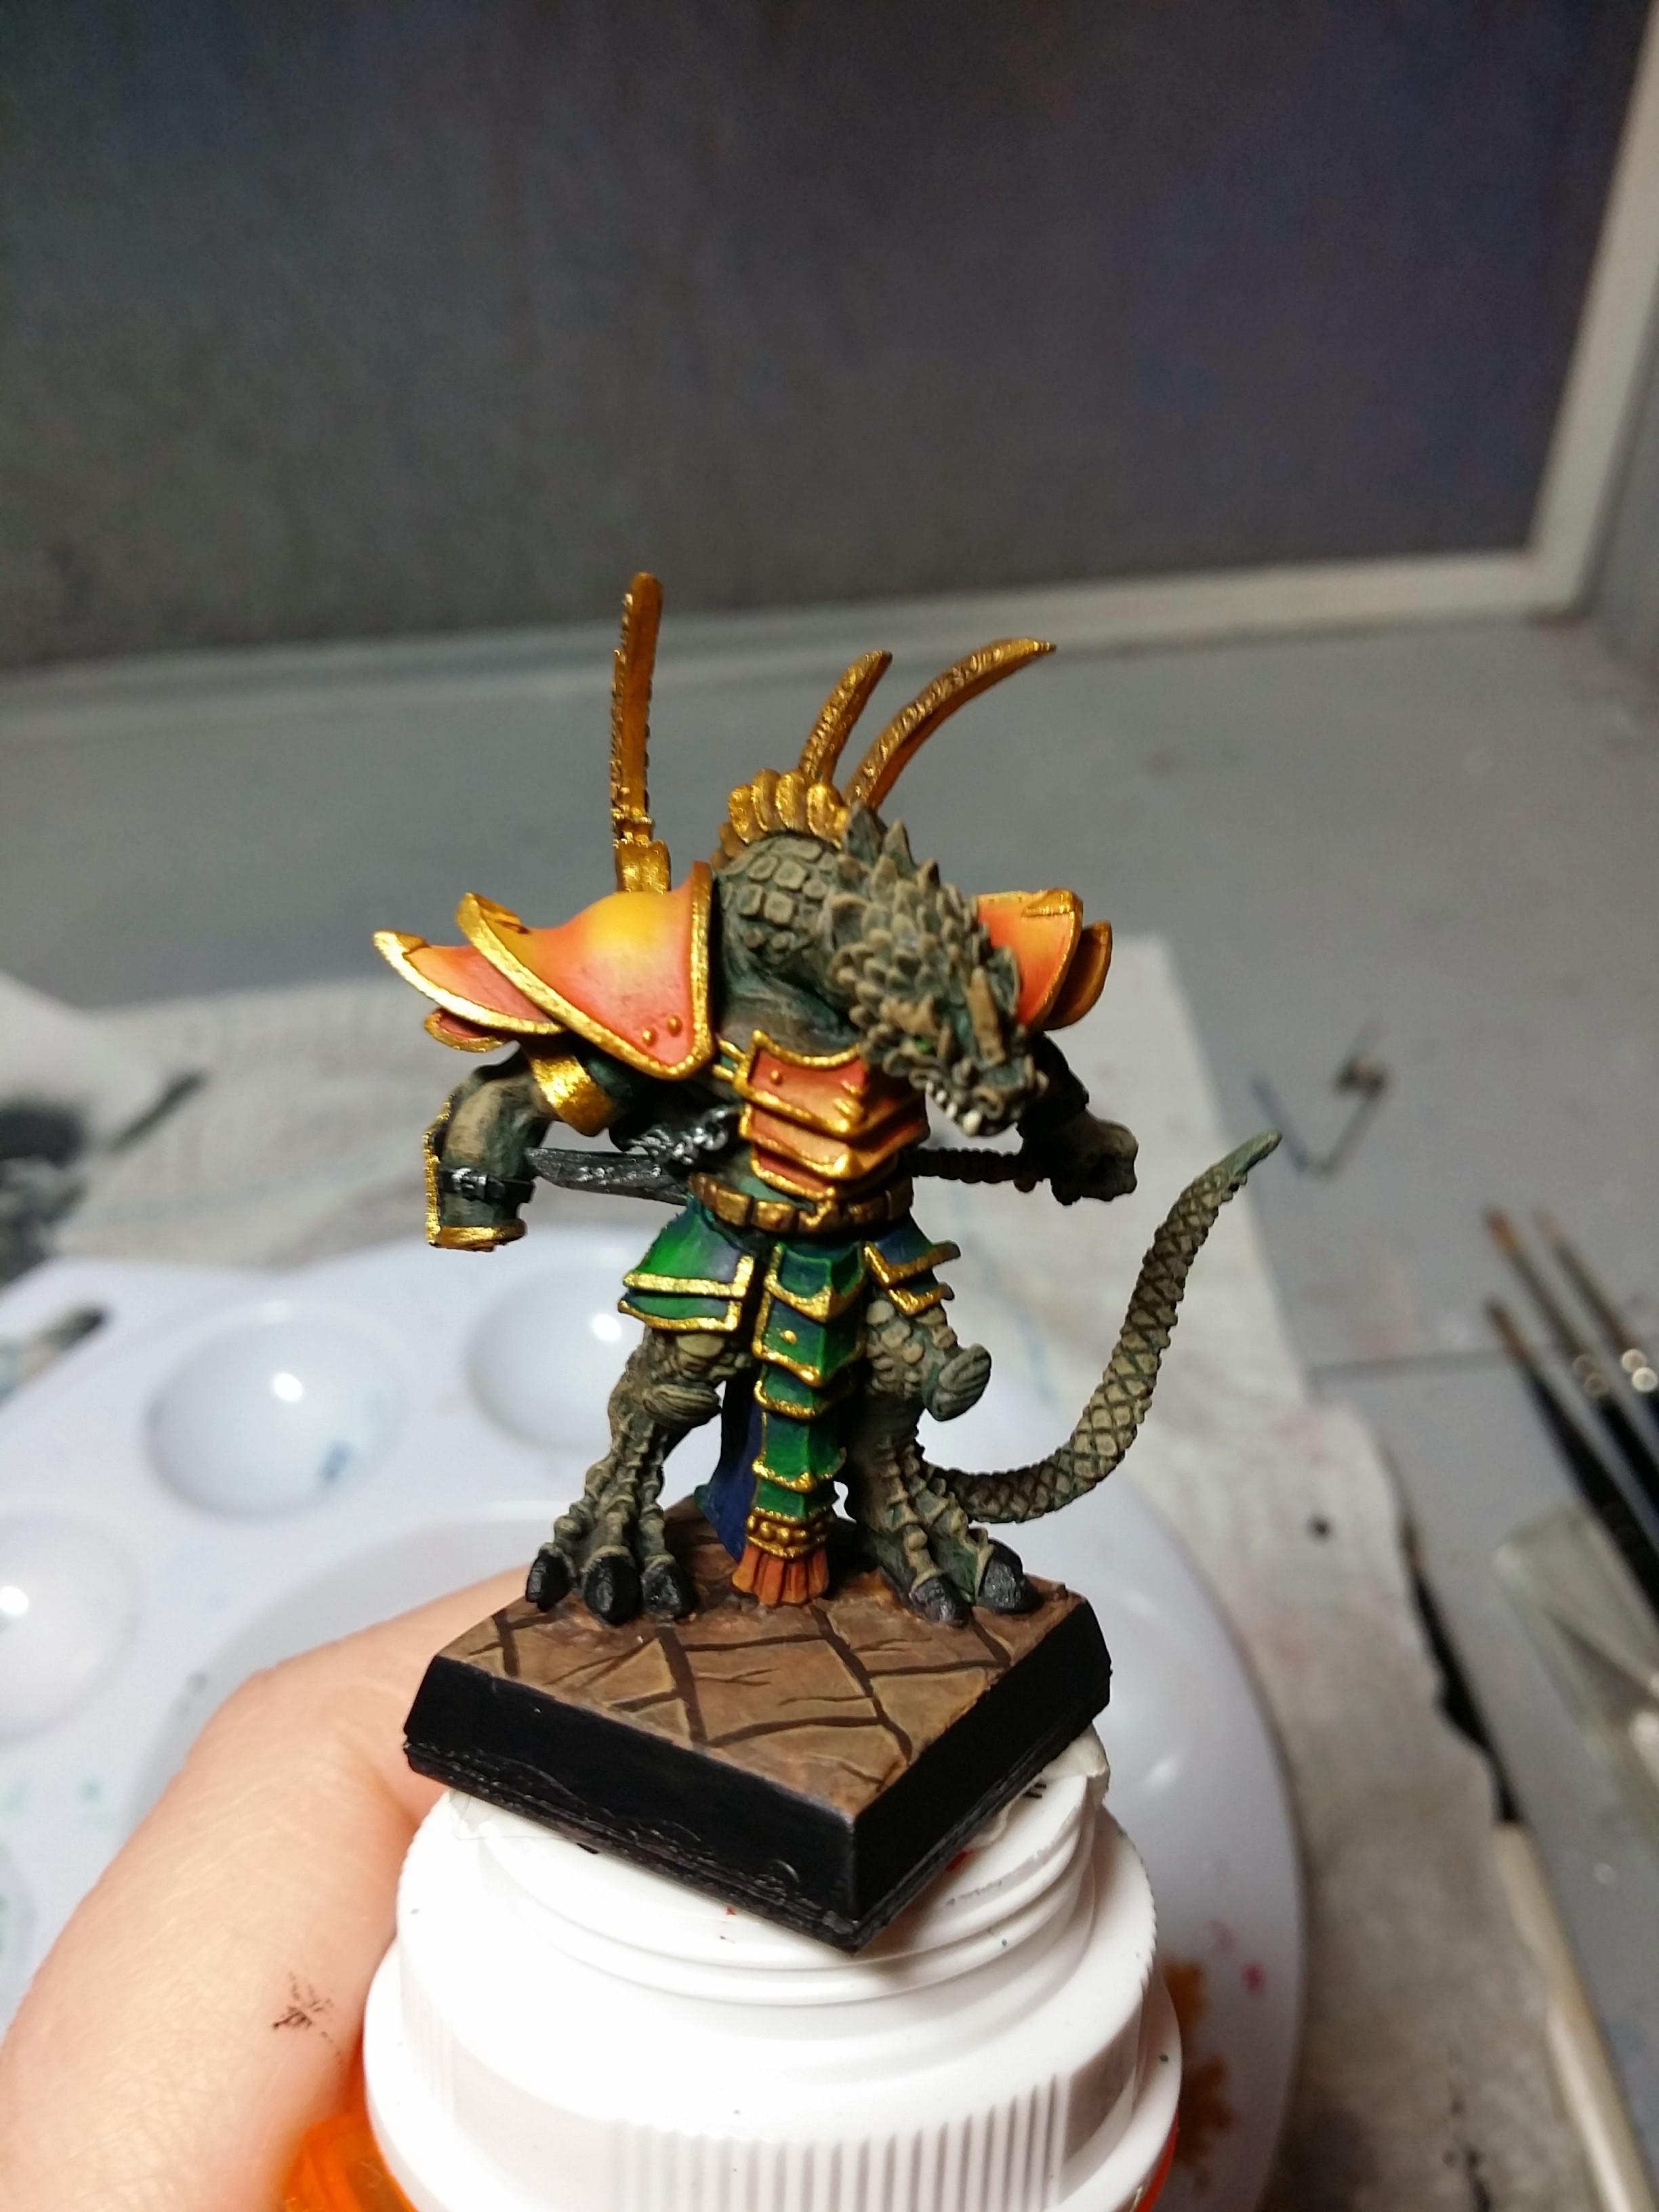
After that his arm was attached, and he was finished!


