Category Archives: Secret Weapon Miniatures
Khador Juggernaut
I totally forgot to take WIP pictures as I did the base. I used Woodland Scenics Soft Flake Snow for the snow, and Woodland Scenics Water Effects with a little bit of VMC Verdigris glaze mixed in for the ice. In the future, I think I will use a white ink instead of the VMC paint so the ice is a bit more transparent.

MGM Painting Khador Juggernaut Standard++
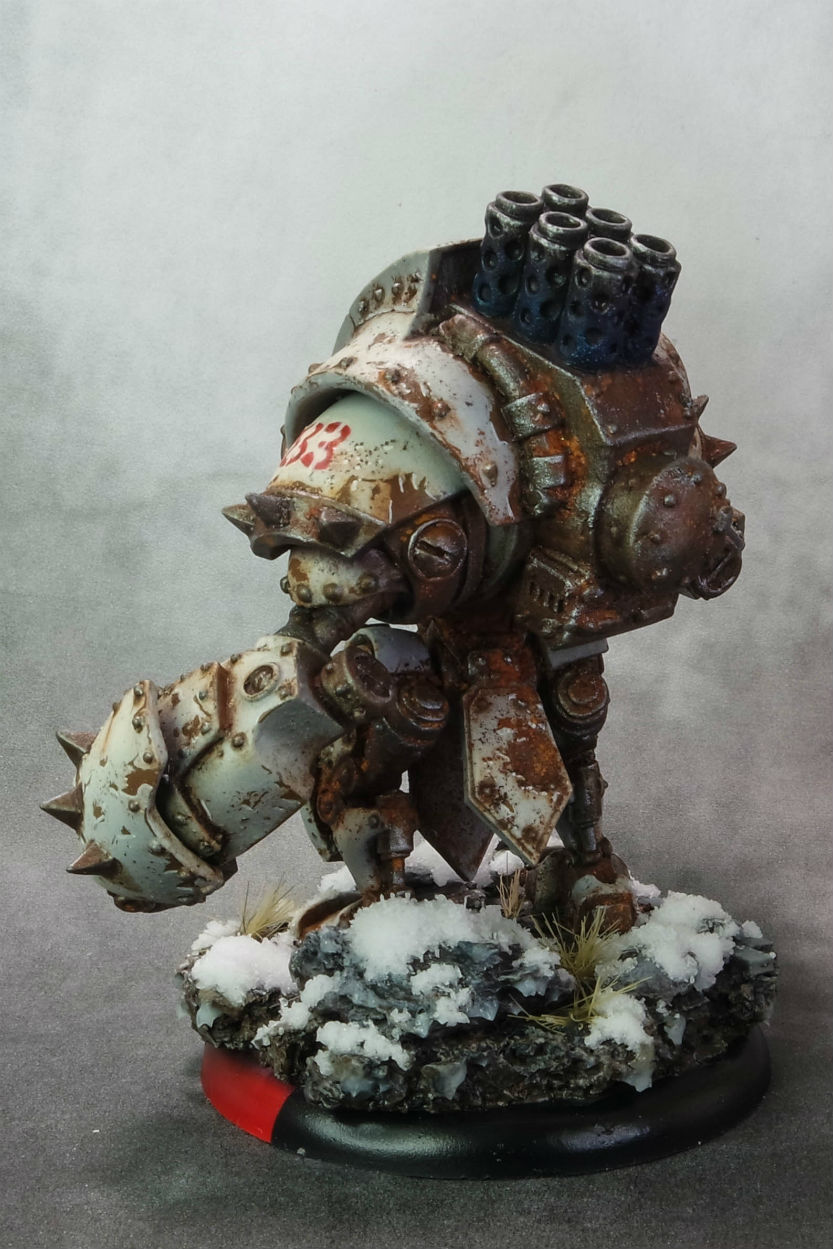
MGM Painting Khador Juggernaut Standard++
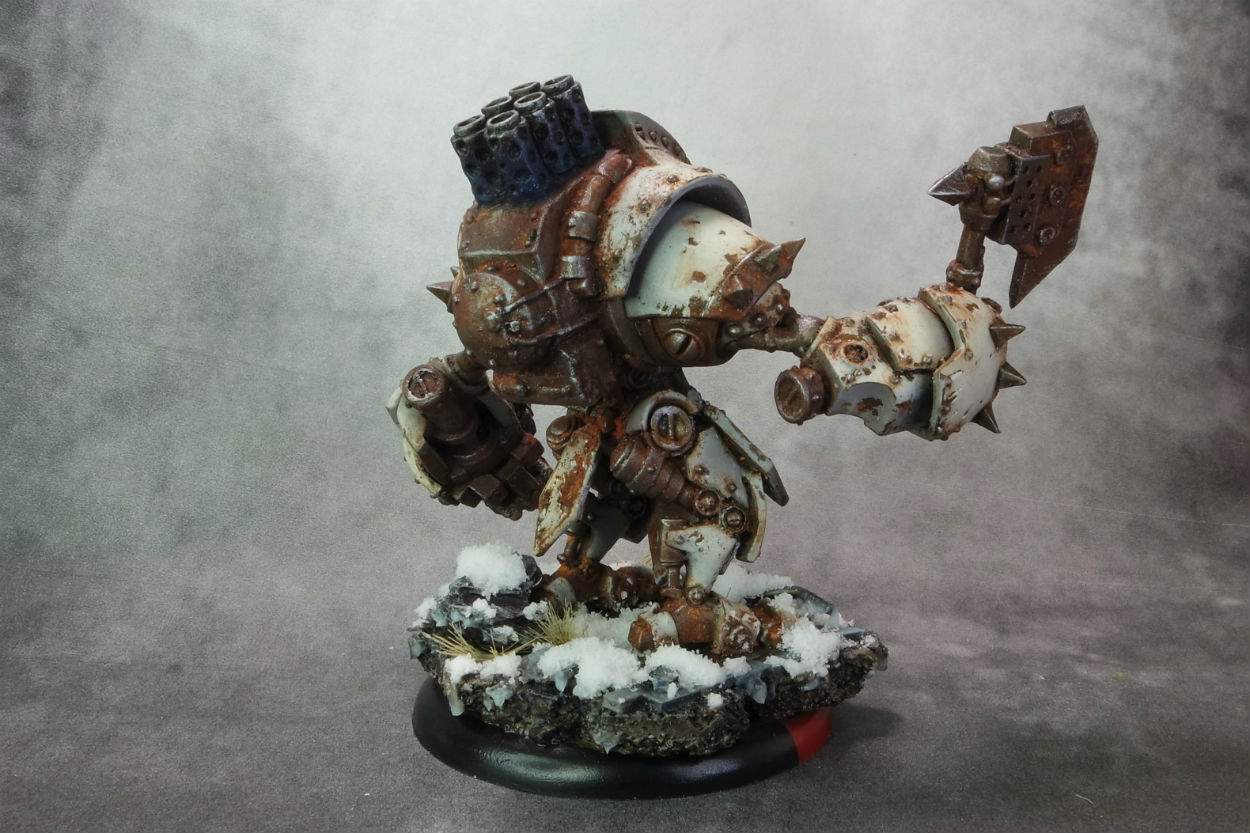
MGM Painting Khador Juggernaut Standard++
WIP Khador Juggernaut
More WIP pictures! I brought back some of the metal highlights, highlighted paint chips, and worked on the visor.


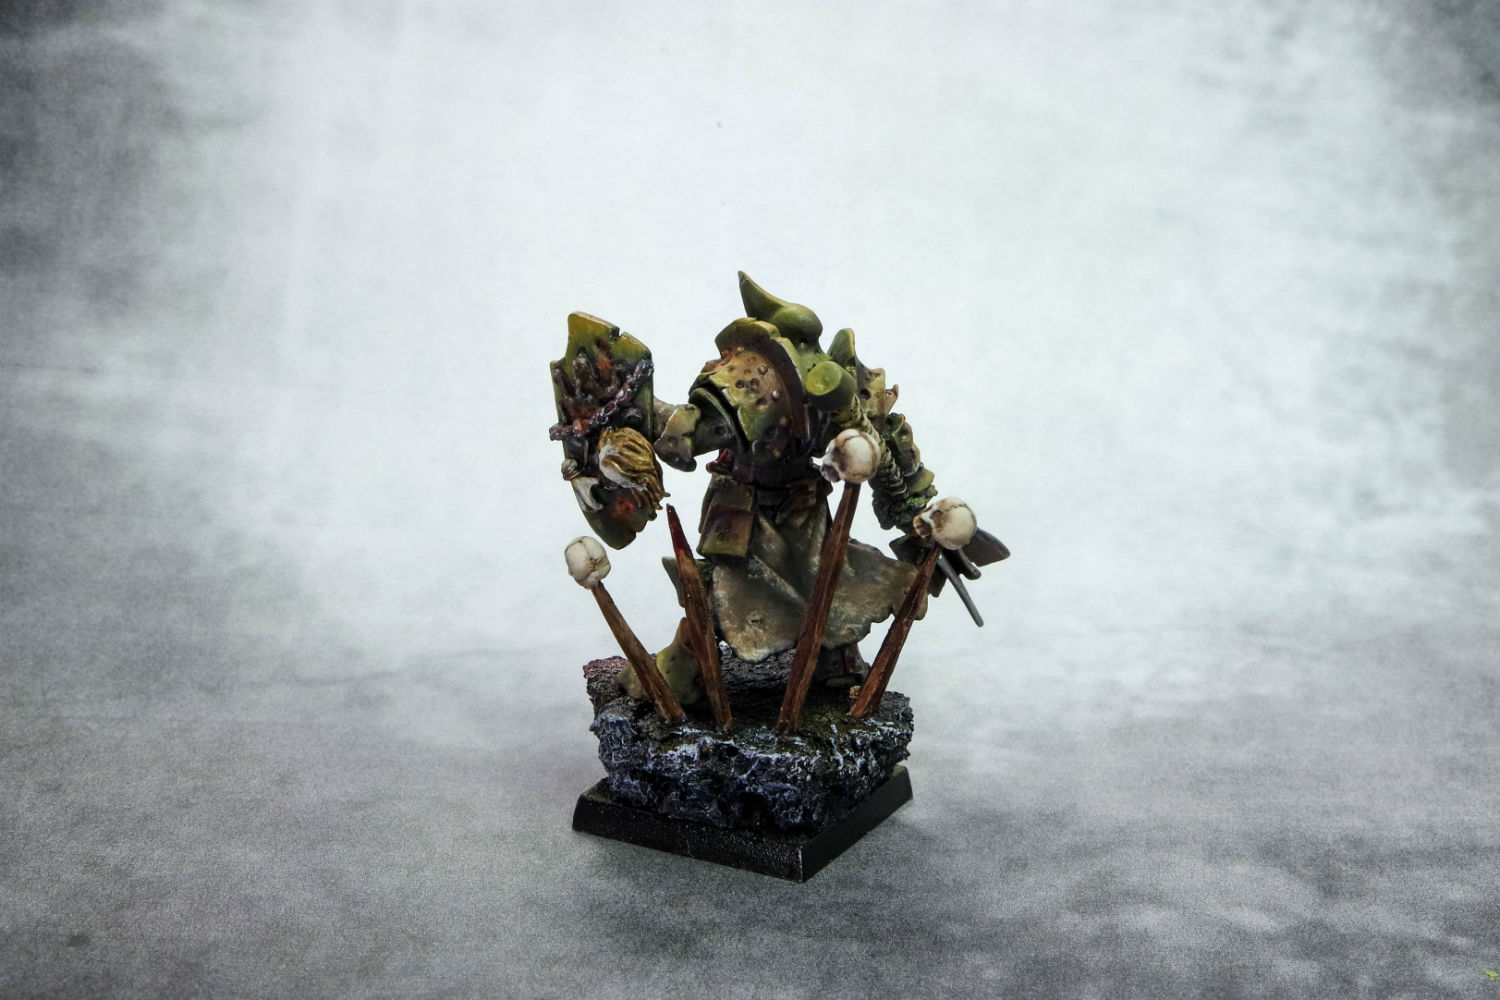
Avatars of War Lord of Pestilence
Here’s the finished photos of the Avatars of War Lord of Pestilence! He was a lot of fun to paint, and I really loved those Secret Weapon skulls – this was the first model I’ve used them on. He would make a great Warriors of Chaos Nurgle Chaos Lord, and he is for sale for $87 plus postage.


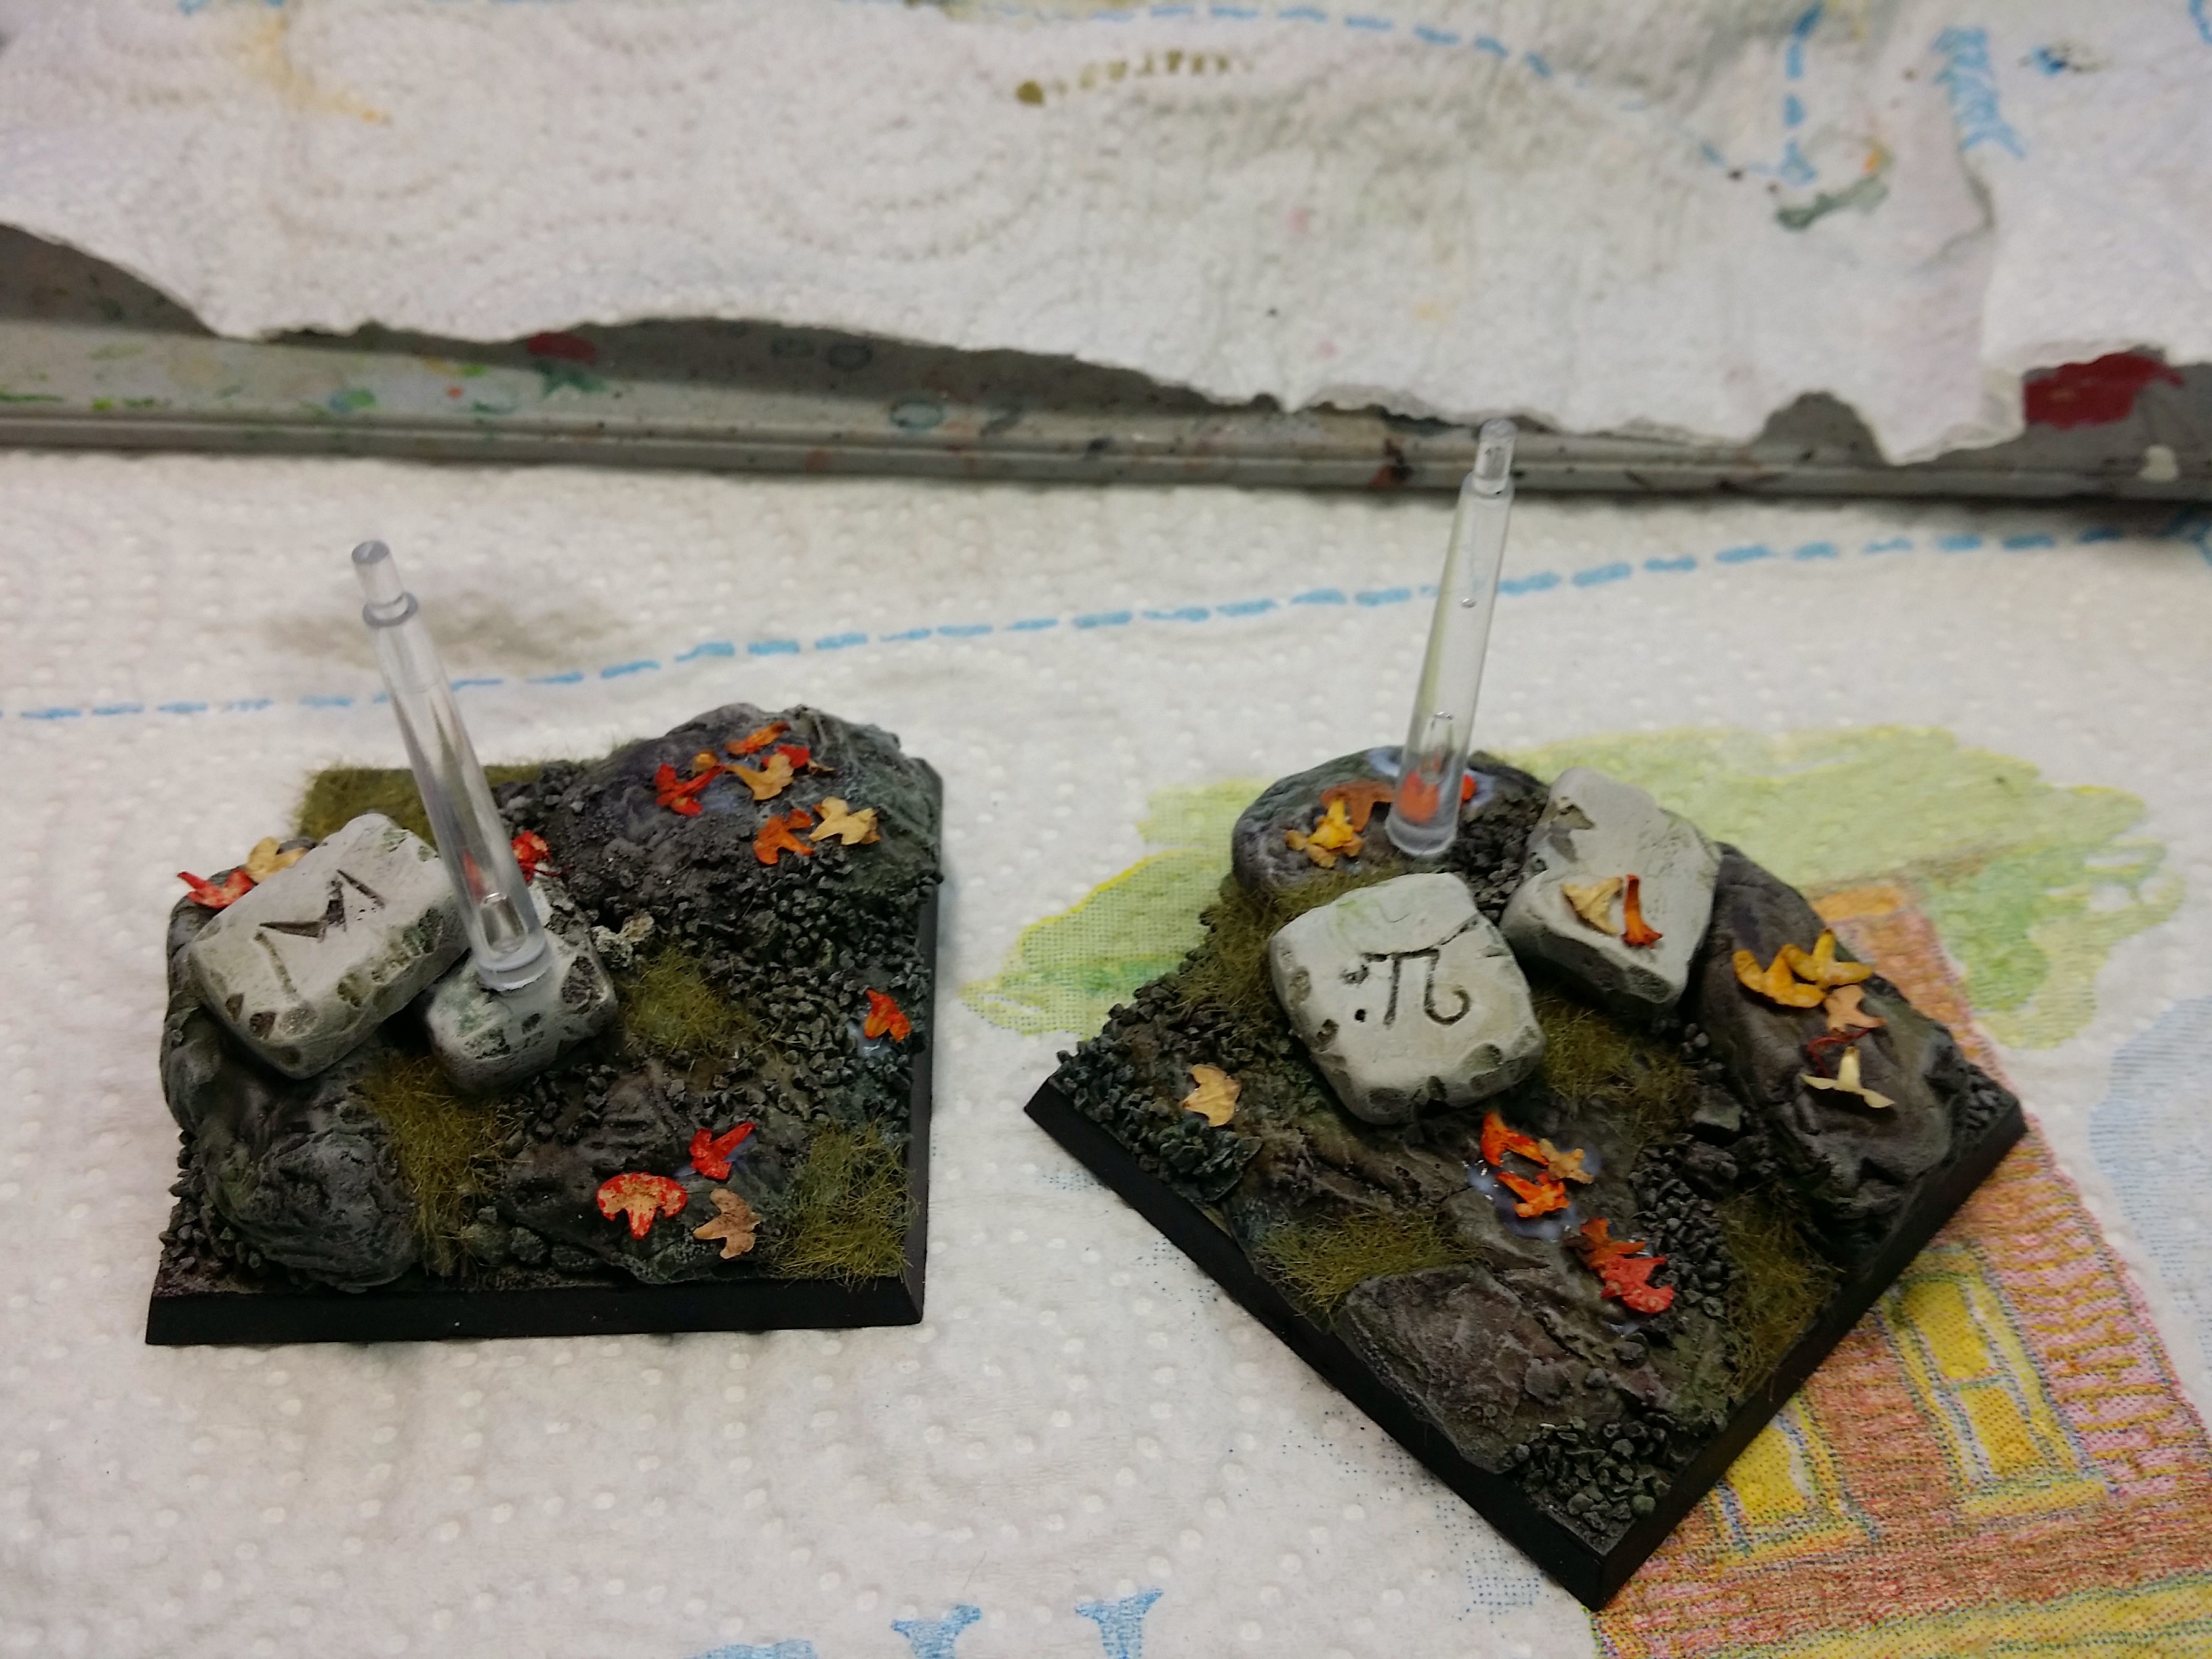
How to Elven Ruins base
Recently I built Elven ruins bases for the High Elf Prince on Griffon I painted. Here’s how I did it:
1. The first step is to create the rocks and pieces of ruins from Sculpey. I used a Woodland Scenics rock mold to create the rocks by pressing Sculpey into parts of them, squishing it in until the part of the Sculpey not in the rock is pretty flat, and then bending the mold to peel out the newly formed rock. I also created a couple small Sculpey “bricks.” Then bake!
Tools:


Rocks:

2. Next, I carved the Sculpey “bricks” into weathered stone with a craft knife.
Before:

After:

3. The next step is to arrange the stones on the base and glue them on.

4. Then, I put Vallejo Red Oxide Paste (still love this stuff, although I could do without the red color) in the crevices and around edges. I also put various sizes of Woodland Scenics ballast on areas of the base. Weathered ruins and rocks are certainly accompanied by smaller rocks!

5. Prime the base! I used Vallejo Black Surface Primer.

6. Now for the fun part – painting! First, I coated the base in VGC Goblin Green.

7. Next I added some stone colors – RMS Bone Shadow then RMS Cloudy Grey.


8. Next I used RMS Linen White on the ruins.

9. Then I used RMS Golden Shadow for more variation in color.

10. Now it’s time to wash the base. I used several colors – GW Athonian Camoshade, Army Painter Red Tone Ink, Army Painter Blue Tone Ink, Army Painter Green Tone Ink.

11. Next, drybrush the base with the colors used previously, as appropriate.

12. The next step is to put in the flight stand. I started the hole with a pin vice, and then finished it with the craft knife since the pin vice couldn’t make a hole big enough.
13. The last step was to use Vallejo Matte Medium to attach Woodland Scenics flock and Secret Weapon leaves.
Fin!

Rocky base for Feral Warpwolf
I had a Feral Warpwolf sitting on my shelf that was just waiting for a base, and he had been waiting for that base for going on a year…no idea how that happened! So I decided to just go ahead and get that taken care of. I had some spare sculpey bits and some wooden craft sticks sitting around, as well as some leaves for basing that I really love.
First, I tore the edges of the sculpey and stacked a few bits together. I also broke off bits of some craft sticks. I then assembled all of this with some super glue. PVA would probably be fine as well, but I accidentally bought a HUGE bottle of super glue that turned out to be 30 minutes set time (I didn’t read the label thoroughly…), so I use it for basing a lot.
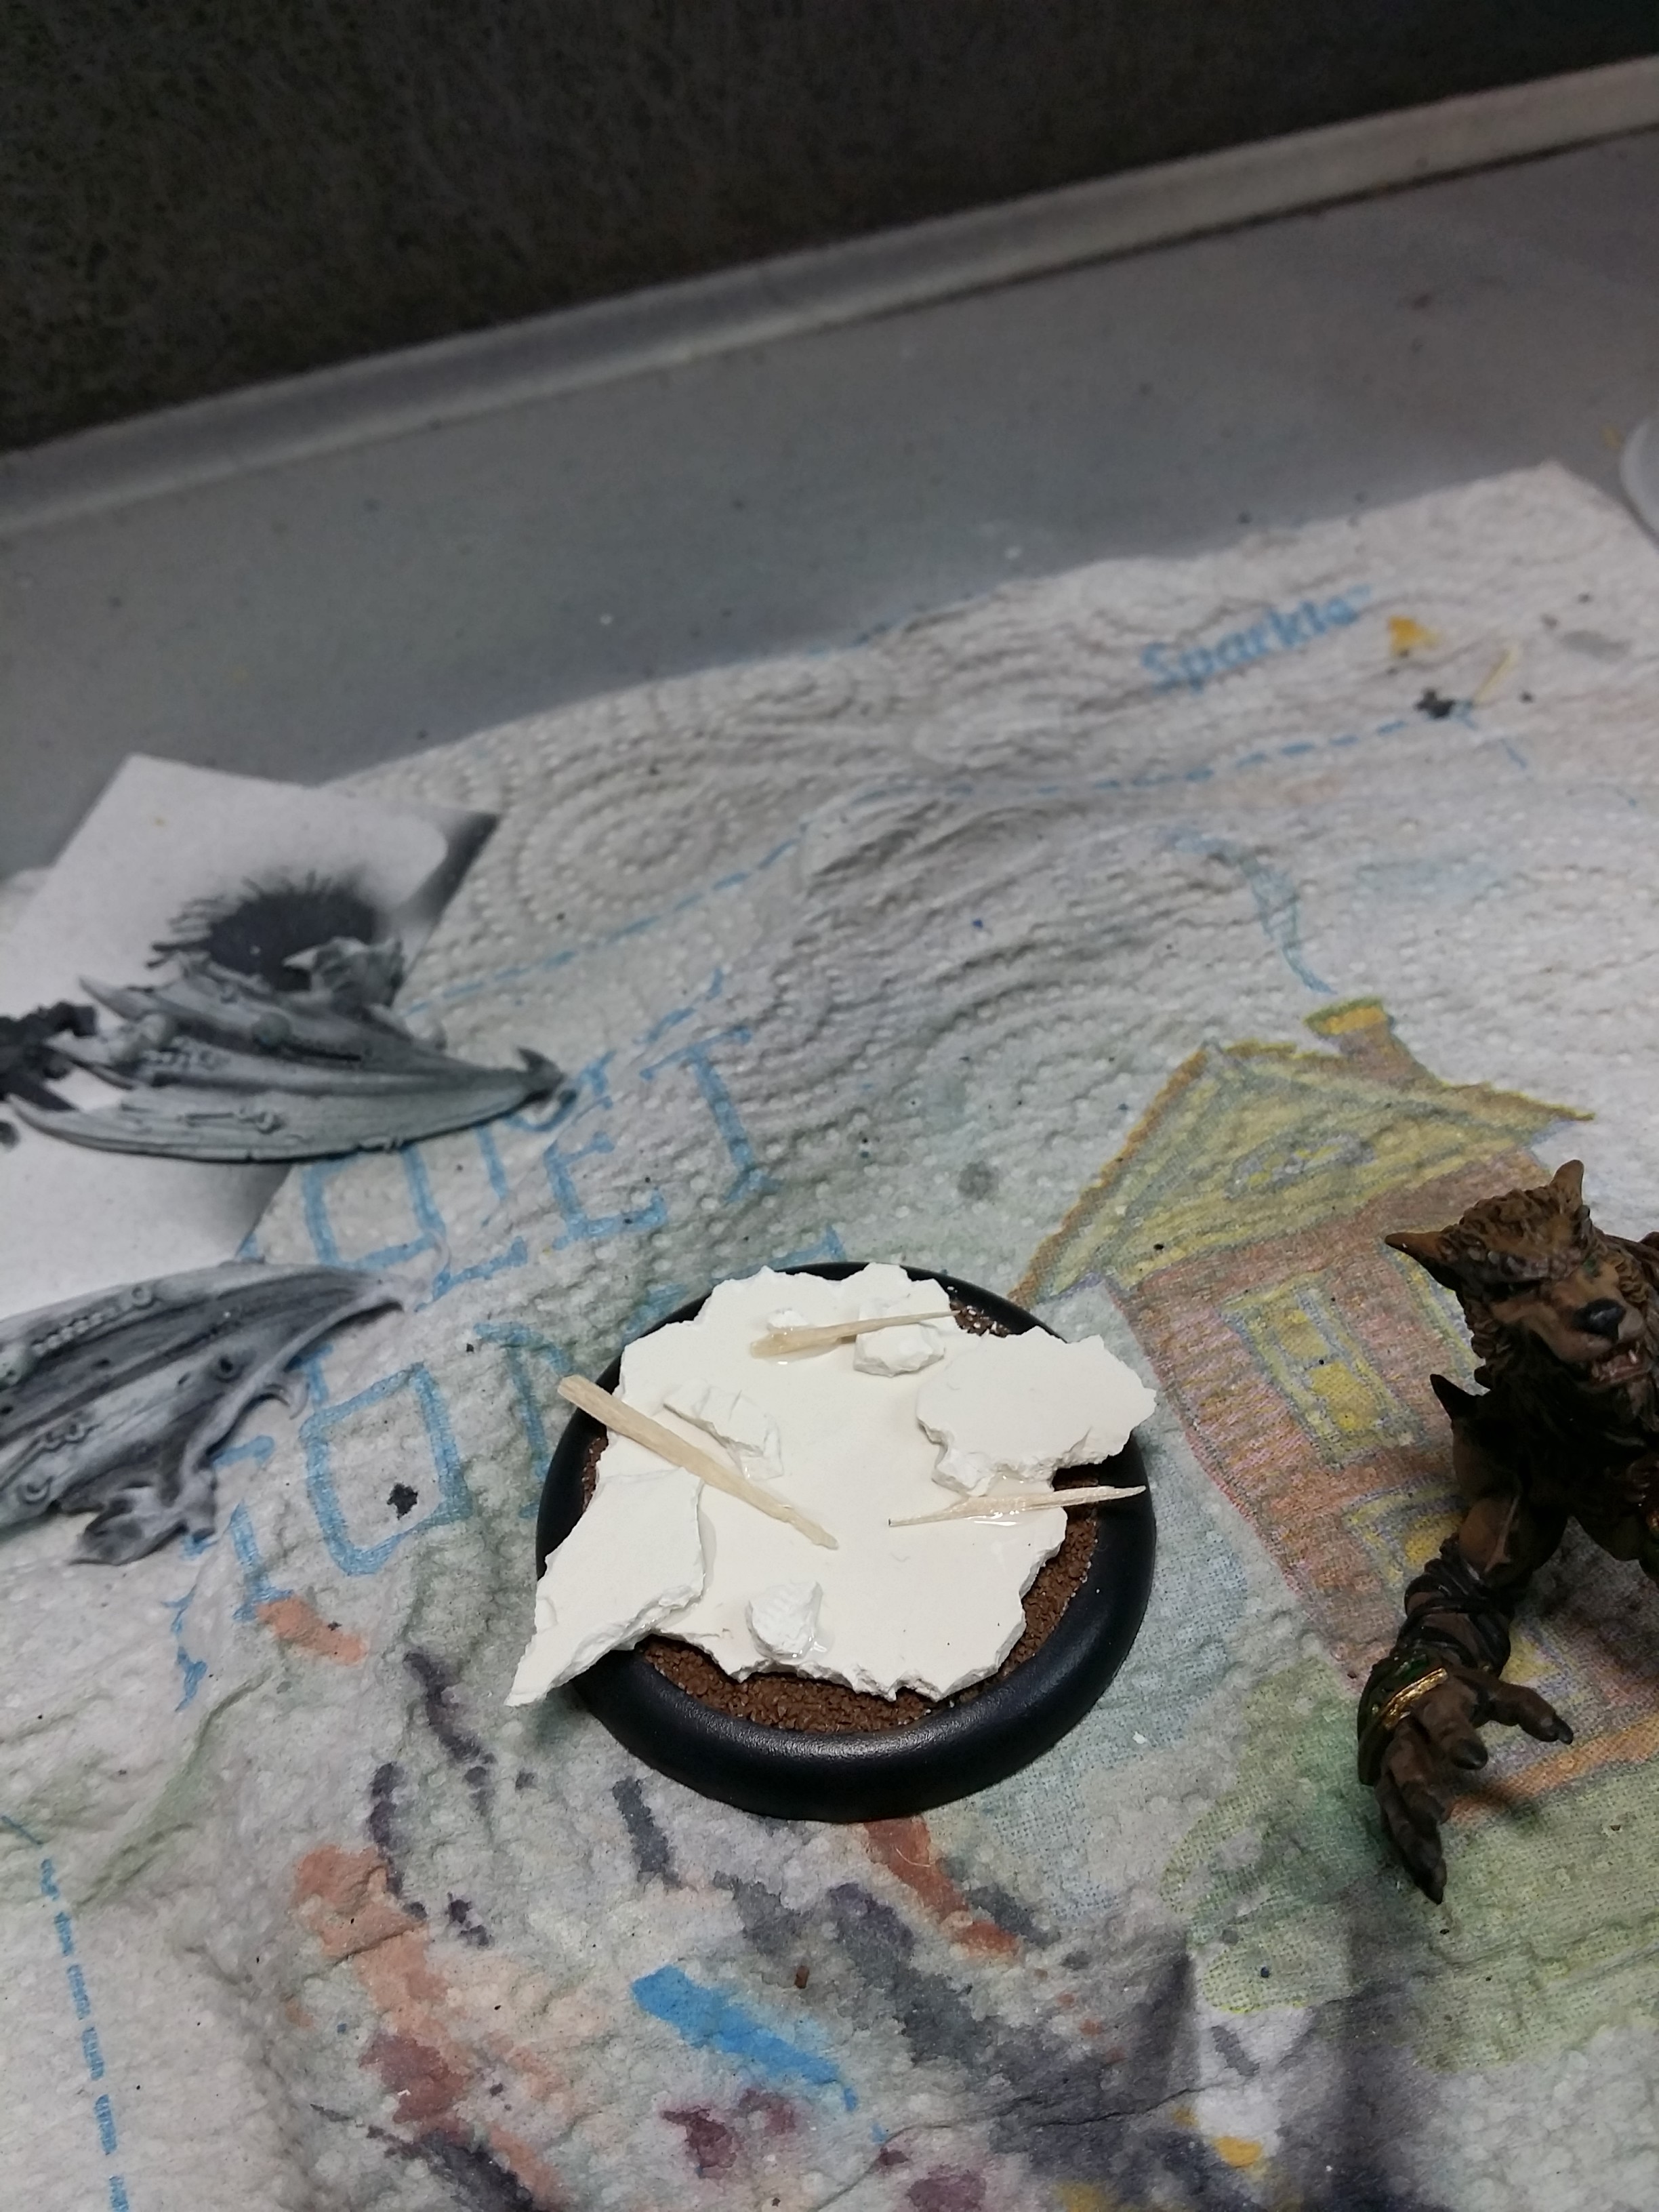
After the glue set, I used Vallejo Red Oxide Paste to fill gaps, smooth transitions, add texture, and glue additional rocks on.
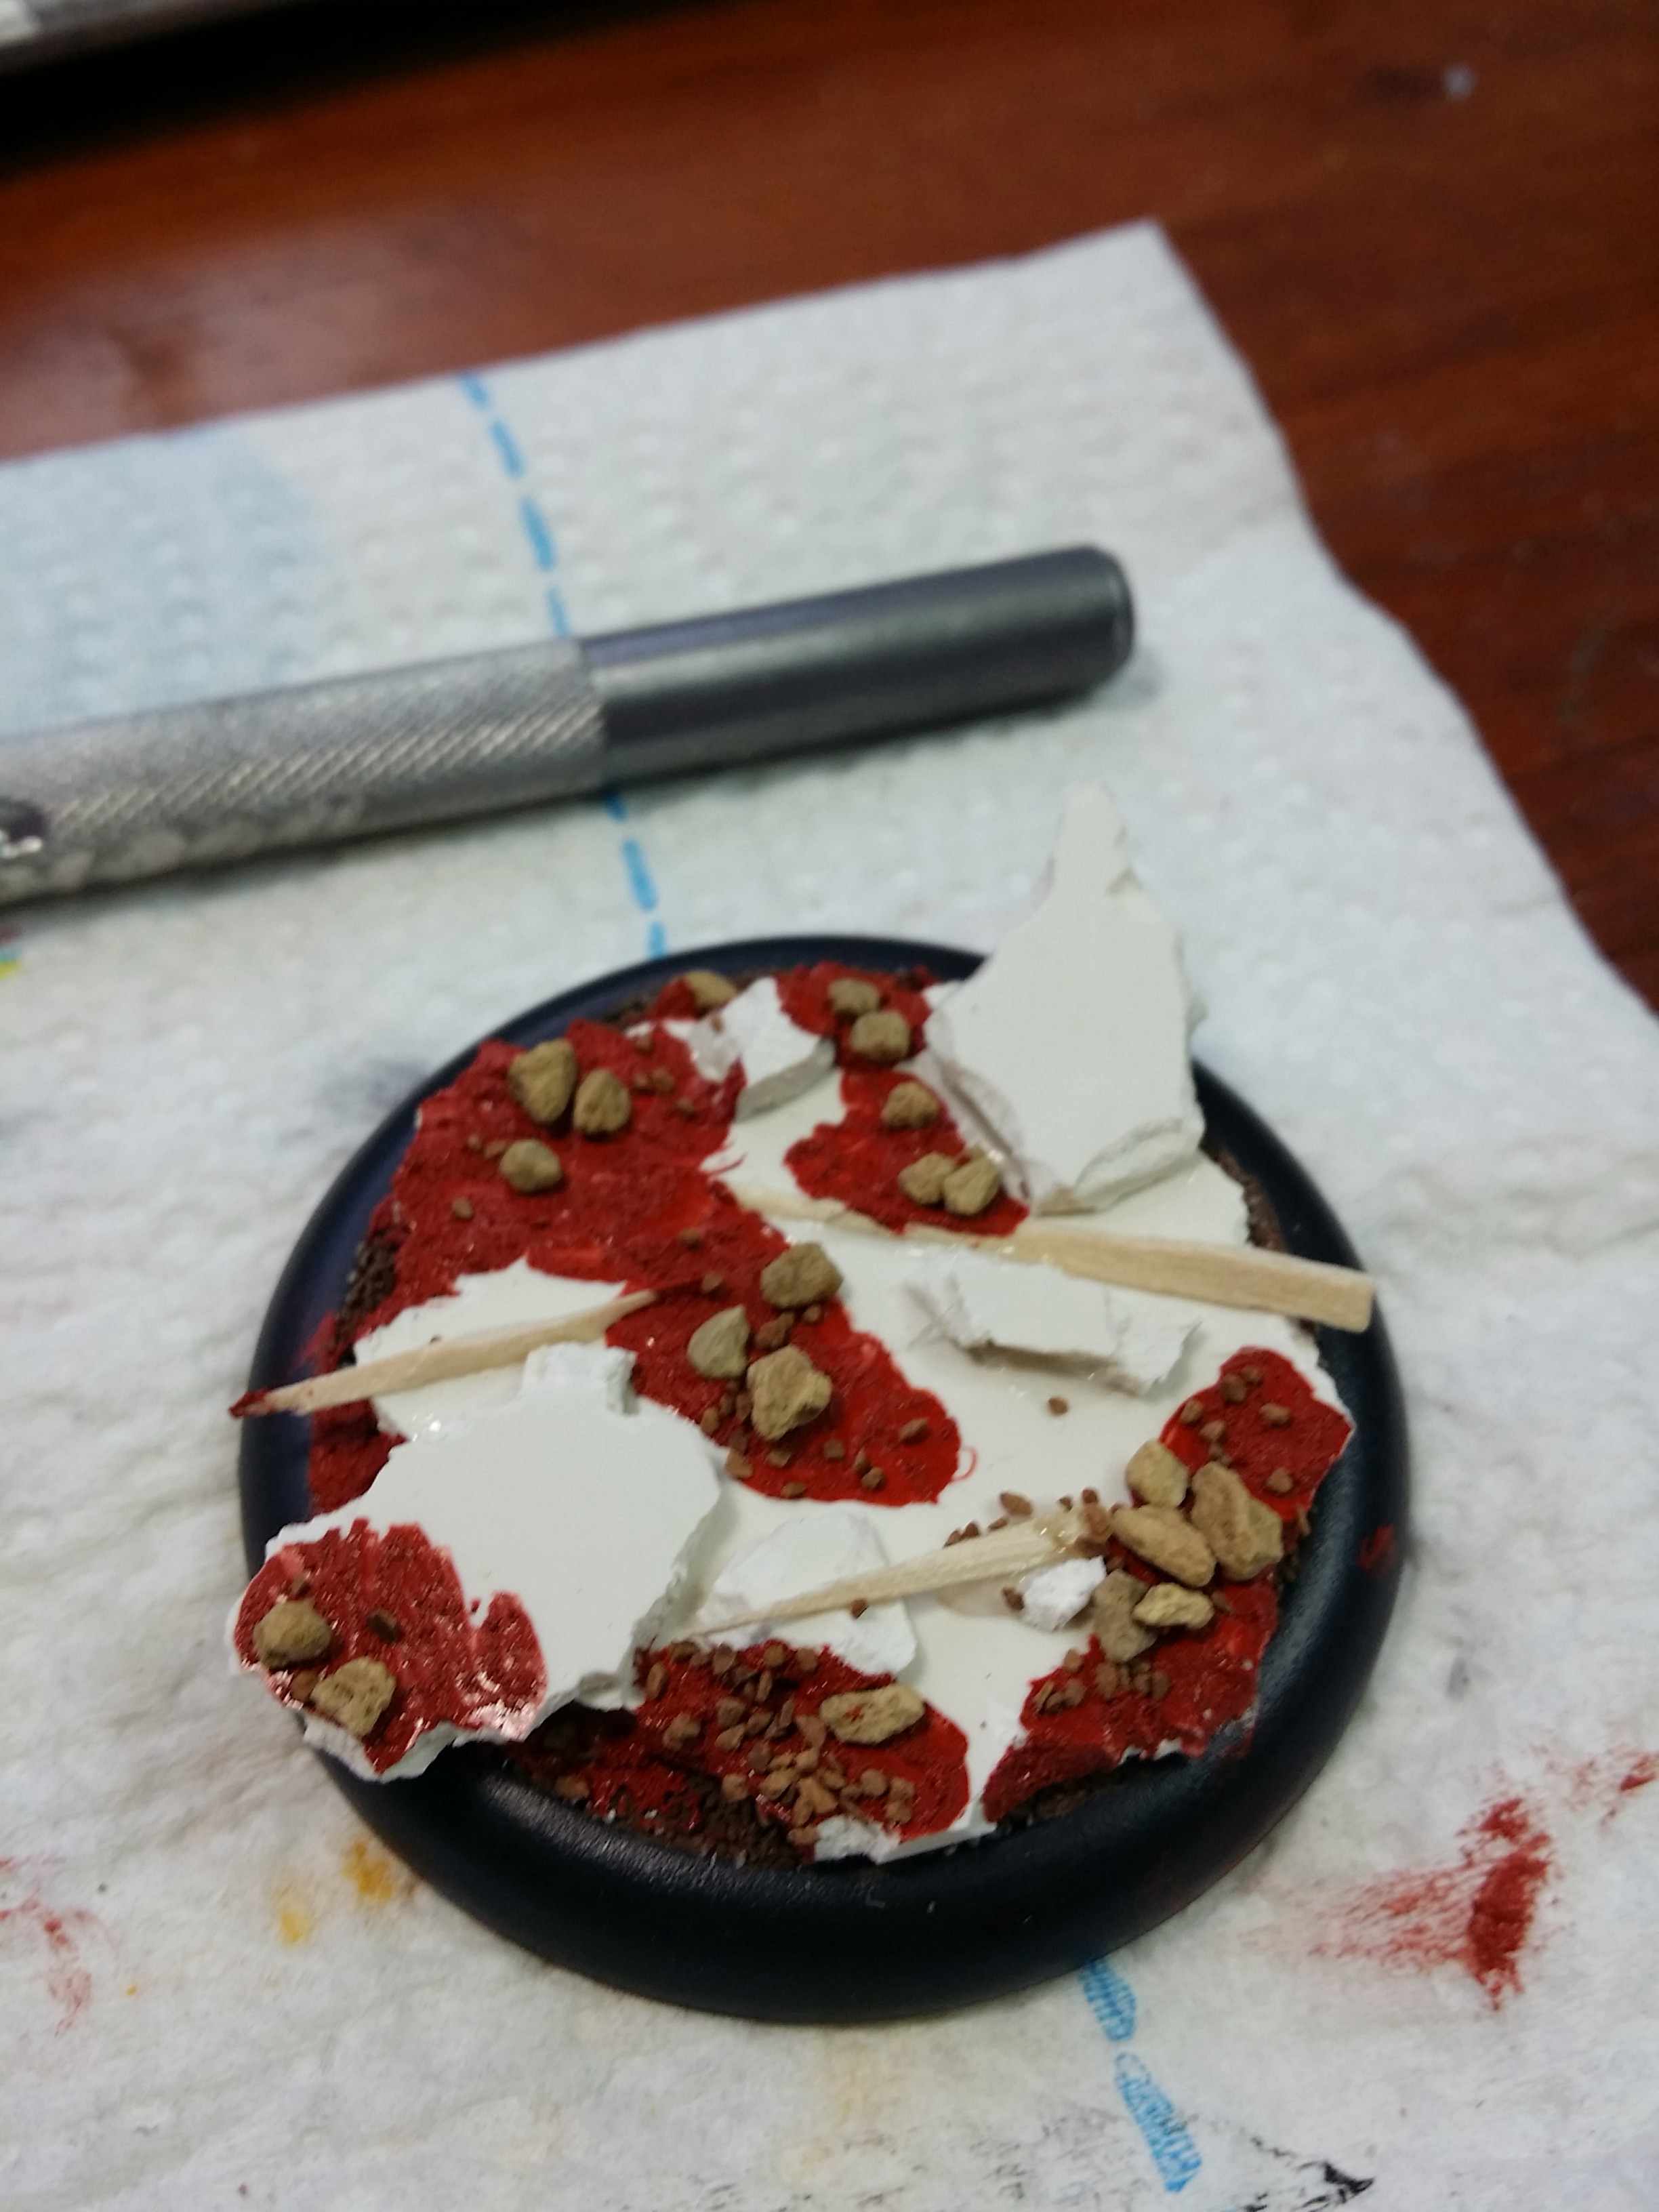
Then I began airbrushing. First was a mix of RMS Woodstain Brown and RMS Golden Shadow. It doesn’t matter too much at this point to be neat.

Then I started adding color, because straight grey or brown is so boring! Also, nothing in nature is truly just one color, a brown rock is more than just brown if you really look at it. I used VGC Goblin Green next.

And RMS Bloodstain Red, then VGC Falcon Turquoise…
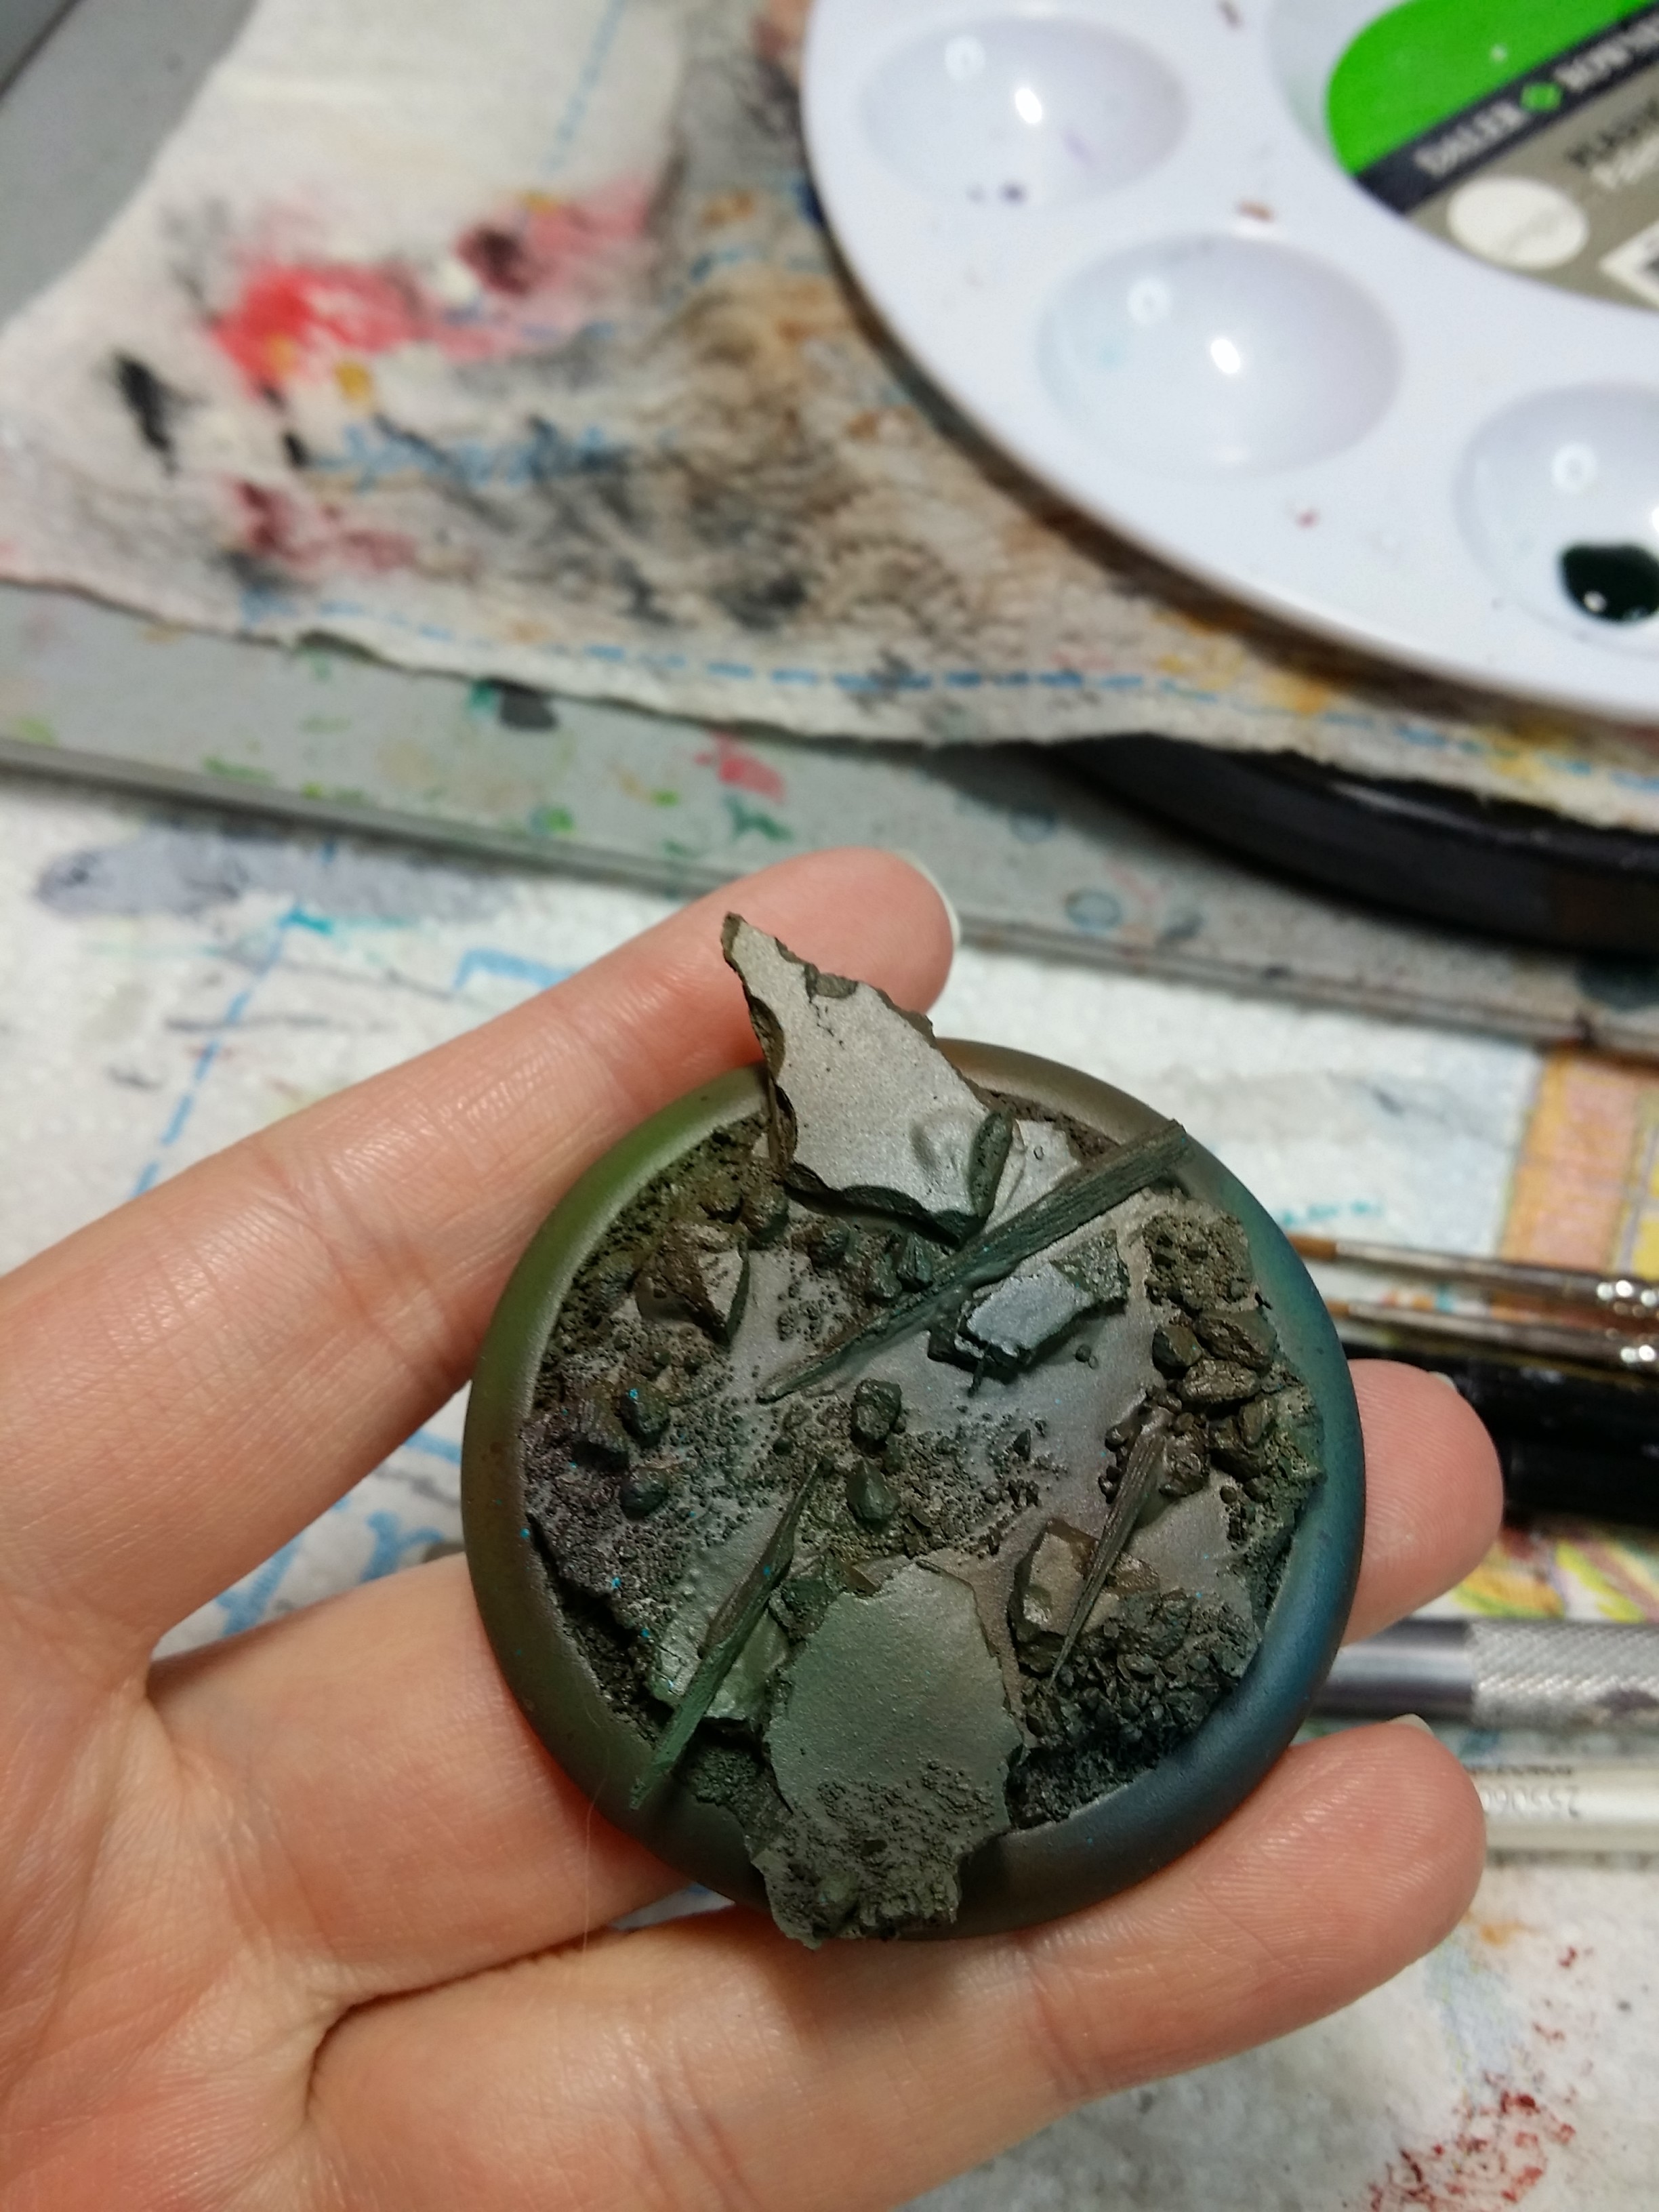
After that I washed it with GW Agrax Earthshade to tie it all back together.

Here is the wash dried:

Then I began drybrushing, first with RMS Aged Bone.

Next, I drybrushed several more colors – RMS Rust Brown, VMC Azure, VGC Goblin Green, RMS Golden Shadow.

Then it was time to black out the edges, drill holes for the pins in the Feral Warpwolf’s feet, and attach the model. Once that was done, I put Vallejo Matte Medium on the base wherever I thought it looked like it needed fallen leaves, and then applied Secret Weapon Summer Color Mix fallen leaves to those areas.


Now that it finally has a base, this model will be listed for sale soon!
