This is the best price I’ve seen on this great airbrush!
Category Archives: Tools
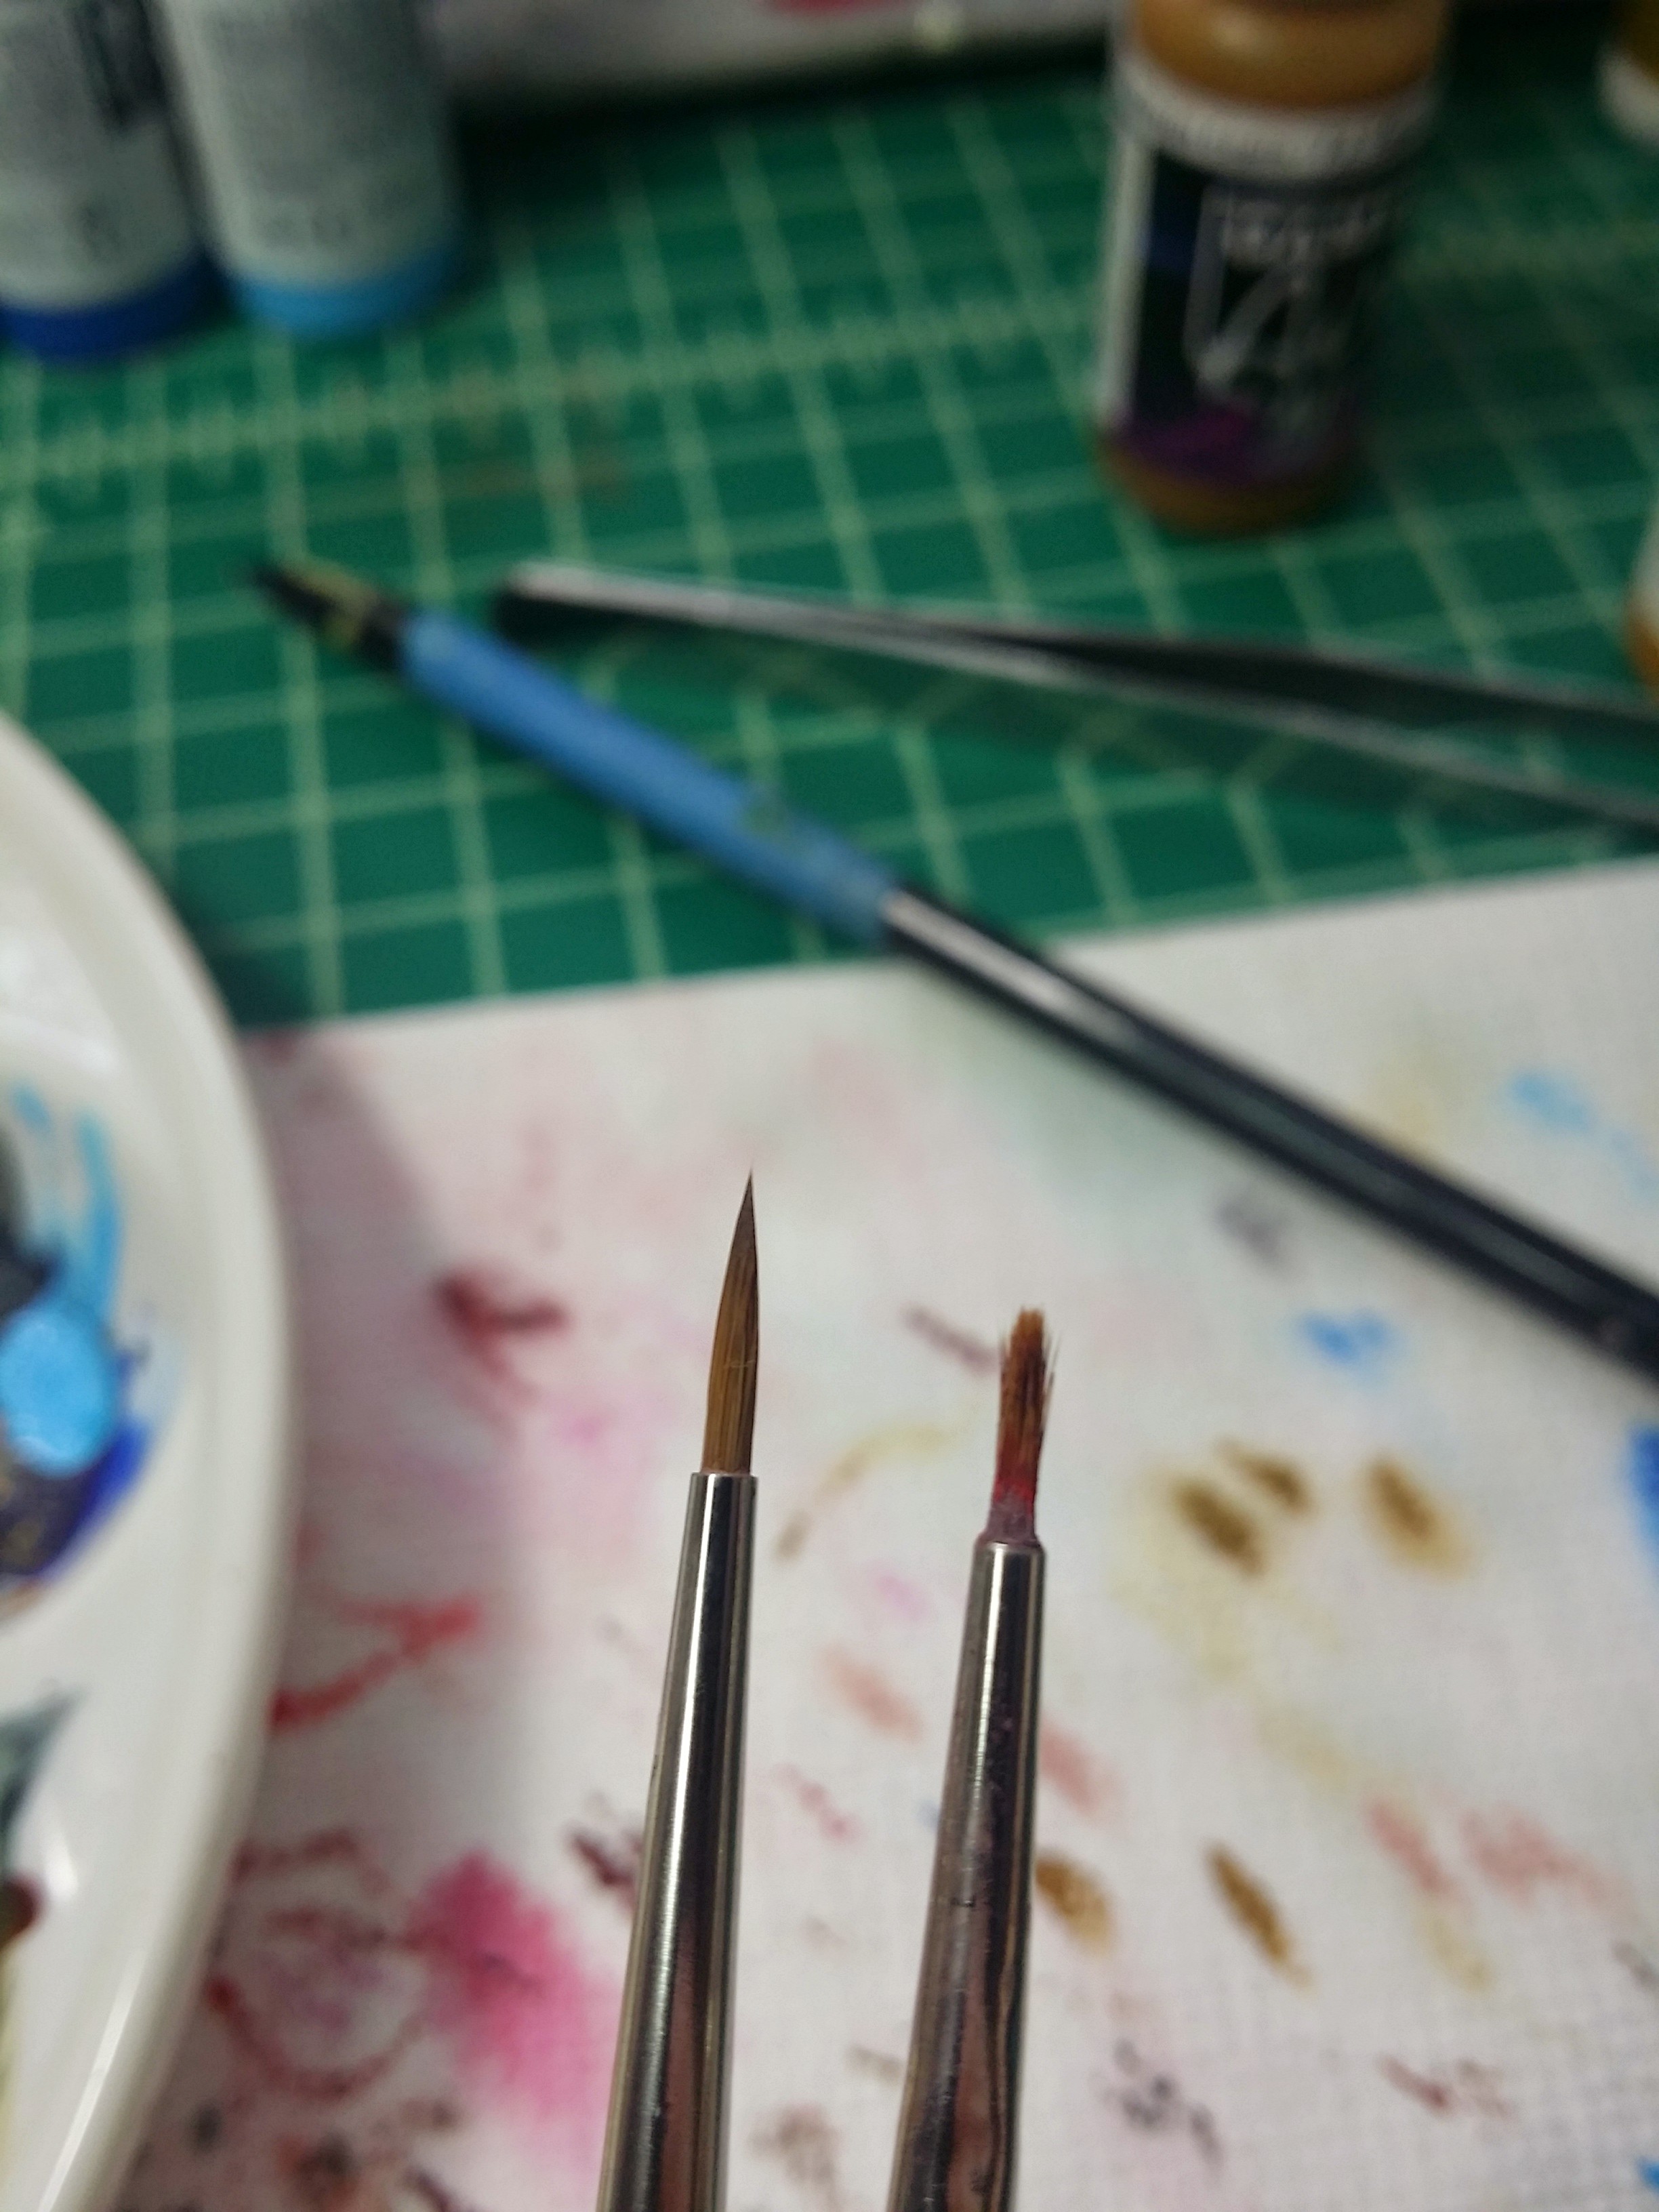
The difference time makes
Both of these brushes are “the same.” They are both size 0 W&N Series 7. The one on the left has been used for about 20 hours of painting. The one on the right has been used for heavy work (painting bases, basecoating over primer, occasional drybrushing) for 2 years after it lost its point. Even well-used “ruined” brushes have some uses! The 20 hours brush is starting to lose its point when painting, and I bet I have at most 20 more hours before I have to use a new one for eyes and such. What I have found is that the bigger Series 7 brushes hold their points for far more painting time than the little ones. I have a size 2 that is probably 60 hours in and it holds its point better than this size 0. When your brush has a decent point, you do not really need a small one! In fact, sometimes a small brush can be a nuisance…such as when you load the brush and by the time you get it to the model the tip is dry but you were going to paint something super small that *needs* a good point.
Paint lines reviews – GW, Vallejo, Reaper, Minitaire, P3
Recently I tried two new lines of paint – Vallejo Game Air and Badger Minitaire. I’ve also used GW, Reaper, Vallejo Model Color, Vallejo Game Color, Vallejo Model Air, P3, Vallejo Liquid Gold (alcohol based metallics), and Army Painter currently and/or in the past. When I first began painting, one of the biggest and toughest to answer questions was what brand of paint to buy. If you look hard enough you can find both positive and negative reviews for every paint line out there, which obviously isn’t too helpful when you don’t have personal experience to base your decision on. Each paint line has pros and cons, and some things may be a con to one person and a pro to another because of personal preferences. Here are my honest thoughts on several prominent paint lines:
Games Workshop/Citadel – This is probably the most widely available paint line out there, which is a big pro, especially if you don’t have a lot of game stores in your area. The pots are horrible, and your paint *WILL* dry out faster than it ought to. The paint costs more per ounce than most other paints, also. I feel like the pigment density isn’t as good as other lines, although it is serviceable and you can probably accomplish anything you need to with it. The paint line is quite large, and it is set up in such a way as to promote a painting process that is 1. prime 2. basecoat 3. wash 4. drybrush 5. highlight edges. I feel like this teaches bad habits and can actually limit a person’s painting growth unless they take it upon themselves to research new ways to do things and even new things to try to do. I’ve been asked by prospective commission clients how many washes and drybrush highlights a particular painting standard contains – typically these people have been greatly influenced by GW and ‘Eavy Metal painting. For most commission painters, rarely does this describe the actual painting process.
Reaper Master Series – At least in my area, this is the second most widely available paint line. It is also the one I ended up purchasing a great deal of when I first began painting. These paints really are great, and that’s not just my Love of All Things Reaper talking. The dropper bottles keep your paint usable for much, much longer than the Citadel pots. Rarely, a dropper bottle will unexpectedly shoot out a bunch of paint after being shaken, but that’s something that seems to happen occasionally with every paint that is in a dropper bottle. My biggest complaint with Reaper paints was that after several years the paints started having tiny dry bits inside that would cause me problems if I tried to airbrush with them. That probably has little to do with the paint line, and more to do with the age of my paints. The paints are among the least expensive per ounce. The paint line is set up in triads of a shadow color, mid-tone, and a highlight color. Although the shadows are typically darker and cooler, and the highlights are typically warmer and lighter, I personally found that there just isn’t enough contrast within a triad to be able to get away with only using the colors within it. It may be possible that that is a result of how I paint and not something everyone experiences. I don’t know. I also feel like although the triads are designed for convenience and to take the guess work out of it for people that aren’t as familiar with color theory, they also are something of a disincentive for people to learn color theory in the first place and learn how to pick colors on their own. The trick is to stop looking at it as triads, and just look at it as a selection of different colors. One last minor complaint is that this paint will rub off if handled a lot before being sealed, especially on metal miniatures. That is something that can be fixed by mounting the miniature on something to hold during painting and sealing the mini before use.
I’m sure by this point you can tell that I think all-in-one solutions for the painting process and color selection aren’t particularly helpful in the big picture. I still regret wasting time trying to learn to paint by reading GW’s How-to-Paint book, and also trying to make triads work for me and wondering why my results just didn’t have the contrast they needed. That being said, I only switched away from Reaper paints when I was running out of basically all of them and was going to have to buy a ton of paint either way. I would still happily use them if I was in a situation where I didn’t have access to my own paints. I also still have a small selection of Reaper paints that I just can’t live without.
Vallejo Model Color – This is one of my most preferred paints, and it is what I ended up replacing my empty Reaper paints with. The paint is quite thick and requires thinning no matter what you are doing with it. Price-wise it is pretty middle-of-the-road. The line is absolutely huge and includes traditional artist colors, accurate military colors, and many, many others. Some game stores have at least part of this line in stock regularly. I feel like this paint separates a little less than others, but it still happens. I haven’t had any problems with this paint rubbing off, and after a day or two it’s pretty tough. The active time on this paint seems to be a little on the short side, and as with any paint, the weather conditions have an effect on this. Really, this is a well-rounded, quality paint.
Vallejo Game Color – This is actually one of my least favorite paints, avoided almost as much as GW. They are the same price as Vallejo Model Color, but their consistency is thinner like Reaper. They also rub off if handled before sealing. The line isn’t as big as Vallejo Model Color, and although it has all the staples, it seems to gravitate towards brighter, Fantasy-type colors. The thing that really put me off of this paint is that when thinned, especially if thinned a lot, it behaves…funny. I had difficulty applying thin, smooth layers of color. Also, when applied while thinned, it sometimes beaded up on the surface on my models. It didn’t really matter what surface I was applying it to, it just beaded up sometimes, and other paints did not on the same surfaces. I had these experiences with all of my game color paints, so it was not just a bad bottle. I don’t have so much extra time that I can spend it fighting my paint, so I had to get rid of these.
Vallejo Model Air – Another great paint line from Vallejo. This paint is similar in cost to Model Color, smaller selection of colors, but thin enough to airbrush straight from the dropper bottle. It mostly contains earth tones and military colors, but there are some brighter colors as well. In my experience, this paint is one of the hardest to find, although some game stores do stock it sometimes. It just seems like even if they have a rack for it, it’s almost always at least half out of stock. In my experience, this paint is the one most likely to unexpectedly shoot extra paint out when you open it after shaking. One other con is that some of the yellow and orange tones have significant problems with coverage. These paints have my absolute favorite metallics, however.
Vallejo Liquid Gold (alcohol based) – These metallic paints have a fantastic finish, but I find them difficult to work with. They are pretty expensive, and almost impossible to find in a store, but readily available online. My biggest gripe with these is that they don’t like to neatly stay put on the model. Not having the surface tension of water will do that. That being said, for some people I’m sure these have their place.
P3 – This is a line of paints that I don’t have quite as much experience with, but I do have a few things to say about it. They come in pots similar to Citadel paints. The pots aren’t nearly as likely to dry your paint out, but they have resulted in my spilling half a new bottle of paint all over my painting table in a way that would never happen with a dropper bottle. The working time of these paints is pretty long. They are also quite thick, so they need thinning pretty much always. The line has a very limited range of colors centered around the studio color schemes for the various Warmachine and Hordes armies. That being said, as with any line of paint, if you don’t have the color you need you can certainly make it. I feel like making good use of this line of paint requires some knowledge of color theory and how colors mix. I haven’t had any trouble with these paints rubbing off before being sealed. I personally find these paints a little inconvenient.
Badger Minitaire – This is a relatively new paint line (or perhaps a reformulation/re-branding of an older line of paints by Badger) that I tried to use for a couple weeks. They are probably the least expensive paint out there. They are supposed to be able to be sprayed with an airbrush straight from the bottle, but I found them overall a little thick for that. This line is pretty comprehensive, although I still found myself wishing for a few more bright colors. The most interesting thing about this paint line is the Ghost Tints, which I found the most use for with a brush instead of an airbrush. These reactivate very easily, even if sealed sometimes. These paints separate horribly. I had brand new paints that required manually stirring and then 15+ minutes of shaking to be able to use at all. They also re-separated within seconds on my palette. When brushed, even when thinned and brushed on in super thin layers, I found these paints to be so shiny that I had to keep spraying the model with a satin varnish just to be able to see enough to keep going. In addition to being shiny, when brushed on, especially when thinned, this paint forms bubbles on the model. These two problems made it unusable for me. I have to have a paint that I can both brush and spray, and this one did not work for me when brushed. That being said, there are some painters out there that are doing fine with these paints.
Vallejo Game Air – This is a brand new paint line, and I love them. I haven’t seen these paints in any stores, but they can be found online. It’s still a little tough to find them for a reasonable price to ship to the US, but that will change with time. They are pretty much exclusively bright, fantasy-type colors, so I find the need to maintain another line of paint as well. They can be sprayed straight from the bottle, and their price is similar to Vallejo Model Color and Vallejo Model Air. I haven’t had any problems with extra paint shooting out in the two months I’ve been using them, but I assume it’s coming at some point. They act like Model Air, but like an improved version. I haven’t had any problems with coverage. Strangely, they smell amazing.
Army Painter – I use Army Painter Inks, and I love them. They are inexpensive, can be found in a lot of stores, and are very versatile. They are not just an alternative to Citadel washes, but if you want to wash with them, you can. They do match some of the colors quite nicely if you’re replacing Citadel. If you want to glaze, go for it. I find they are great for shading and giving the impression of texture. They are also useful on metallic paints. Unlike some other inks, they do not reactivate. Army Painter also makes paints, but I have absolutely no experience with them, so I can’t speak on that.
There are other paint lines out there that I have not yet tried, but I know other painters have success with. Off the top of my head I can think of Andrea, Scale 75, and Golden acrylics.
Finished Reaper Annasha Tomebreaker
Here are finished pictures of a recent commission. I’ve got a few new models I’ve been working on. I also got a new camera! No more smartphone pictures! I had a semi-decent point-and-shoot, but the motor in the lense broke recently, leaving me with nothing but the camera on my Galaxy Note 3 phone. I found a deal on a Samsung NX300, and now I need to learn how to use it! Hopefully, I will be able to start posting better pictures of the models I have around and future models as well.


I am working on a Kingdom Death Survivor as well as a Privateer Press Circle of Orboros Bradigus. After Bradigus, I should be painting a Khador Juggernaut and a GW Ogre Stonehorn conversion.
On another topic, I’m switching over from mostly Reaper paint to Vallejo Game Air and Badger Minitaire. I do still like Reaper paint, and I’m keeping quite a few of them…but I’ve been using mostly the same bottles of paint since I started painting in 2012, and a lot of them were running low, so I needed to buy more paint anyways. I’ve tried a few Vallejo paints and I do really like them. Also, I’m making an effort to use my airbrush more in my work, and constantly having to thin Reaper paint was a bit of a pain. Vallejo Game Air is a new line or airbrush-ready paints designed with fantasy colors in mind, and so far I really like them. I haven’t tried the Minitaire line yet, but I will soon!
Reaper Bones Plastic followup and WIP
On yesterday’s post, there was a very useful comment with a link to information about working with Bones plastic: http://www.reapermini.com/forum/index.php?/topic/48668-bones-preparation-glues-putties-mould-lines-etc/
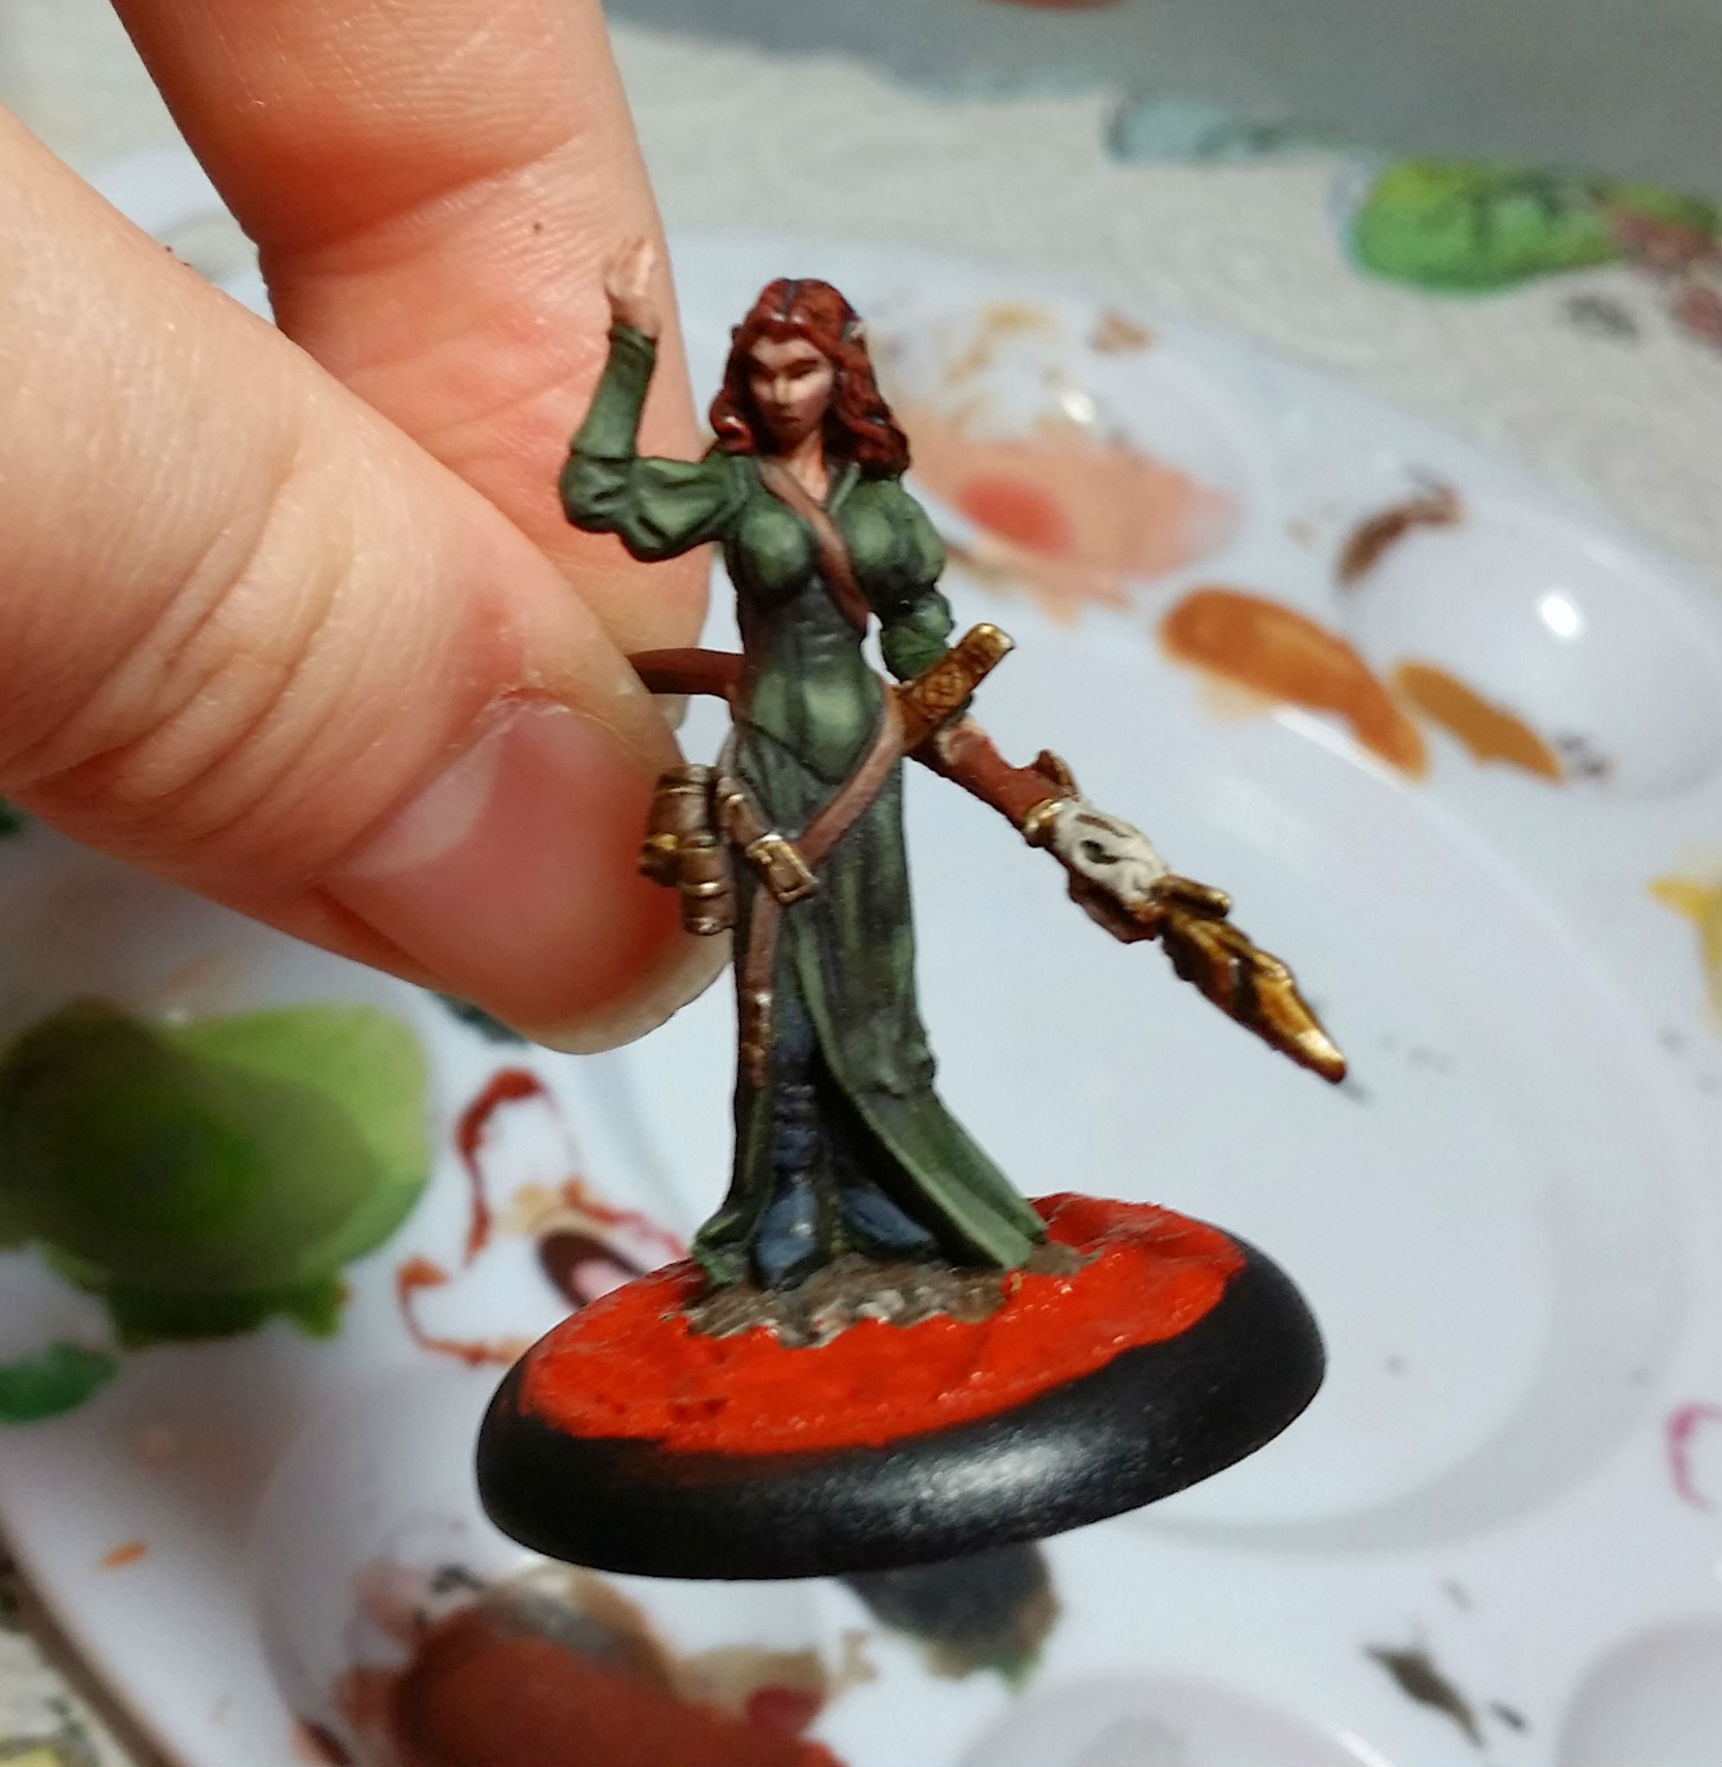
The staff on the Bones model that I had to boil is still straight, so this really does seem to have fixed the problem.
I repainted her, and here she is attached to a round base with some Vallejo Oxide Paste to blend it all in:
Reaper Bones Plastic
Happy New Year!
I decided to take a night off from my previously scheduled painting and grab a mini out of my Vampire box from the first Reaper Bones Kickstarter to experiment with this new plastic. I found only two minis loose in the box (the rest were bagged together, stapled together, etc.) – Mister Bones and a very basic female something-or-other. I didn’t want to mess with Mister Bones, so the as yet unidentified female it was.
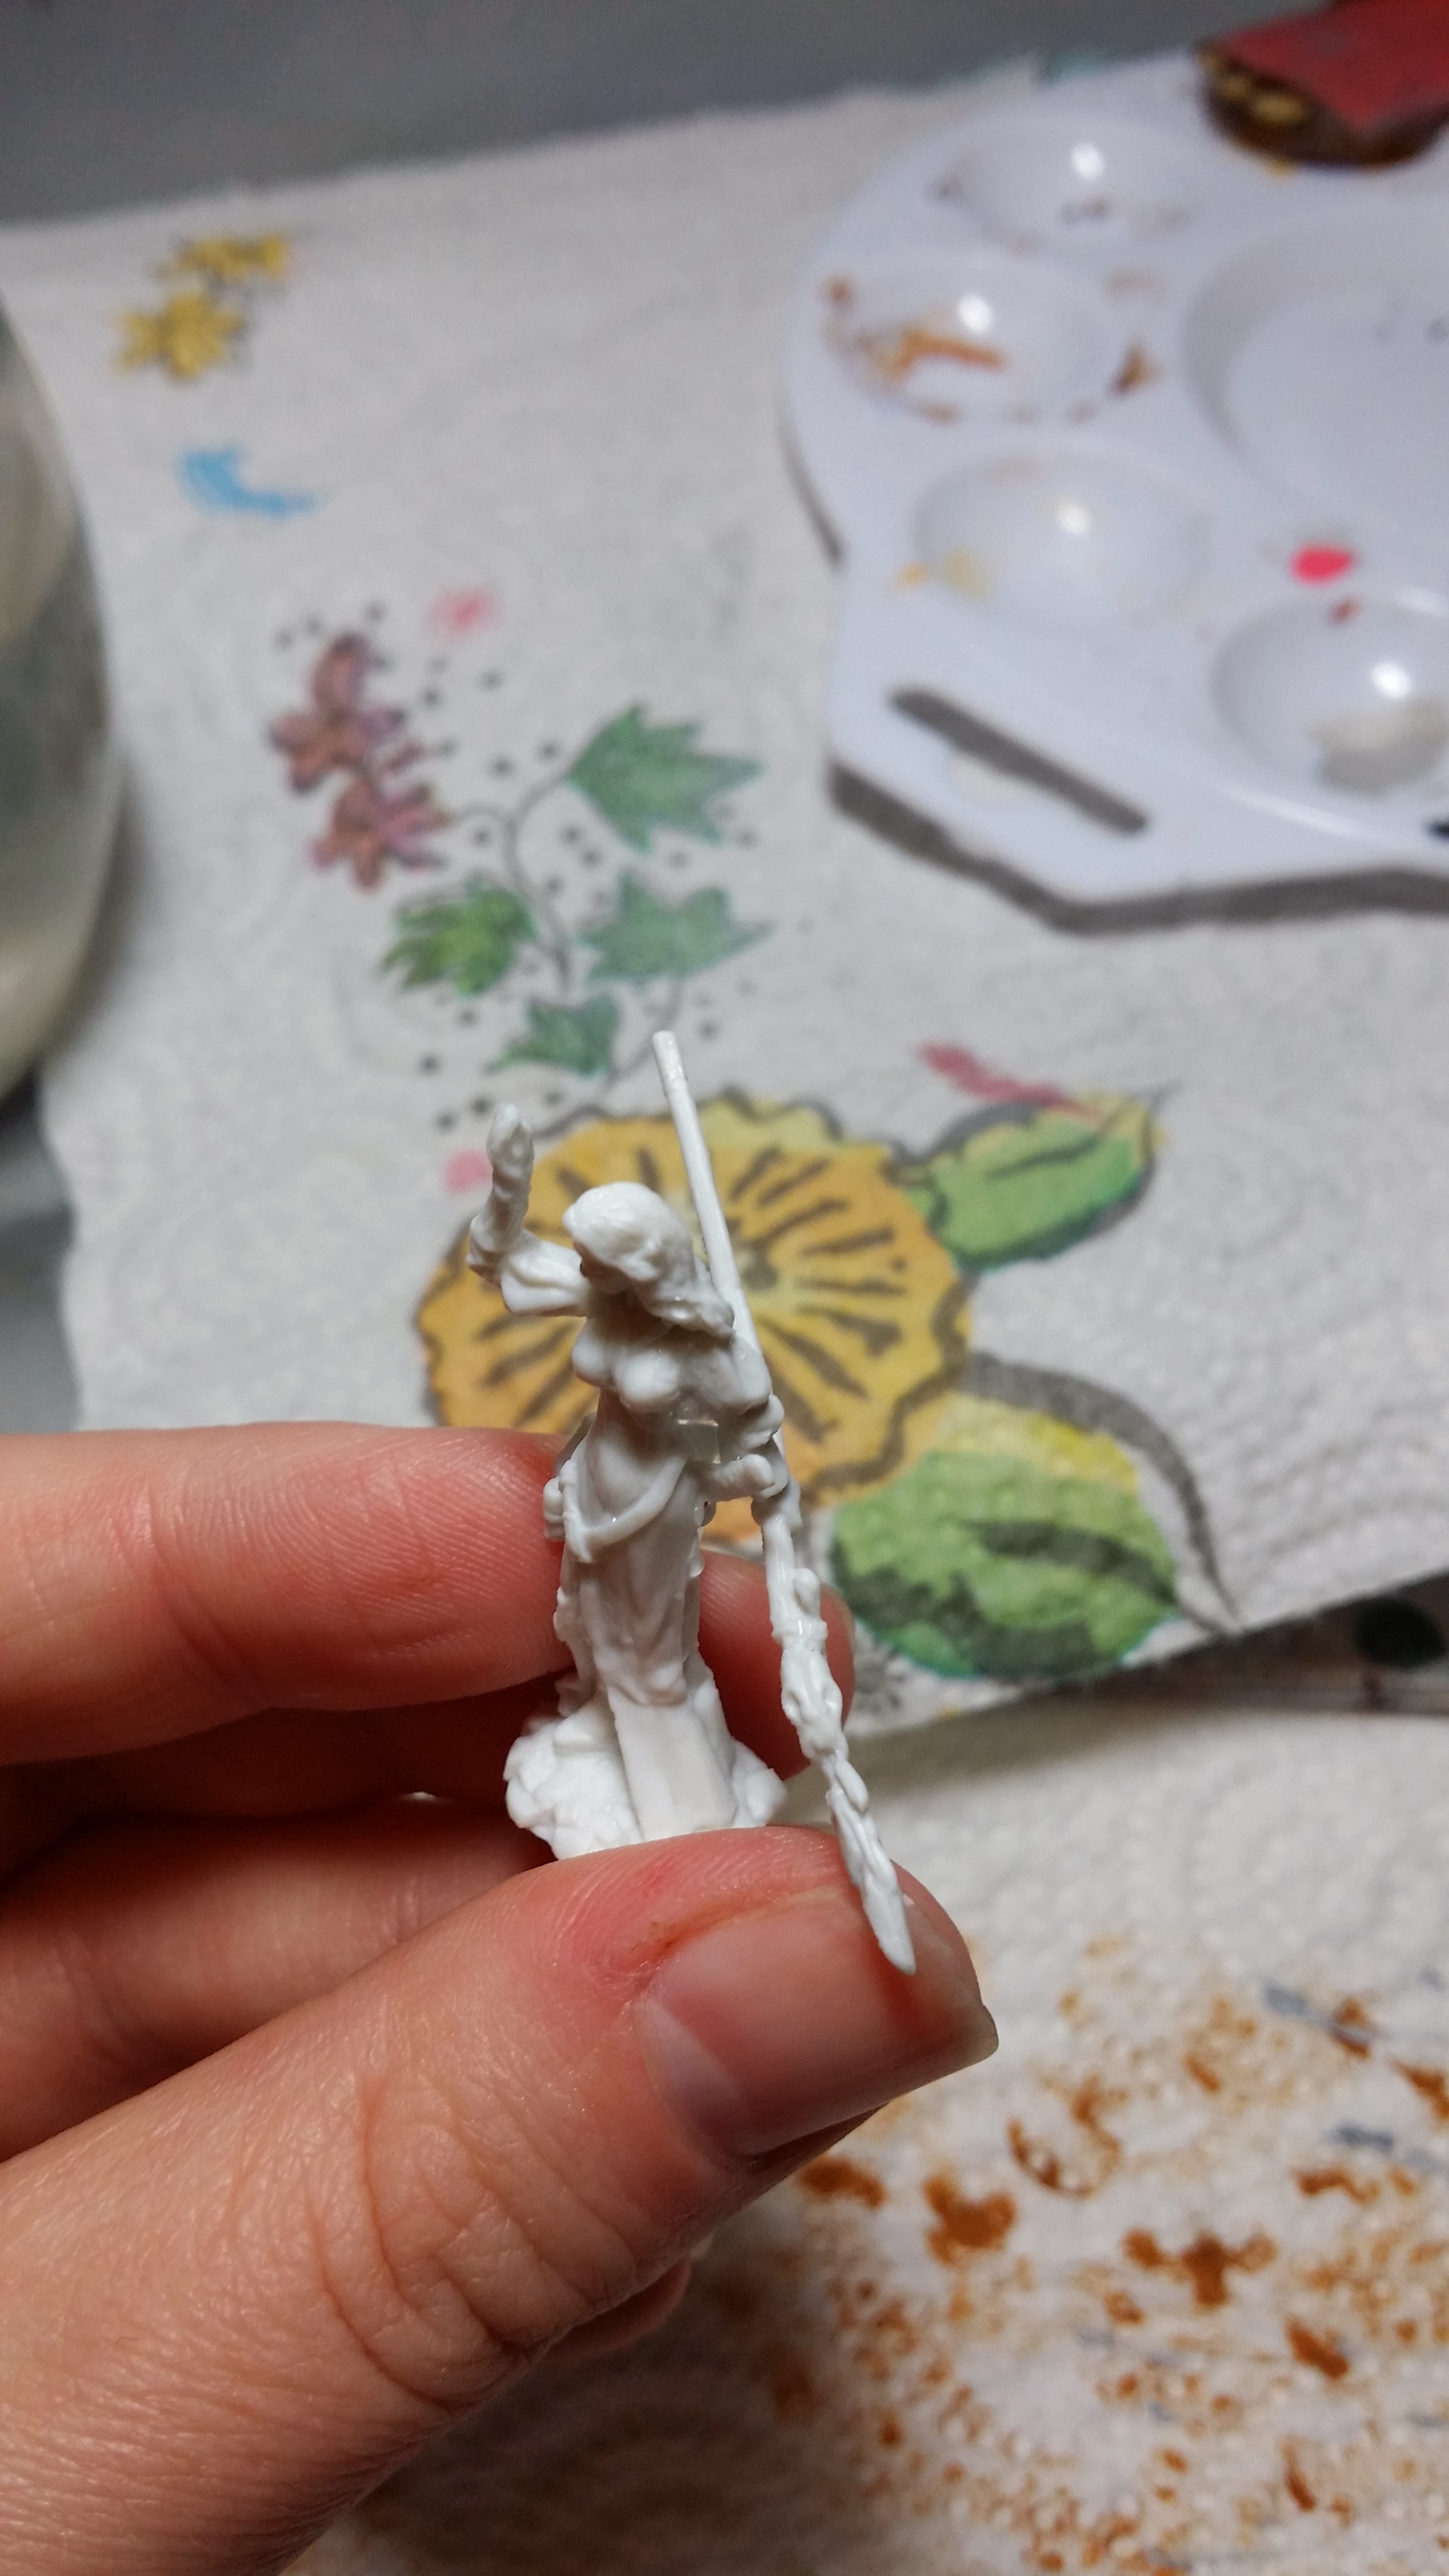
Supposedly this plastic does not require priming, so I didn’t prime it. I did clean mould lines and scrub the model, but that was it. I even left her on her broccoli base since it was so tiny I figured I could blend it easily into a regular base later. I found the weird, crunchy, hard spot that every Bones mini I’ve handled has had. Not entirely sure what that’s from, but on this model it was in her armpit, which made it a bit harder to clean up.
Her staff was bent up pretty badly, as you can tell in the picture below.

I put her in scalding hot water from the tap, held the staff straight, and put her in cold tap water. This seemed to fix the problem.
The first layer of paint went on a bit differently than I’m used to, as though the paint was a wash. After that dried, the rest went on as normal. It seemed to be staying on well also, so I think it’s probably true that this plastic does not need priming. I have a really hard time seeing the details on it though, so the matte finish of a primer may be helpful.
In this picture, her skirt, top, and boots are all the same color, but the skirt has several layers of paint and the rest of her dress and boots has only one layer, so you can see what I mean about the paint going on like a wash in the first layer.

The next morning her staff had reverted to its previously bendy self.

I did some reading, and found that the temperature of the water I used to straighten her staff the first time may not have been hot enough. This time I was going to put her in boiling water. There was a good chance of ruining the paint already applied to her, but that’s a small loss in the name of science. Figuring out how to handle Bones plastic is pretty important considering how very many Bones minis I have now and will have in the future from the second Kickstarter.
I dipped her in the boiling water for about 10 seconds, and her staff completely reset itself. I didn’t have to hold it straight, and cold water was probably unnecessary. I did notice that the staff was less pliable after this process, but only a little.
Unfortunately, a lot of the paint was ruined.

I found out what mini she is before starting this post – Reaper Bones 77193 Hyrekia Dragonthrall Mage. She’s not even supposed to be in the Kickstarter Vampire box! Of course if I try to just randomly pick a mini out of that box the extra one would be the one I pick, and of course I would ruin her, lol. Oh well. I’m going to give her staff some time to see if it stays straight.
Paint and brush racks by TheIronBow
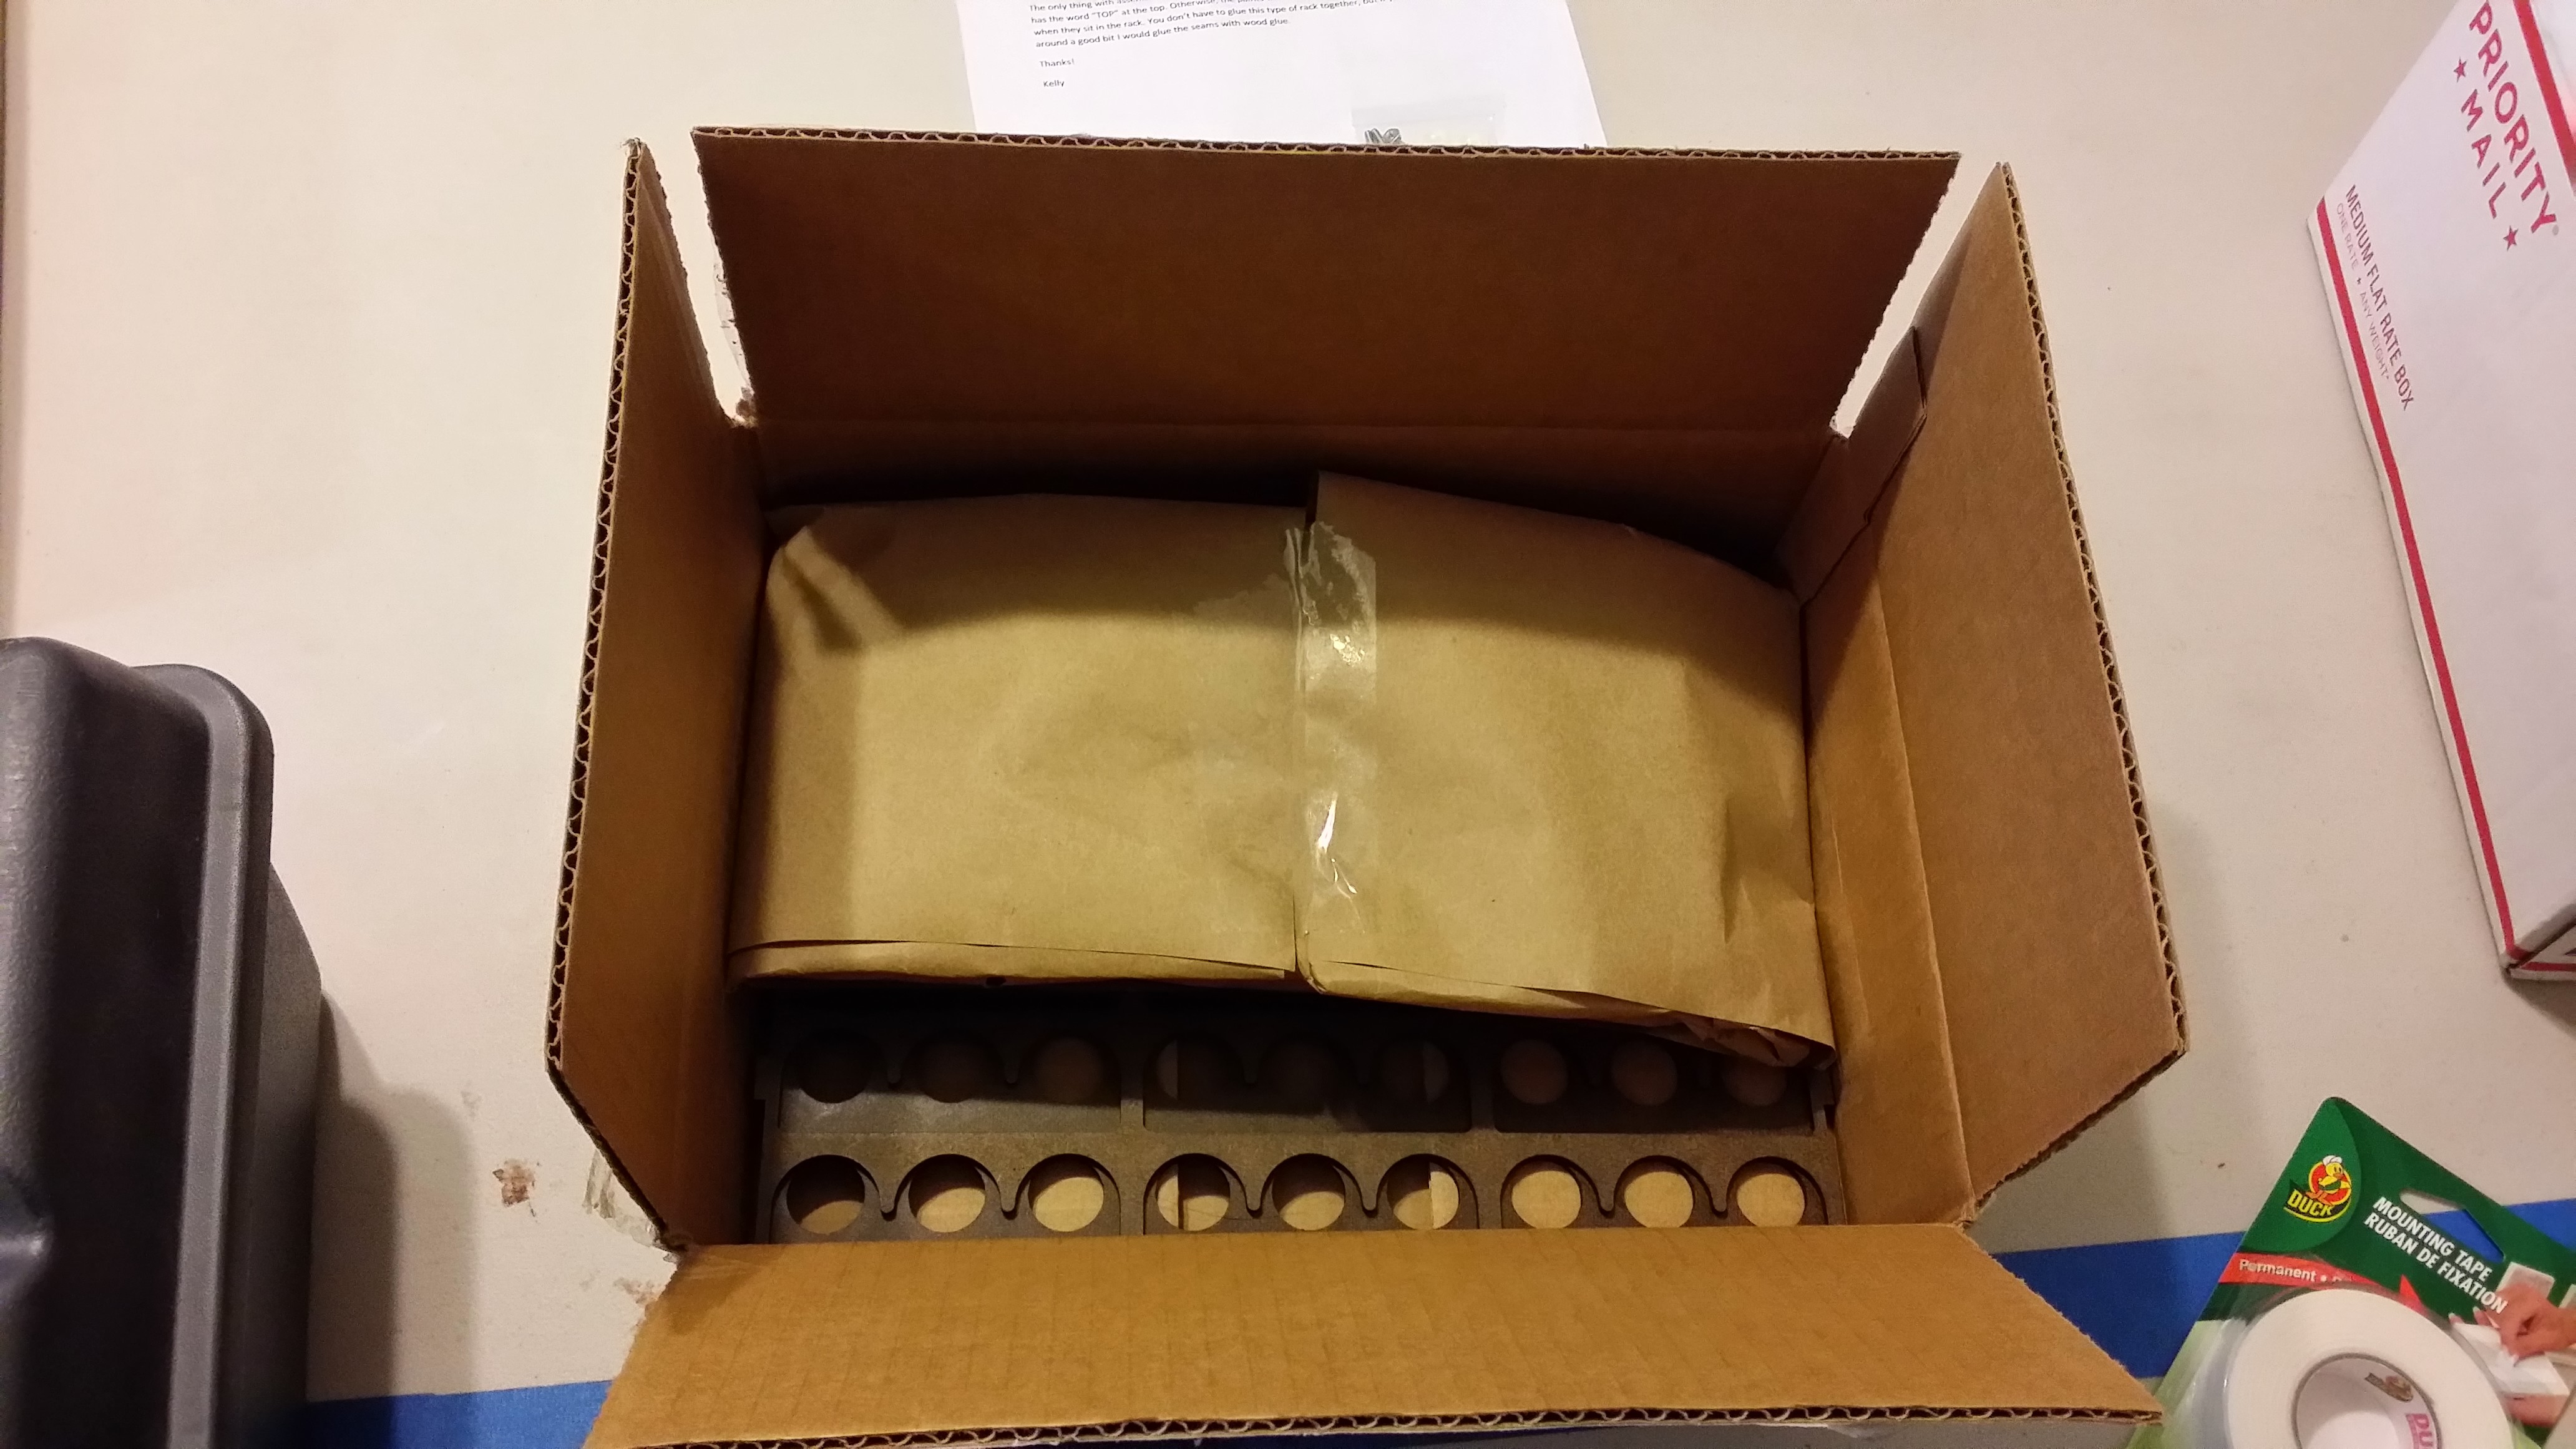
Recently I received very nice racks for brushes and dropper bottle paints from an Etsy store called TheIronBow. They shipped quickly, and they were well packed with a letter that included instructions on assembly.

The paint rack is completely vertical and holds 54 dropper bottles. Its assembly was extremely simple and required no tools.

Assembly on the brush rack was a little tricky. The letter gave some basic information about assembly, but for the most part you are on your own to figure it out. I had a little trouble. I wanted to assemble it without tools or glue as it really seemed like you ought to be able to considering how the parts are held together. I did manage to do it without tools, but glue was necessary for me. Here’s how I ended up doing it:

Whoops!

That’s better..
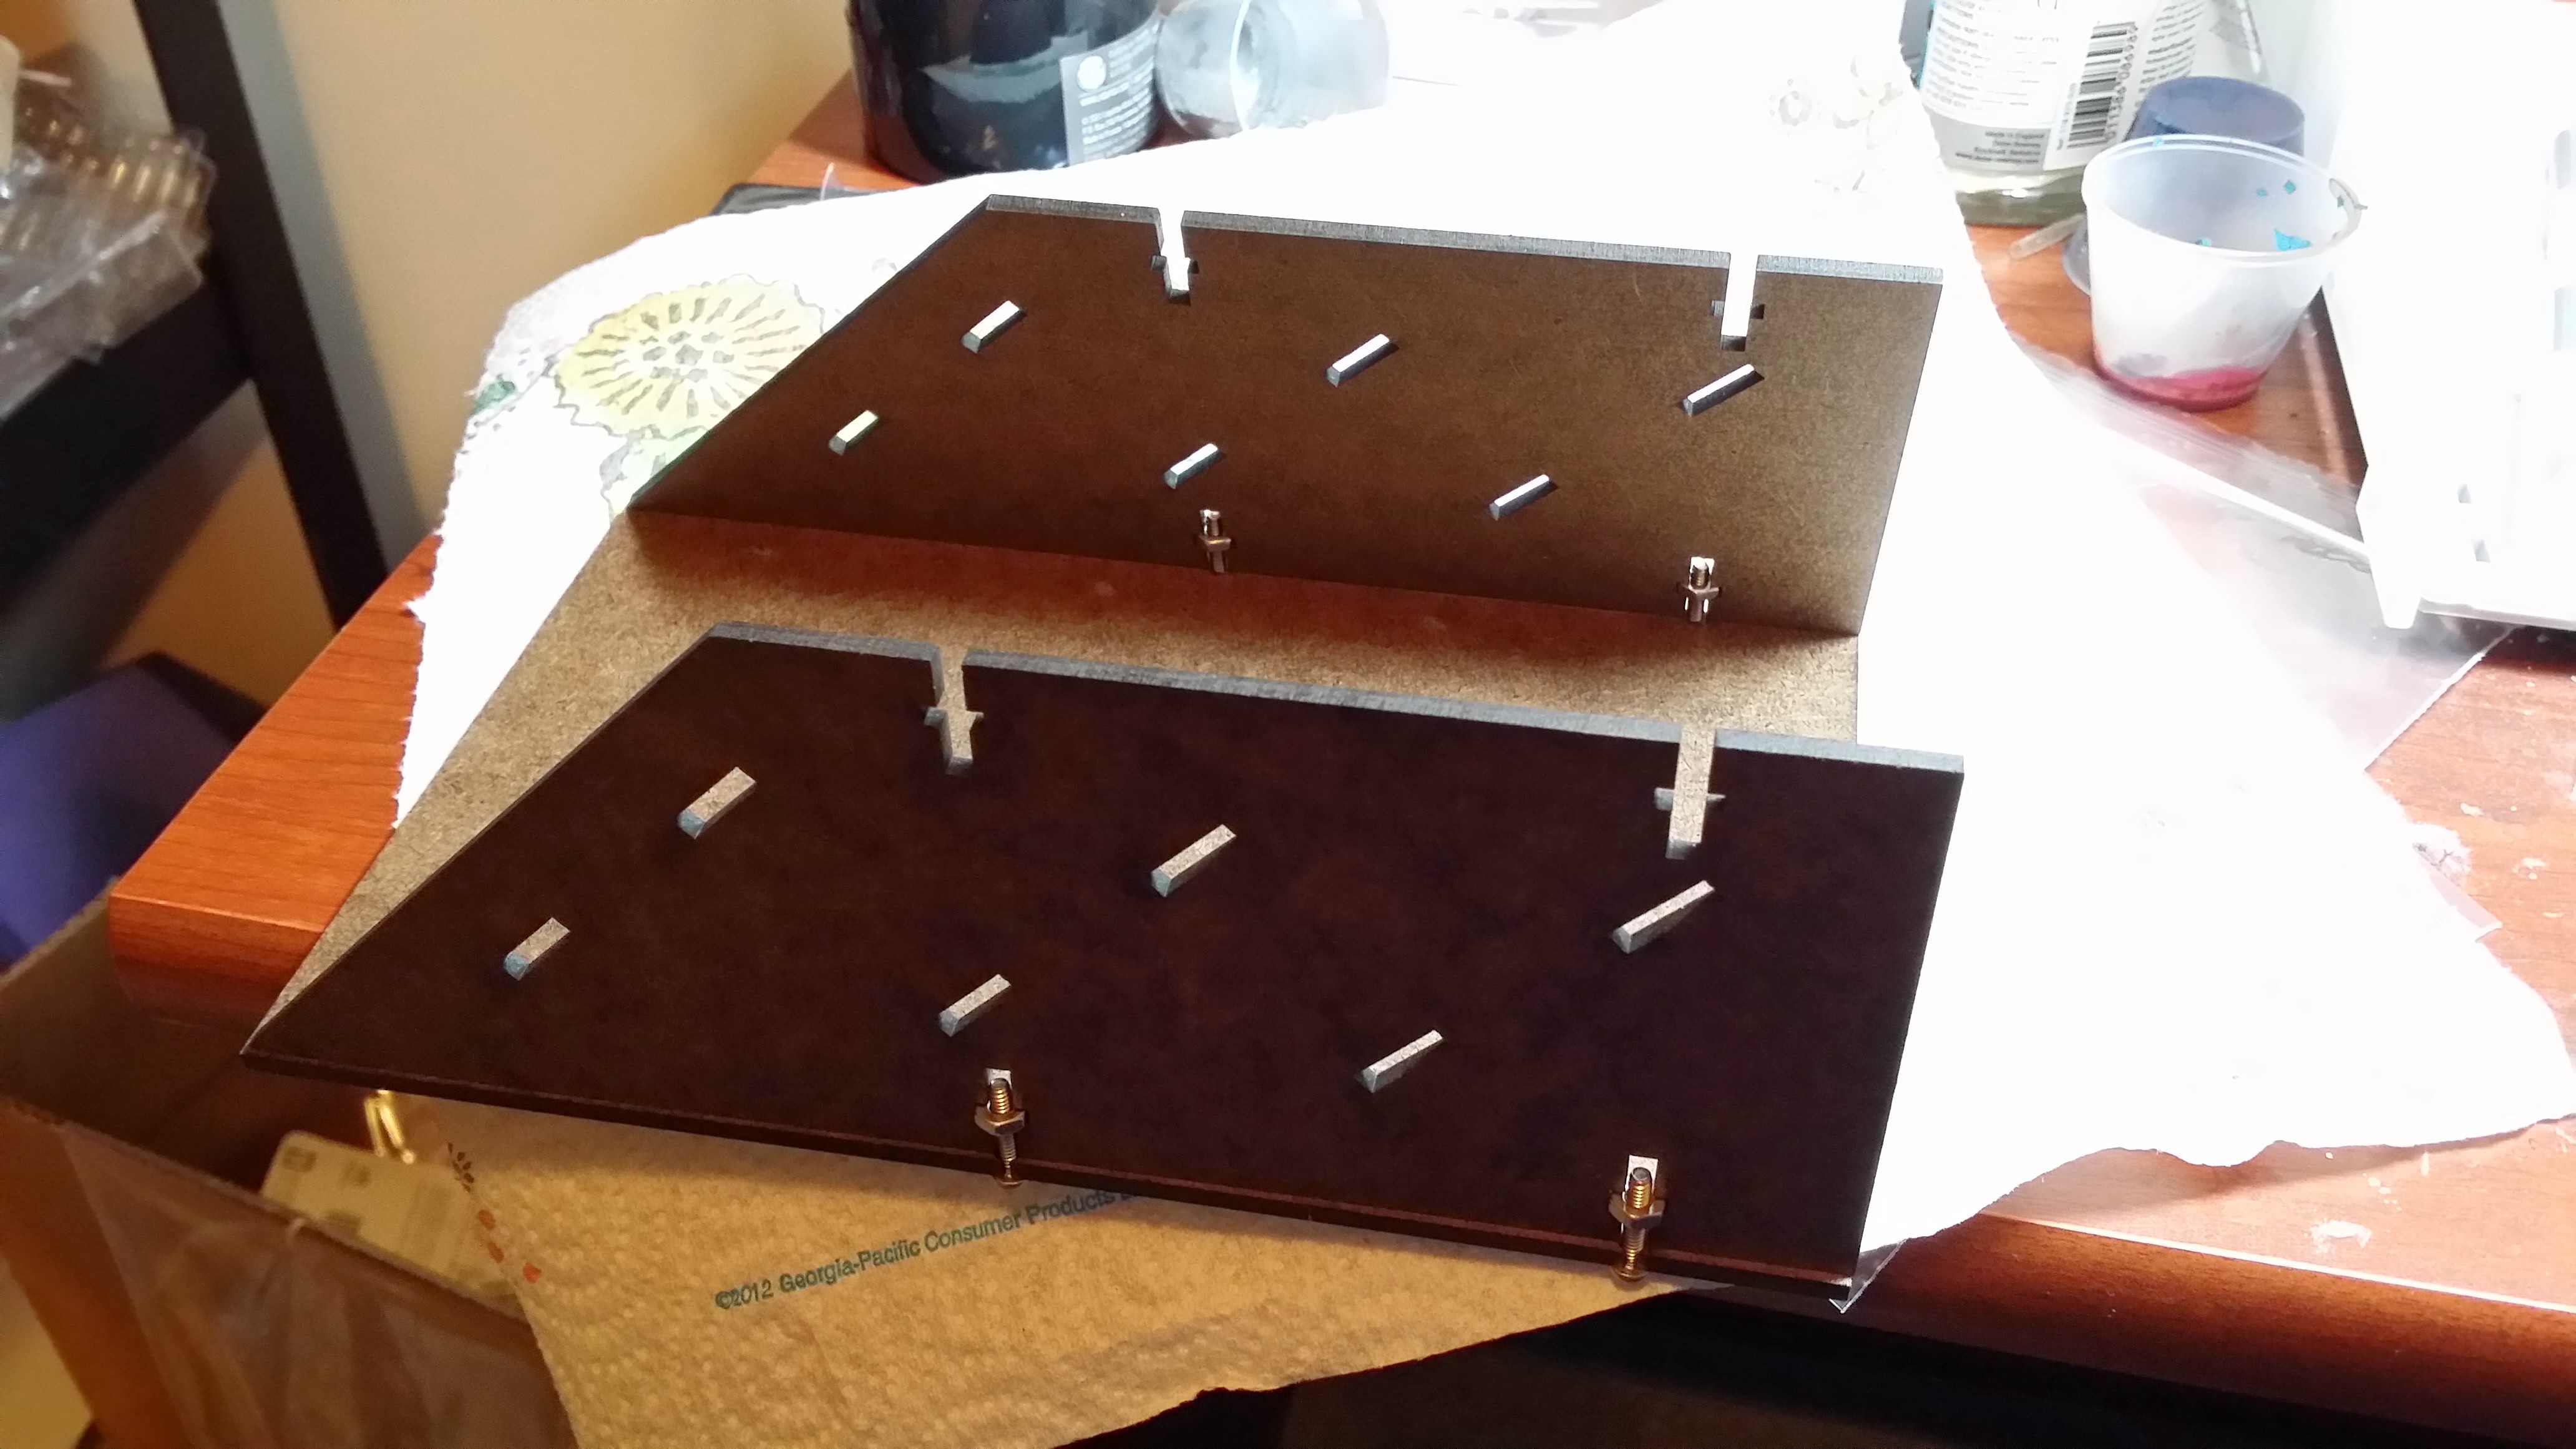
No glue yet…
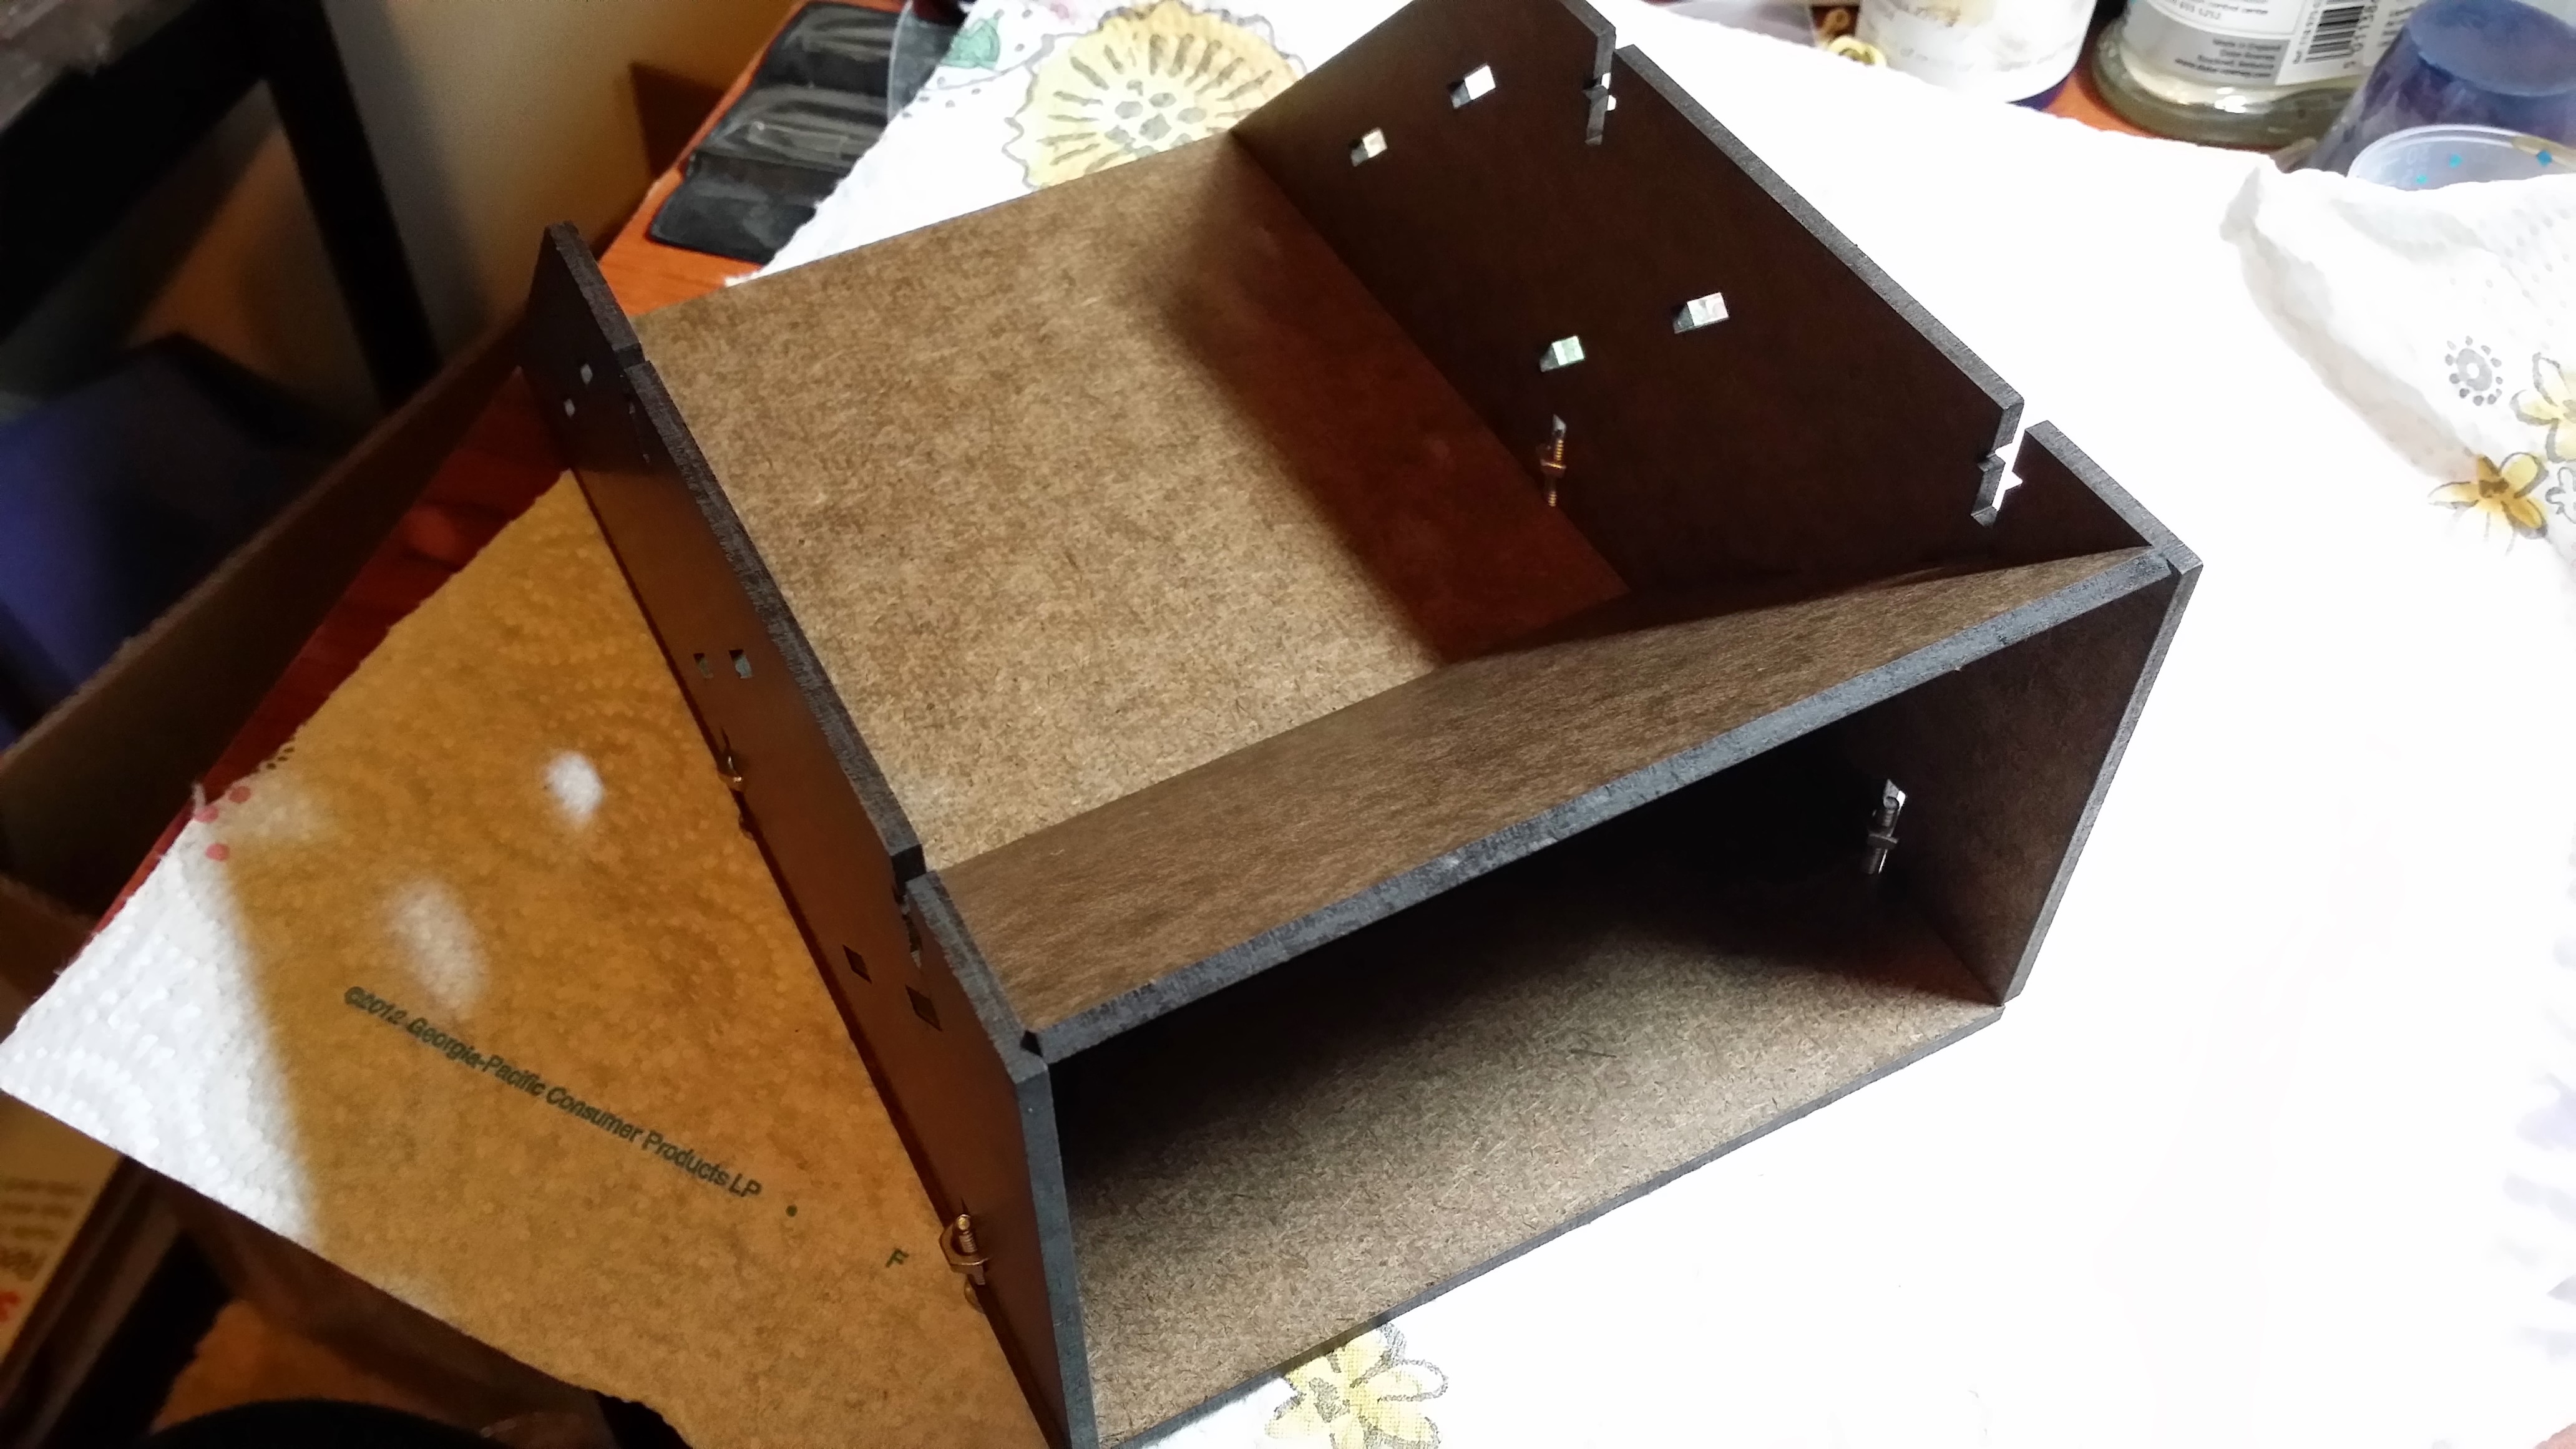


At this point I had to glue the side on in order to get the front on. When I tried without glue the tabs kept coming out of their slots and the whole thing would fall off one side or the other of the back piece. Honestly, most of my troubles stemmed from not wanting to use glue, and the letter did mention that glue would make it easier!

Here it is fully assembled with my brushes in it. As you can see, it will hold a ton of brushes and tools.

For a size reference, here are both racks in my workspace. The paint rack is especially compact considering it holds 54 bottles. That is just over half of what one of my wall racks will hold, and its facing appears to be about 1/3 of the facing of my wall rack. The wall rack isn’t as deep though. I think it would be totally reasonable to have a couple of these paint racks sitting around the edge of your workspace – you would still have almost the entire space remaining and all of your paints would be in easy view and reach. The brush rack also takes up very little room and can hold basically any brushes and tools, although I’m not sure about the triangular Army Painter brushes if you use those. At $20 each, the price is very reasonable. Both racks seem to be solid once built, and probably will hold up very well to typical use.
TheIronBow also sells several other types of paint racks that are good for craft paint and paints that come in pots. In addition, there is a caddy for larger bottles and a rack that holds both paints and tools together. They also sell dice towers, and they seem to do custom orders as well.
Check out TheIronBow at http://www.etsy.com/shop/TheIronBow!
Brushes!
A few weeks ago I was in the market for some new Windsor & Newton Series 7’s. I was perusing DickBlick.com and noticed that the W&N Series 7’s were mostly out of stock with no expected restock date. That was obviously very troubling, so I took a look at my other options. Obviously Raphael 8404’s are a great option, but I was curious about the DickBlick Studio (not to be confused with their Master line!) brushes so I bought one. Over the last couple weeks I’ve been using a DickBlick Studio size 0 round sable for most of my work to compare with the Raphaels and the W&Ns.
For a very inexpensive brush, the DickBlick brush is pretty nice. It holds a tip very well. I can’t speak for long-term use, but over a couple weeks it’s kept its ultra-sharp tip as well as I’d expect a Raphael 8404 or W&N Series 7 to with the same care. The only thing about its shape I’m not completely happy with is that if you use warm water to clean it that is maybe the hotter side of warm (but still something you can keep your hands in), it may become slightly deformed. My brush now leans to one side a little after the first time I cleaned it. That has not happened with any of my Raphael’s or W&N Series 7’s.
I typically use a Raphael 8404 for blending. It holds a ton of paint, and the bristles are fairly firm, but soft enough to allow for very smooth brush strokes. The DickBlick bristles aren’t nearly as firm as even the Raphael 8404, but the brush is still more than capable of smooth blending. The bristles, however, are very short in comparison and don’t hold very much paint. In retrospect, I probably should have purchased a size 2 instead as that’s a size I use a lot anyways and it would hold a bit more paint.
For everything except blending I typically use a W&N Series 7 because the bristles hold a super sharp point and they feel a lot more firm than the Raphael 8404. This affords me the most control, and overall these brushes have my absolute favorite feel. For very fine detail, such as tiny eyes, this is absolutely necessary.
For basecoating, the DickBlick brush was fine, just not what I was used to. It also held less paint than the W&N Series 7, which means you can’t get as much coverage from each time you fill your brush. This does slow you down a bit.
When doing tiny details the DickBlick studio brush is also capable, but I still prefer the firm feel of the W&N Series 7’s. I had a more difficult time than I’m used to painting tiny things like eyes, but in the end they still got done.
Overall, if you aren’t able to invest the $12-15/brush for Windsor & Newton Series 7’s or Raphael 8404’s, the $6-9 DickBlick kolinsky sable brushes are probably your next best bet. They are certainly much better than synthetic brushes, and those typically run about the same price. They are also far and away better than the cheap-o “sable” brush sets you can find in any craft store, and those are a similar price as well.
DickBlick kolinsky sable round brushes: http://www.dickblick.com/products/blick-studio-sable-brushes/
Raphael 8404 brushes: http://www.dickblick.com/products/raphael-kolinsky-red-sable-fine-pointed-round-series-8404/
Windsor & Newton Series 7 brushes: http://www.dickblick.com/products/winsor-and-newton-series-7-kolinsky-sable-pointed-round/
EDIT: At this time it appears that all of their Kolinsky sable brushes are running out of stock with indefinite backorder, and as far as I know this is due to THIS unfortunate bit of bureaucracy. There are still a few sites you can get W&N Series 7 brushes and Raphael 8404 brushes at, but not the DickBlick studio brushes. Hopefully this will be resolved soon.
New photos!
A few days ago I bought a cheap ($30) but useful tabletop photo studio off Amazon.com, and tonight I finally got a chance to set it up and try it out.
I took new photos of the Skink unit I recently painted:


I also took some decent photos of the two Fenrisian Wolf Packs that I recently painted:
Pack 1

Pack 2

Overall I think the tabletop studio is very useful and was certainly a good purchase, but I think I need at least one more light to fill the front of the space. It came with two lights, and they just aren’t able to fill the entire space with light on their own. Ideally, I think I would have 4 lights, but I’m going to try 3 first.
Tools: Brush Comparison
Over the next couple weeks I’m going to be putting in some hours using the Dick Blick brand Kolinsky Sable brushes as well as my usual W&N Series 7 brushes and Raphael 8404 brushes and then write up a post about my experiences with each one. The Dick Blick brushes cost about 25% of what the other two cost, so let’s see what you get for your money with each type!
